• Link to X
  • Link to Instagram
  • Link to Youtube
  • Link to Facebook
  • Link to WhatsApp
CALL: (503)526-3887 or EMAIL: info@raindropnw.com
RAINDROP ROOFING NW | PORTLAND, OR
  • Home
  • About Us
    • About Raindrop Roofing NW
    • Our Team
    • Areas We Serve
    • Who We Support
    • Our Commitment to a Greener Future
    • Careers
    • Blog
  • Residential Roofing
    • Services
      • New / Replacement Roofs
      • Repairs and Maintenance
      • Remodels and Additions
      • Balconies, Patios, and Flat Decks
      • Roof Inspections and Certifications
    • Financing
    • Roof Gallery
    • Roof Types and Products
    • Manufacturer-Certified Roofing Contractor
    • Owner Resources
  • Commercial Roofing
    • Services
      • New and Replacement Roofs
      • Estimates and Inspections
      • Warranties
      • Real Estate Partnerships
      • Roof Certifications
    • Commercial Gallery
    • Roof Types and Products
    • Featured Project
  • Reviews
  • Contact Us
  • Menu Menu
You are here: Home1 / Roofing

In-Depth Guide to Best Roofing Materials for Portland Area Homes

Roofing

Why Portland Homeowners Can’t Afford to Get Roofing Materials Wrong

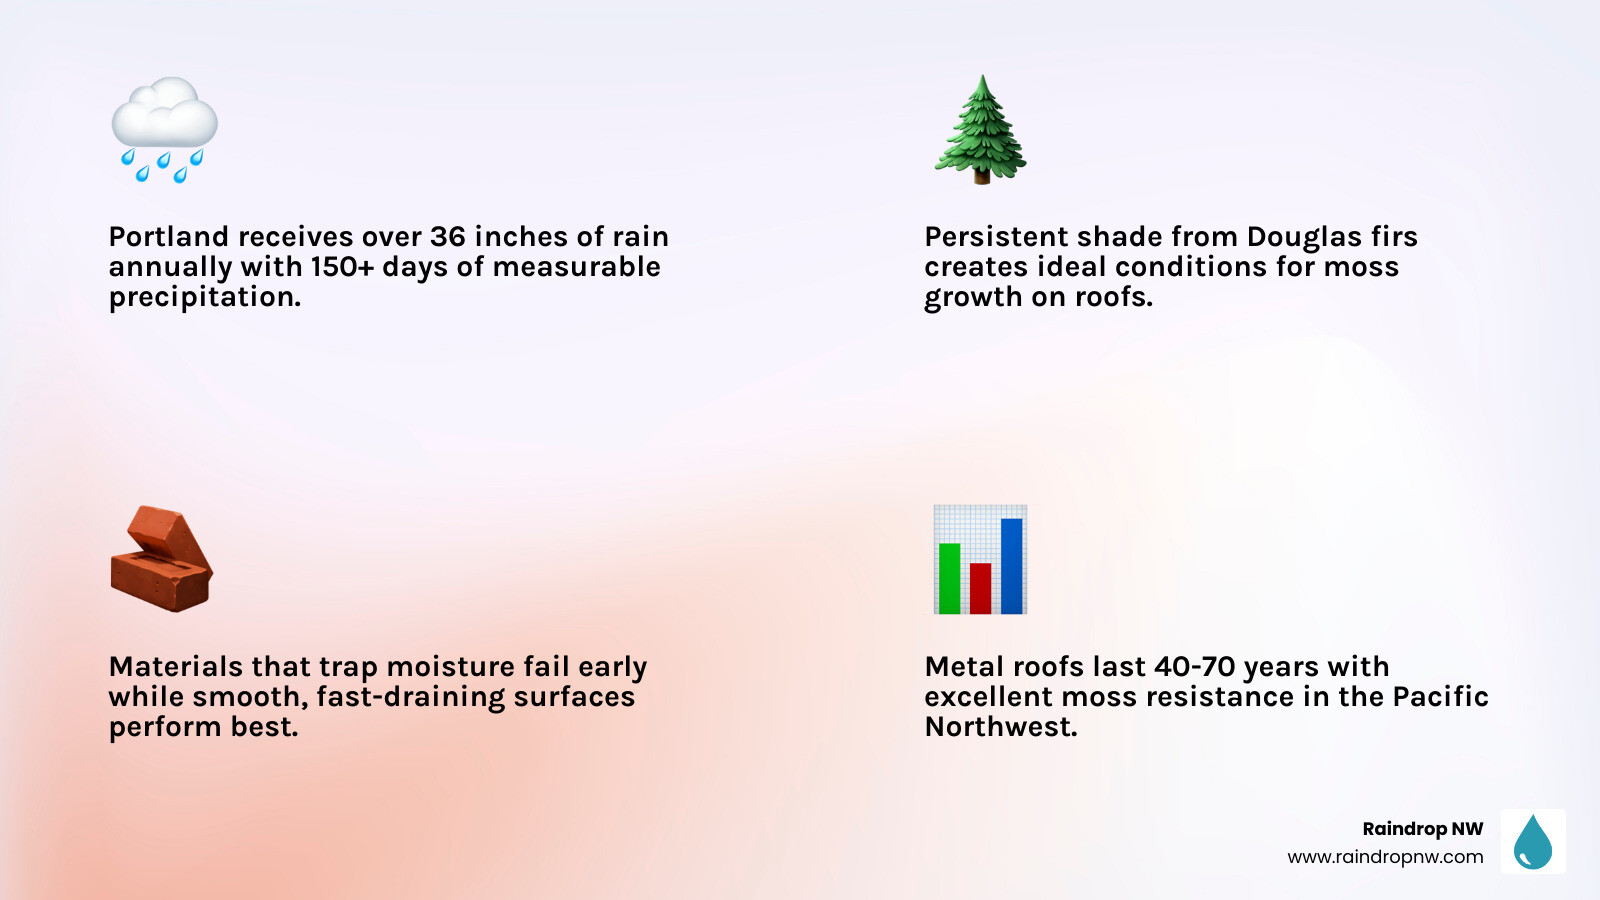
Choosing the best roofing materials for Portland area homes is one of the most important decisions you’ll make as a homeowner in the Pacific Northwest. Portland’s climate is relentless — over 36 inches of rain annually, 150-plus days of measurable precipitation, persistent shade from towering Douglas firs, and the ever-present threat of moss taking hold before you even notice it. The wrong material doesn’t just look bad after a few years. It fails early, costs more to maintain, and can void warranties faster than you’d expect.

Here’s a quick look at how the most common roofing materials stack up for Portland-area homes:

Material Lifespan in PNW Moss Resistance Best For
Architectural Asphalt Shingles 20-30 years Good (with algae-resistant granules) Budget-conscious homeowners who want proven performance
Metal (Standing Seam) 40-70 years Excellent Long-term owners, homes under heavy tree cover
Composite/Synthetic Shake or Slate 30-50 years Very Good Homeowners who want a premium look without heavy upkeep
Cedar Shake 25-30 years (with maintenance) Poor Curb appeal priority; requires consistent treatment
Concrete or Slate Tile 50-200 years Moderate Structurally reinforced homes with long-term investment goals

Portland’s wet climate punishes materials that trap moisture, and rewards smooth, fast-draining surfaces. That’s why material selection here isn’t just about aesthetics or upfront cost — it’s about how your roof performs through a decade of wet winters, shaded slopes, and seasonal debris.

I’m Torrey Yungeberg, owner of Raindrop Roofing NW, a family-owned business rooted in the Pacific Northwest, and I’ve spent years helping Portland-area homeowners navigate exactly these decisions around the best roofing materials for Portland area homes. Let me walk you through everything you need to know to make a confident, informed choice for your home.
Infographic comparing Portland roofing materials by lifespan, moss resistance, and maintenance needs infographic

How the Pacific Northwest Climate Dictates Your Roofing Needs

moss growing on a shaded roof

When selecting a roof in the Portland metro area, we have to look closely at our unique weather patterns. Unlike regions that deal with extreme desert heat or heavy eastern blizzards, our primary adversary is consistent, damp, low-temperature moisture. From October through April, our roofs rarely get the chance to dry out completely.

This environment is the perfect breeding ground for moss and blue-green algae. Moss is more than just an aesthetic issue; it acts like a sponge, holding water directly against your roofing material. Over time, this trapped moisture causes shingles to curl, wood shakes to rot, and water to back up under the protective underlayment. To fight this, modern roofing materials rely heavily on algae-resistant granules. These granules are typically infused with copper or zinc, which slow down the growth of organic matter every time it rains.

Wind-driven rain is another common challenge in areas like the Columbia River Gorge, East Multnomah County, and parts of Vancouver and Camas. When heavy rain is pushed horizontally by strong winds, it can easily find its way under standard shingles if they aren’t sealed correctly. This is why we pay close attention to the wind ratings of the shingles we install, often recommending architectural options designed to withstand gusts up to 130 mph.

To understand how our local weather interacts with your home’s structure over time, check out our guide on How Portland Metro Climate Affects Your Roof.

Finally, we cannot ignore the importance of attic ventilation. In a wet climate, warm, moist air from your kitchen, bathroom, and laundry rises into the attic. If your roof lacks balanced intake and exhaust ventilation, that moisture condenses on the underside of your roof deck. This leads to dry rot in the plywood and mold growth in the attic space. A high-performing roof is a complete, breathing system, not just a layer of shingles. For a deeper look into how architectural design plays a role, read about Which Roof Style is Better for Rain.

Impact of Roof Slope on Material Selection

Your roof’s slope, or pitch, is a primary factor in determining which materials can be safely installed. Roof pitch is represented as a ratio of vertical rise to horizontal run. For example, a 4/12 slope rises 4 inches for every 12 inches of horizontal run.

A 4/12 pitch is incredibly common across Portland suburbs like Beaverton, Tigard, and Hillsboro. It is steep enough to shed water effectively using standard shedding materials like architectural asphalt shingles, metal panels, or synthetic shakes. However, once a roof’s slope drops below a 2/12 pitch, it is classified as a low-slope or flat roof.

On low-slope sections, water does not shed quickly. Instead, it tends to pool, meaning traditional shingles cannot be used because water can easily seep between the overlapping seams. For flat and low-slope roofs, we must install continuous, waterproof membranes such as TPO (Thermoplastic Polyolefin) or PVC. These single-ply membranes are heat-welded at the seams to create a completely watertight seal that prevents ponding water from penetrating the home.

Choosing the right material for your roof’s specific angle is critical to preventing leaks. You can read a detailed breakdown of these structural differences in our Flat Roof vs Pitched Roof Comparison.

Evaluating the Best Roofing Materials for Portland Area Homes

When we evaluate the best roofing materials for Portland area homes, we look at three main pillars: long-term durability in wet environments, maintenance requirements, and compliance with local building codes and fire ratings.

In Oregon, fire safety is increasingly important, even in suburban communities. Many local homeowners’ associations (HOAs) and municipal codes in wooded areas like Lake Oswego, West Linn, and the West Hills of Portland place strict limitations on materials like untreated wood shakes due to fire spread risks. Most modern materials we install carry a Class A fire rating — the highest level of protection against external fire spread.

Ensuring your roof is prepared for decades of damp weather requires choosing a material suited to your home’s specific microclimate. For practical tips on maximizing your roof’s service life, see our guide on How to Extend the Life of Your Roof in Rainy Climates.

Asphalt Shingles: The Most Common Choice for Portland Homes

Asphalt shingles remain the most popular choice for homeowners throughout the Portland metro area. However, not all asphalt shingles are created equal. Traditional three-tab shingles are thin and prone to wind damage, whereas modern architectural shingles offer a thicker, multi-dimensional profile that handles our wet, windy seasons much better.

For the Pacific Northwest, the gold standard in asphalt technology is SBS (Styrene-Butadiene-Styrene) polymer-modified asphalt, often referred to as “rubberized asphalt.” Standard asphalt shingles can become brittle in cold weather and dry out over time, leading to cracking and granule loss. SBS polymer-modified shingles, however, retain their flexibility even in near-freezing temperatures. This flexibility makes them highly resistant to impact and wind damage, and it makes them much easier to install safely during our cool, damp shoulder seasons.

A major advantage for local homeowners is that Malarkey Roofing Products, a pioneer in SBS polymer-modified technology, has been headquartered and manufacturing right here in Portland since 1956. Their shingles feature exceptional granule retention and standard algae resistance, making them highly effective at resisting the dark streaks caused by blue-green algae.

To understand the structural and aesthetic differences between your asphalt options, explore our Architectural vs Designer Shingle Comparison and view some of the top-tier products available in our guide on Premium Shingle Options for Pacific Northwest Homes.

Metal Roofing: The Long-Term Value Option

For homeowners planning to stay in their homes for decades, standing seam metal roofing represents an incredible long-term value. Unlike asphalt, which relies on a granular surface that can accumulate dirt and organic debris, metal roofs are incredibly smooth. Rainwater, pine needles, and leaves slide off easily, leaving no organic material behind to support moss growth.

Standing seam metal systems use concealed fasteners. This means the screws holding the roof down are protected beneath the overlapping metal joints, completely shielded from rain and wind. This eliminates the risk of rubber washer failures, which are common in exposed-fastener metal roofs over time.

While metal roofing requires a larger upfront investment, its lifespan of 40 to 70 years means you will likely never have to replace your roof again. It is also highly reflective, helping to keep your home cooler during hot Northwest summers and reducing the load on your air conditioning system.

To see how metal compares directly to traditional shingles in terms of performance and value, read our Asphalt Shingle vs Metal Roof Comparison and learn how they hold up under heavy rainfall in Metal Roofing Durability vs Shingle in Oregon Rain.

Composite and Synthetic Materials: Premium Aesthetics Without the Maintenance

If you love the rustic charm of natural cedar shakes or the elegant look of slate, but dread the constant maintenance they require, synthetic and composite materials are an outstanding alternative. These premium products are engineered from advanced polymers and recycled materials to mimic the exact texture, shadow lines, and color variations of real wood or stone.

Traditional cedar shakes are highly susceptible to moisture absorption, rot, and moss infestation in our damp climate, often requiring specialized, frequent cleanings to prevent premature failure. Synthetic shakes, on the other hand, do not absorb water. They are completely impervious to rot, insects, and moss growth, and they carry Class A fire ratings.

Additionally, synthetic slate offers the gorgeous, historic look of real natural stone without the immense weight. Real slate often requires expensive structural reinforcement of your home’s framing before installation. Synthetic slate is lightweight, durable, and handles our heavy winter rains with ease.

Comparing Performance, Lifespan, and Maintenance Across Materials

Every roofing material requires some level of care to reach its maximum expected lifespan in the Pacific Northwest. Even the most durable roofs need regular gutter cleaning to prevent water from backing up under the eaves, and overhanging tree branches should always be trimmed back to allow sunlight and airflow to dry the roof surface.

For homes situated under heavy tree canopy in shaded neighborhoods like Lake Oswego, West Linn, or Southwest Portland, installing zinc or copper strips near the roof ridge can be highly beneficial. As rainwater washes over these metal strips, it releases ions that naturally inhibit moss and algae growth further down the slope.

Here is a direct comparison of how the top roofing materials perform over time in our local climate:

Material Type Expected Lifespan Moss Resistance Required Maintenance Level Primary Benefit
Architectural Asphalt 20 – 30 Years Moderate to High Low to Moderate Cost-effective, reliable, widely versatile
Standing Seam Metal 40 – 70 Years Excellent Very Low Maximum durability, sheds debris, zero moss
Synthetic Slate/Shake 30 – 50 Years High Low Premium look, lightweight, rot-resistant
Natural Cedar Shake 25 – 30 Years Low High Authentic historic look; requires regular washing
Clay/Concrete Tile 50 – 75+ Years Moderate Moderate Extremely long-lasting; heavy structural load

Frequently Asked Questions about Portland Roofing Materials

What are the best roofing materials for portland area homes to prevent moss?

Standing seam metal is the absolute best material for preventing moss growth, as its smooth surface sheds water and debris quickly, leaving no organic matter for moss to grip. High-quality synthetic/composite shingles are also excellent because they do not absorb moisture. If you choose architectural asphalt shingles, look for options featuring copper-infused algae-resistant granules, and consider adding zinc or copper strips near the ridge of your roof to help keep moss at bay in heavily shaded areas.

How do I choose the best roofing materials for portland area homes based on roof pitch?

For standard sloped roofs with a pitch of 4/12 or higher, you have complete flexibility to choose between architectural asphalt shingles, standing seam metal, synthetic shakes, or tile. On lower slopes between 2/12 and 4/12, standing seam metal or specialized asphalt application techniques are required to prevent water backup. For flat or low-slope roofs under 2/12, traditional shingles cannot be used; instead, you must install a continuous, heat-welded membrane system like TPO or PVC to ensure a completely waterproof seal.

How does the 2026 Oregon Structural Specialty Code affect my material choice?

The 2026 Oregon Structural Specialty Code (ORSC) emphasizes energy efficiency and treats your roof as a critical part of your home’s “full thermal envelope.” This means a roof replacement is no longer just about installing new shingles; it requires evaluating your entire attic system, including proper intake and exhaust ventilation, high-reflectivity underlayments, and adequate attic insulation. Choosing energy-efficient materials, such as cool-roof rated shingles or reflective metal roofing, helps ensure full code compliance while lowering your heating and cooling costs.

Conclusion

Your roof is your home’s primary defense against the unique, damp climate of the Pacific Northwest. Whether you choose the reliable, budget-friendly performance of architectural asphalt shingles, the lifetime durability of standing seam metal, or the premium, low-maintenance beauty of synthetic slate, selecting the right material is essential to protecting your investment.

At Raindrop Roofing NW, we believe that the quality of your installation matters just as much as the materials you select. As a truly local, family-owned, and independently operated company based in Beaverton, we are deeply committed to providing our neighbors throughout the Portland metro area with honest advice, exceptional craftsmanship, and long-term accountability. We don’t believe in high-pressure sales or out-of-state corporate structures — just reliable, multi-generational expertise and transparent service.

If you’re ready to find the perfect roof for your home, we are here to help. Schedule a professional roof replacement consultation with Raindrop NW today, and let our family take care of yours.
https://www.raindropnw.com/wp-content/uploads/2026/07/pexels-photo-19408308.avif 627 940 SEO Stats https://www.raindropnw.com/wp-content/uploads/2024/05/logo-raindrop-space-300x92.png SEO Stats2026-07-07 12:45:422026-07-07 12:45:42In-Depth Guide to Best Roofing Materials for Portland Area Homes

The Ultimate Guide to Gutter Maintenance and Roof Impact

Roofing

Why Gutter Maintenance and Its Impact on Your Roof Should Be Every Oregon Homeowner’s Priority

Understanding gutter maintenance and its impact on your roof could be the difference between a roof that lasts decades and one that fails years too soon. Here is a quick summary of what you need to know:

  • Gutters direct water away from your roof edge, fascia, and foundation
  • Clogged gutters overflow back onto shingles, rotting the fascia and soaking the roof deck
  • Clean gutters twice a year at minimum — more often if your property has heavy tree cover
  • Warning signs include water stains on siding, peeling paint near the roofline, and soil puddling at the foundation
  • Neglected gutters can lead to mold in the attic, ice dams in winter, and expensive structural repairs
  • Routine maintenance is far less costly than repairing the damage that results from ignoring it

One inch of rain falling on a 2,000-square-foot roof generates over 1,200 gallons of water that must be moved away from your home efficiently. When gutters are blocked or damaged, that water has nowhere to go — and your roof, walls, and foundation pay the price.

Here in the Portland metro and greater Beaverton area, we see this play out every wet season. Pacific Northwest rainfall is relentless, and homes surrounded by Douglas firs, maples, and other overhanging trees are especially vulnerable. Gutters clog fast, and when they do, the damage compounds quietly — out of sight in your attic, behind your fascia boards, and along your foundation line — until it becomes a costly repair.

I’m Torrey Yungeberg, owner of Raindrop Roofing NW, and after years of inspecting roofs and drainage systems across Oregon and Southwest Washington, I’ve seen how gutter maintenance and its impact on your roof can be the deciding factor in how long a roofing system actually lasts. Whether you’re managing routine upkeep or noticing the first signs of trouble, this guide will walk you through everything you need to protect your home from the top down.

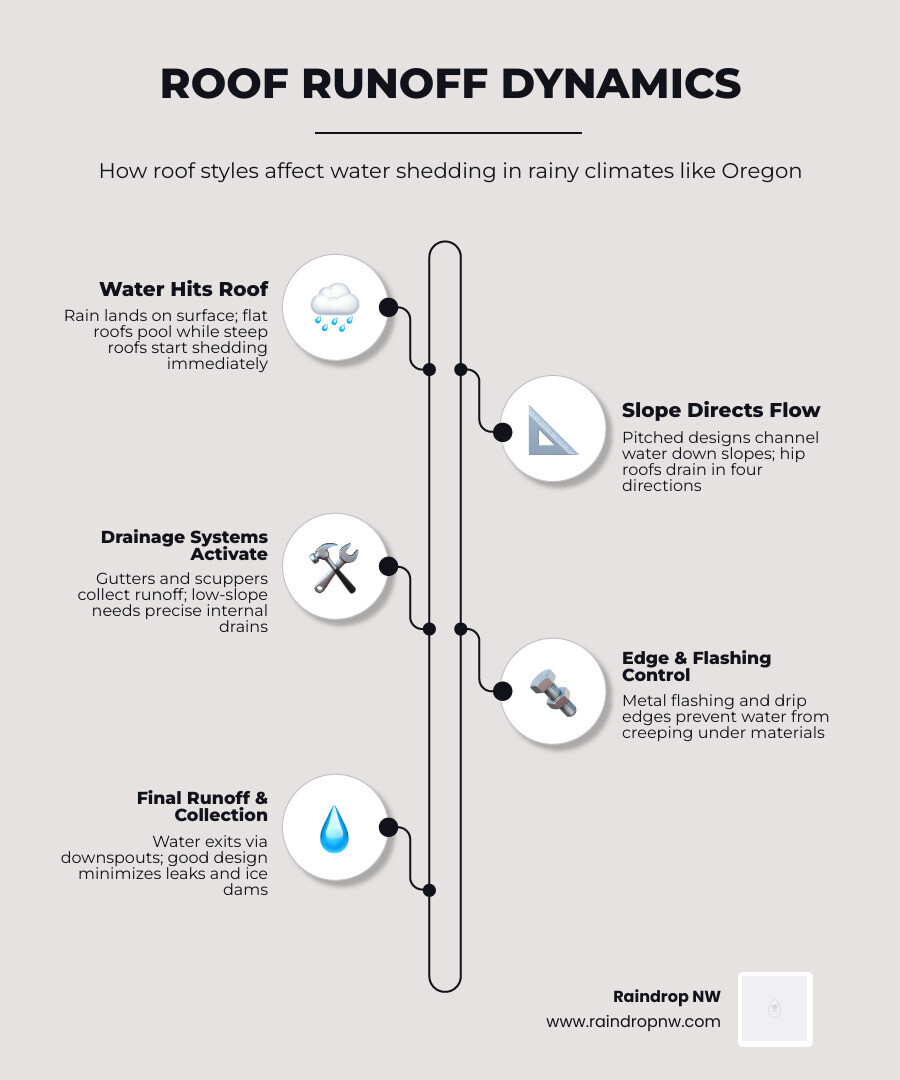
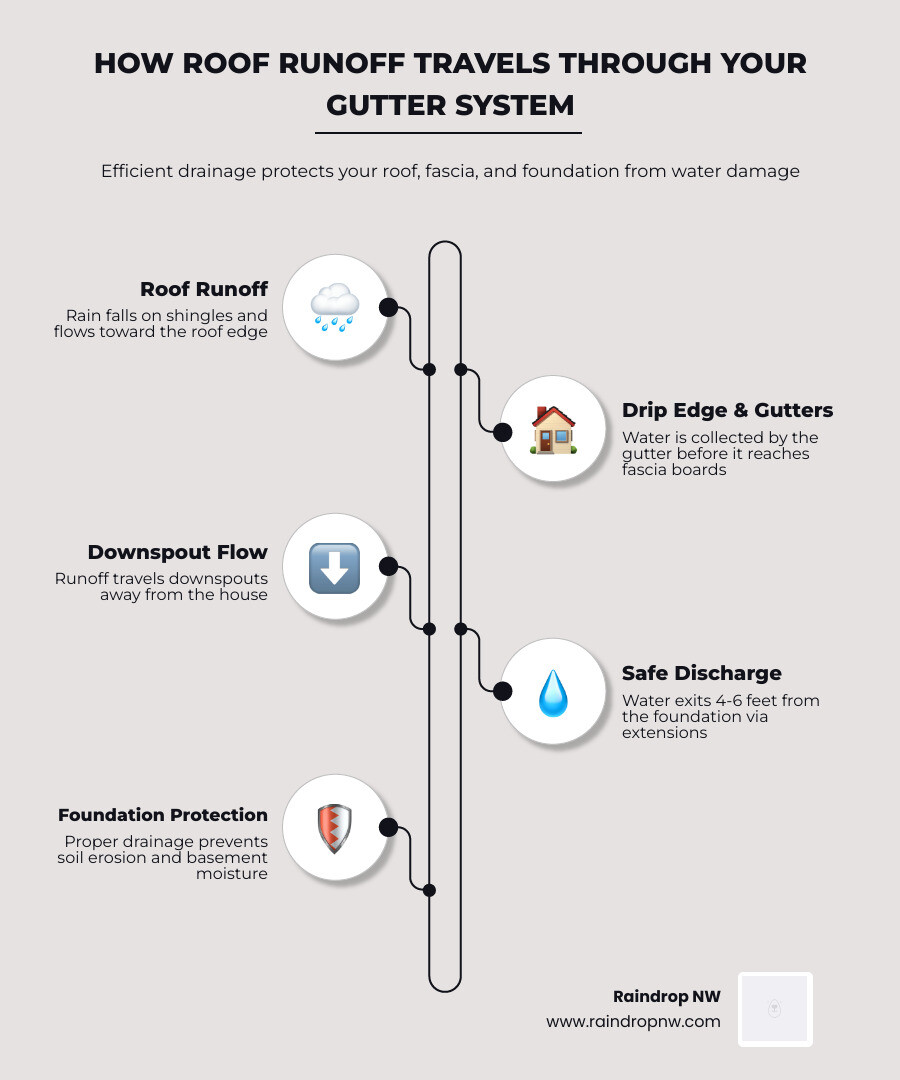
Infographic showing how roof runoff travels from shingles through gutters and downspouts away from the foundation infographic

Why Gutter Maintenance and Its Impact on Your Roof Matters

Your gutters are not just metal troughs hanging off the edge of your house. They are part of the roofing system. Their job is to catch runoff and move it safely away before it can soak roof edges, fascia boards, soffits, siding, or the soil around your foundation.

In our Northwest climate, that job is a big one. Poor drainage is a major contributor to residential water damage, and even a normal storm can test a neglected gutter system quickly. If you want a deeper overview of how gutters fit into roof performance, see Gutter Systems and Why They Matter for Your Roof and How to Protect Your Home from Water Damage Through Your Roof.

How gutters protect shingles, fascia, and attic spaces

When gutters are clean and properly sloped, they help protect:

  • Shingle edges from constant splash-back
  • Underlayment and roof decking from backed-up water
  • Drip edge and roof edge trim from repeated saturation
  • Fascia boards from overflow and rot
  • Soffits from staining and wood decay
  • Attic insulation from moisture intrusion
  • Roof framing from mold and long-term dampness

This matters because roof problems often start at the edges. Once water works behind the gutter line, it can wick into wood components, damage paint, soften sheathing, and create the damp conditions mold likes best.

What happens when clogged gutters overflow back onto the roof

A clog does not just make a mess. It changes the path of water.

Instead of moving to the downspout, water starts to:

  • Pool in the gutter
  • Spill over the front and back edges
  • Back up under lower shingle courses
  • Run behind the fascia
  • Stain siding and windows
  • Collect near the foundation
  • Contribute to attic humidity and hidden wood rot

In winter, trapped water can also freeze and support ice dam formation. In milder but wet Oregon winters, even repeated freeze-thaw cycles at roof edges can stress materials. The result is often granule loss, softened wood, fascia decay, and moisture where your home definitely did not order it.

The Most Common Gutter Problems That Lead to Roof Damage

overflowing clogged gutter along roof edge

Most gutter-related roof damage starts with a few very predictable issues:

  • Clogs from leaves, fir needles, moss, seed pods, and roof grit
  • Leaks at seams or corners
  • Sagging sections caused by debris weight or loose hangers
  • Improper pitch that leaves standing water
  • Blocked downspouts
  • Short downspout discharge near the foundation
  • Rust, corrosion, or cracked sections
  • Pull-away from rotted fascia boards

Research consistently shows that neglected gutters are tied to fascia damage and foundation problems. Licensed roofing contractors report that a large share of fascia rot cases can be traced back to gutters that were not cleaned or re-sloped within the previous two years.

Gutter maintenance and its impact on your roof in heavy tree cover and wet climates

For homes in Beaverton, Portland, Lake Oswego, Hillsboro, Vancouver, Camas, and nearby communities, tree cover changes the maintenance equation.

Heavy tree cover means more:

  • Pine needles that slip into every opening
  • Maple leaves that mat together like wet cardboard
  • Seed pods and blossoms in spring
  • Moss fragments and algae buildup
  • Twigs that jam elbows and downspouts

Wet debris is especially hard on gutters because it gets heavy fast. Water weighs about 8.3 pounds per gallon, so clogged sections can put serious strain on hangers and fascia. That is why homes with overhanging branches or evergreen exposure often need quarterly attention instead of just spring and fall cleanings.

Warning signs your gutters need cleaning or repair

You do not need to climb onto the roof to spot trouble. Watch for these signs from the ground:

  • Water spilling over the gutter edge during rain
  • Plants or moss growing in the gutter
  • Dark streaks or “tiger stripes” on the outside of the gutter
  • Peeling paint near the roofline
  • Water stains on fascia or soffits
  • Puddling soil near the foundation
  • Downspouts that drip from joints or elbows
  • Gutters that look uneven or detached
  • Visible rust, cracks, or separated seams
  • Interior ceiling or attic stains near exterior walls

If you see more than one of these at the same time, maintenance is overdue.

How Often to Clean Gutters and What to Do Each Season

Most homes should have gutters cleaned at least twice a year. In the Portland-metro and Southwest Washington service area, that usually means:

  • Late spring, after seed drop and winter debris
  • Late fall, after most leaves have fallen but before hard freezes

If your home sits under firs, pines, big leaf maples, or other overhanging trees, quarterly cleaning is smarter. If you want more seasonal water-management guidance, see Water Damage Prevention Tips for Pacific Northwest Homeowners and How to Extend the Life of Your Roof.

Gutter maintenance and its impact on your roof through spring, summer, fall, and winter

Each season brings a different kind of debris and risk.

Spring

Spring gutters often collect:

  • Blossoms
  • Seed pods
  • Pollen sludge
  • Winter roof grit

This is a great time to flush the system, inspect for loose hangers, and confirm water exits properly through every downspout.

Summer

Summer is inspection season. Check for:

  • Sagging runs
  • Dried-out sealant at joints
  • Rust spots
  • Overflow marks from spring storms
  • Branches hanging too close to the roofline

It is also the easiest season to repair minor slope or attachment issues before fall debris loads arrive.

Fall

Fall is the big one in our area. Leaves and needles can fill a gutter surprisingly fast. Complete a full cleaning after major leaf drop, and do not forget roof valleys, which often feed extra debris into the gutter system.

Winter

Winter is about monitoring, not heroic ladder work in bad weather. Watch for:

  • Ice at roof edges
  • Icicle formation
  • Overflow during rain
  • Water near the foundation
  • Interior signs of attic dampness

If water is freezing in clogged sections, do not chip at it with tools. That often causes more damage than the ice.

Cleaning frequency by home type, tree coverage, and location

A simple rule of thumb:

  • Open lot, few trees: usually twice yearly
  • Moderate tree coverage: often 3 times yearly
  • Heavy tree canopy or lots of evergreens: quarterly
  • Multi-story or steep-roof homes: inspect more often and plan professional service
  • After major windstorms: perform a ground-level check

In our area, wet weather and dense tree cover often make a “twice a year forever” plan too optimistic. Gutters love to prove homeowners wrong.

DIY Gutter Maintenance Steps Homeowners Can Follow Safely

DIY maintenance can work well on accessible single-story homes if you use the right tools and common sense. The goal is simple: remove debris, confirm flow, and spot small problems before they become big ones.

Basic tools include:

  • Work gloves
  • Eye protection
  • Stable extension ladder
  • Ladder stabilizer
  • Gutter scoop or small plastic trowel
  • Bucket or debris bag
  • Garden hose with spray nozzle
  • Basic screwdriver or drill for loose fasteners

Ladder safety matters. More than 164,000 ladder-related injuries send people to emergency rooms each year, so if a job feels sketchy, that is your cue to stop being brave and start being practical.

A simple step-by-step gutter cleaning and inspection routine

  1. Set the ladder on firm, level ground and use a stabilizer if possible.
  2. Remove debris by hand first, then use a scoop for compacted material.
  3. Bag debris instead of tossing it into landscaping.
  4. Flush each gutter run with a hose, starting away from the downspout.
  5. Watch for standing water, which can signal bad pitch.
  6. Check seams and corners for drips while water is running.
  7. Inspect hangers, brackets, and screws for looseness.
  8. Test each downspout for full flow.
  9. If a downspout is clogged, clear it from the bottom or disconnect the elbow if accessible.
  10. Confirm the discharge point sends water well away from the home.

A proper hose test tells you a lot. If water rushes toward the downspout cleanly, that is a good sign. If it puddles in sections, leaks from joints, or gushes over the edge, repairs may be needed.

When DIY is fine and when professional help is the safer choice

DIY is usually reasonable for:

  • Single-story homes
  • Light to moderate debris
  • Minor leaks at easy-to-reach joints
  • Tightening a loose screw or bracket
  • Simple downspout extension adjustments

It is time to call a professional when you have:

  • Two-story or higher gutters
  • Steep rooflines
  • Major sagging or pull-away
  • Persistent overflow after cleaning
  • Rotting fascia or soffit
  • Storm damage
  • Ice-damaged gutters
  • Multiple leaks or failing seams
  • Signs water has entered attic or walls

If the gutter issue might actually be a roof-edge issue, it makes sense to have both evaluated together.

Smart Upgrades That Help Prevent Roof-Related Gutter Problems

Maintenance is essential, but a few upgrades can make it easier and reduce the chance of overflow-related roof damage.

Useful upgrades include:

  • Gutter guards
  • Downspout extensions
  • Splash blocks
  • Downspout strainers
  • Seamless gutters
  • Larger-capacity gutters where runoff is heavy
  • Branch trimming near the roofline

For more on drainage and structural protection, see How Gutter Maintenance Prevents Foundation Damage.

Upgrade What it helps with What it does not do
Gutter guards Reduces leaf buildup and large debris entry Does not eliminate inspections or fine debris
Downspout extensions Moves water farther from foundation Will not help if the gutter above is clogged
Splash blocks Improves discharge direction at grade Can shift or sink over time
Strainers Helps stop large debris at the downspout opening Needs periodic clearing
Seamless gutters Reduces leak points at joints Still needs cleaning and slope checks

What gutter guards can and cannot do

Gutter guards can be a smart upgrade, especially on heavily wooded lots. They can reduce the amount of large debris entering the gutter and lower cleaning frequency. Some systems perform better than others with wet leaves or fir needles.

But gutter guards are not magic.

They still allow some debris in, including:

  • Pine needles
  • Shingle granules
  • Fine grit
  • Algae film
  • Seed fluff

Even with guards installed, annual inspection is still important. Think of guards as maintenance reducers, not maintenance eliminators.

Why proper pitch and downspout discharge matter

Even a clean gutter fails if water cannot move where it needs to go.

Best practice is a slight slope toward the downspout, commonly about a quarter-inch drop for every 10 feet of run. Without enough pitch, water sits in the gutter, increasing weight and corrosion. Too much pitch can also look awkward and cause uneven flow.

Downspouts matter just as much. They should discharge at least 4 to 6 feet from the foundation in most cases. That small detail can make a huge difference in preventing:

  • Soil erosion
  • Splash-back on siding
  • Foundation saturation
  • Basement moisture
  • Crawlspace dampness

A clogged elbow is another common problem point, so if one section always seems slow, check there first.

Inspection Tips, FAQs, and When to Schedule Expert Roof Help

Routine inspection catches small drainage issues before they shorten roof life. We recommend checking the whole roof edge system, not just the gutter trough itself.

During an inspection, look for:

  • Water stains on fascia
  • Soft or peeling soffits
  • Granules collecting in gutters
  • Detached drip edge
  • Overflow marks on siding
  • Damp attic insulation near eaves
  • Mold or mildew smell in upper spaces
  • Recurring puddles near downspouts

Regular inspections are one of the best ways to prevent surprise repairs. You can learn more in How Regular Inspections Catch Problems Early and How Often Should You Have Your Roof Inspected?.

FAQ: Can gutter problems really damage a newer roof?

Yes. A newer roof is not immune to bad drainage. If gutters overflow or back up, water can still soak fascia, wick into roof decking, and shorten the life of shingles at the eaves. We sometimes see newer roofs with healthy field shingles but damaged roof edges because the gutter system was neglected.

FAQ: Do gutter guards eliminate the need for cleaning?

No. They help, but they do not remove the need for maintenance. Fine debris, granules, moss, and film buildup still collect over time. Plan on periodic inspection and at least occasional cleaning even if guards are installed.

FAQ: What other roof issues should be checked along with gutters?

Gutters should be inspected together with:

  • Flashing at walls and penetrations
  • Roof valleys
  • Drip edge and edge metal
  • Attic ventilation
  • Insulation condition near eaves
  • Signs of condensation or mold

Ventilation matters because not all attic moisture comes from exterior leaks. Poor airflow can also trap moisture and make roof-edge problems worse. For that topic, see How Ventilation Reduces Moisture Damage.

Conclusion

Gutters do quiet work, but the impact is anything but small. When they are clean, secure, properly sloped, and draining well, they help protect your shingles, fascia, soffits, attic, siding, and foundation all at once.

That is the real story behind gutter maintenance and its impact on your roof: a simple routine can prevent a long chain of water damage.

For homeowners in Beaverton, Portland, Gresham, Hillsboro, Lake Oswego, Vancouver, and surrounding communities, a smart plan is straightforward:

  • Clean gutters at least twice yearly
  • Increase frequency if trees overhang the roof
  • Check downspouts after storms
  • Watch for overflow, staining, and sagging
  • Schedule expert help when drainage issues persist

If you want help protecting your roof and home from the Northwest rain, explore our residential roofing services.

https://www.raindropnw.com/wp-content/uploads/2026/07/photo-1634853982486-c06f0e17940f.jpeg 720 1080 SEO Stats https://www.raindropnw.com/wp-content/uploads/2024/05/logo-raindrop-space-300x92.png SEO Stats2026-07-03 12:49:232026-07-03 12:49:23The Ultimate Guide to Gutter Maintenance and Roof Impact

The Definitive Guide to Cost of Repairing vs Replacing Your Roof

Roofing

Is It Cheaper to Repair or Replace Your Roof? Here’s What Oregon Homeowners Need to Know

Understanding the cost of repairing vs replacing your roof is one of the most important financial decisions you’ll make as a homeowner — and the right answer isn’t always obvious. A small leak after a Pacific Northwest storm might only need a targeted fix. But an aging roof with recurring problems across multiple areas could cost you far more in repeated repairs than a single full replacement would.

Here’s a quick snapshot to help you decide:

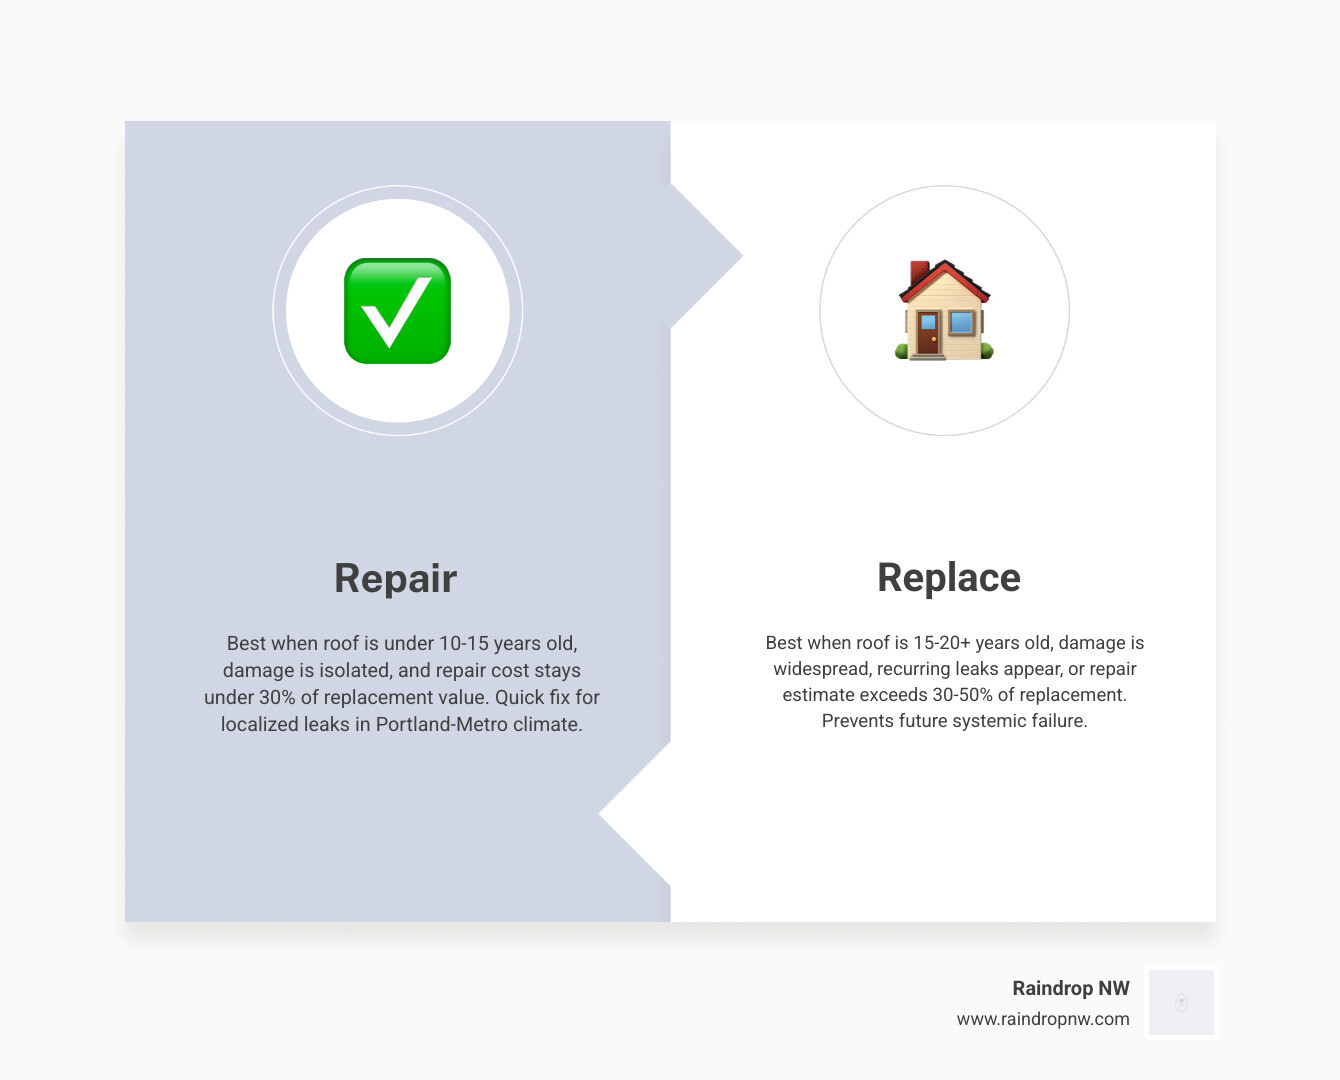
Situation Likely Best Choice
Roof under 10-15 years old, isolated damage Repair
Repair estimate under 30% of replacement cost Repair
Roof 15-20+ years old, widespread damage Replace
Repair estimate exceeds 30-50% of replacement cost Replace
Recurring leaks in multiple locations Replace
Severe storm or hail damage across multiple slopes Replace

Keep reading for a full breakdown of costs, key decision factors, and what to watch out for when choosing a contractor in the Portland-Metro area.

I’m Torrey Yungeberg, owner of Raindrop Roofing NW, and after years leading a family-owned roofing business across Oregon and Southwest Washington, I’ve helped hundreds of homeowners work through the exact same question about the cost of repairing vs replacing your roof. I’ll walk you through everything you need to make a confident, well-informed decision — no pressure, no guesswork.

Infographic decision tree comparing roof repair vs replacement based on age, damage extent, and cost thresholds infographic

Understanding the cost of repairing vs replacing your roof

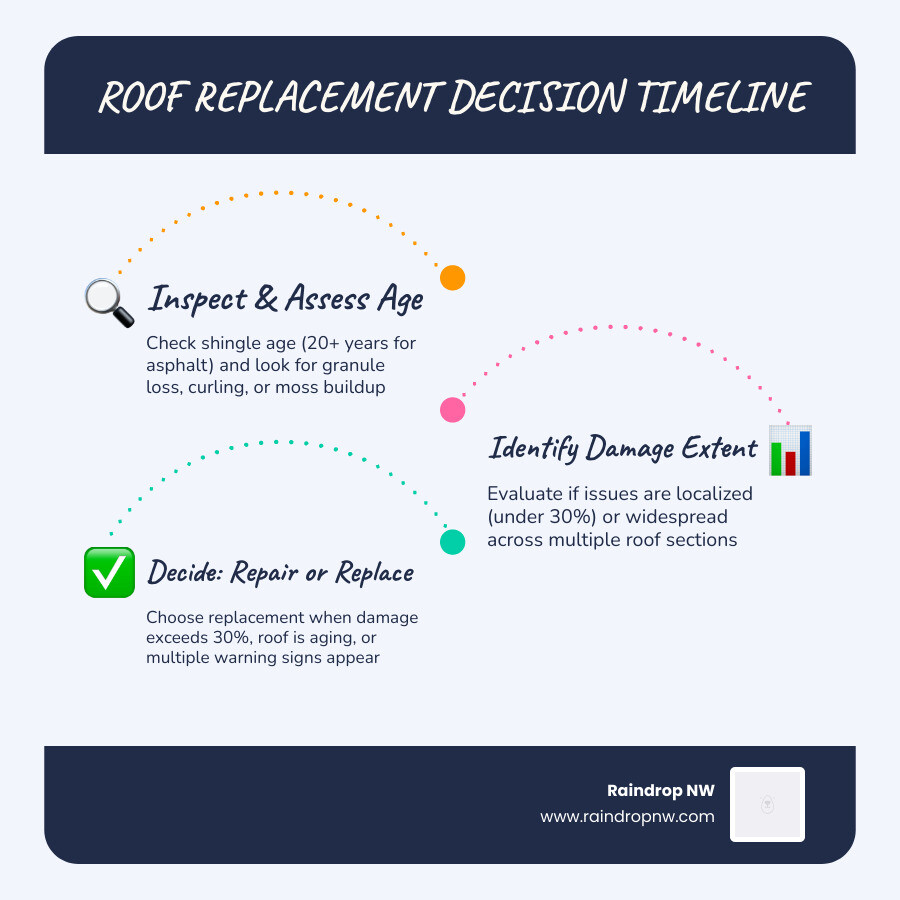
When we arrive at a home in Beaverton or Hillsboro to evaluate a leak, our goal is to provide a clear-eyed assessment of the cost of repairing vs replacing your roof. For many homeowners, the immediate reaction to a leak is a desire for a quick patch. While this is often viable for younger roofs, we have to look at the “30% Rule.”

In the roofing industry, if a repair estimate starts climbing toward 30% or more of what a full replacement would cost, it is almost always the smarter long-term financial move to invest in a new roof. Why? Because a roof requiring such extensive work is often signaling systemic failure. Patching one area might stop a leak today, but in our damp NW Oregon climate, the next weak point is usually just one storm away.

Localized damage, such as a few shingles blown off during a wind event or a single failed pipe boot, is a prime candidate for repair. However, when we see widespread issues like curling shingles, heavy moss growth that has compromised the integrity of the materials, or multiple leaks occurring simultaneously, we are looking at a systemic issue. At that point, the Should I Repair or Replace My Roof? question becomes about protecting your home’s interior from mold and structural rot.

How material choice affects the cost of repairing vs replacing your roof

The materials protecting your home play a massive role in the math. In the Portland-Metro area, we see a wide variety of styles, each with its own “breaking point” for repairs.

  • Asphalt Shingles: These are the most common. Standard 3-tab shingles have a shorter lifespan, while architectural shingles are more durable. Repairs are relatively straightforward, but as they age, they become brittle. Trying to “tie in” new shingles to old, brittle ones can often cause more damage than it fixes.
  • Metal Roofing: These systems are incredibly durable and can last 40 to 70 years. While the initial investment is higher, repairs are rare. However, if a metal roof is improperly installed or damaged by a major limb fall, the repair can be more technical and labor-intensive.
  • Clay Tile and Slate: These are “forever” roofs, often lasting 50 to 100+ years. Repairs usually involve replacing individual broken tiles or fixing the underlayment. Because these materials require specialized labor, the repair price per square foot is significantly higher than asphalt.

Understanding these differences is key to our Roof Replacement Cost Guide for Homeowners, as the material dictates both the upfront price and the frequency of maintenance.

Evaluating the long-term cost of repairing vs replacing your roof

It is easy to look at a repair bill and think you’re saving money, but we encourage our neighbors in Tigard and Lake Oswego to look at the cumulative costs. If you spend money on three different repairs over five years, you may have already paid for half a new roof without getting the benefits of a new warranty or improved energy efficiency.

A new, properly ventilated roof can significantly lower your summer cooling bills in the Willamette Valley. Furthermore, insurance companies are becoming increasingly strict. Many carriers in 2026 may refuse to renew policies or will switch to “Actual Cash Value” (ACV) coverage once a roof passes the 15-year mark. Replacing your roof proactively can keep your premiums lower and ensure you have “Replacement Cost Value” (RCV) protection. Plus, if you plan to sell your home in the next few years, a new roof is one of the highest-ROI upgrades you can make, often recouping a large portion of its value at resale. Knowing How to Extend the Life of Your Roof through maintenance is great, but knowing when to stop the “stacked repair” trap is even better.

Critical Factors in the Repair vs. Replace Decision

Making the right call requires balancing several variables. In Oregon, the weather is our biggest adversary. Constant moisture, moss growth, and the occasional ice storm accelerate wear in ways that dry climates don’t experience.

Factor Favor Repair Favor Replacement
Age Under 12 years Over 18-20 years
Damage Extent Less than 25% of surface More than 30% or multiple slopes
Leak History First time, isolated spot Recurring, multiple locations
Shingle Condition Supple, granules intact Brittle, curling, bald spots
Future Plans Staying 1-3 years Staying 5+ years or selling soon

The impact of roof age on your investment

Age is often the ultimate tie-breaker. Asphalt shingles in the Pacific Northwest typically have a realistic lifespan of 20 to 25 years, depending on the quality and how well they were maintained. Once a roof hits the 15-year threshold, the shingles begin to lose their protective granules and the asphalt mat becomes brittle.

If we find significant granule loss in your gutters—looking like coarse sand—it’s a sign the shingles are losing their ability to deflect UV rays and shed water. At this stage, a repair is often just a “band-aid.” We often see that How Regular Inspections Catch Problems Early can help you squeeze a few more years out of a roof, but once the material reaches the end of its chemical life, replacement is the only permanent solution.

When storm and hail damage dictate the path forward

Storm events can change the math instantly. While Oregon doesn’t get the massive hailstorms seen in the Midwest, we do get high-wind events and heavy limbs that can cause widespread impact. If a storm damages more than 25% of a single roof slope, many building codes and insurance policies suggest a full replacement is necessary to ensure structural integrity and a proper shingle match.

Shingle colors are often discontinued every few years. If we can’t find a match for your 12-year-old roof, a repair will leave a visible “patchwork” look that can hurt your home’s curb appeal. In these cases, insurance may cover a full replacement. We also see this frequently with businesses; checking for Signs Your Commercial Roof Needs Attention after a storm is vital for insurance documentation.

When Damage Severity Dictates a Full Replacement

Sometimes the choice is taken out of our hands by the condition of the roof itself. If we step onto a roof in Tualatin and feel “soft spots,” we aren’t just looking at a shingle problem; we’re looking at a structural one.

Identifying minor vs. major repair needs

It helps to know what we consider a “simple” fix versus a major project.

  • Minor Repairs: Replacing a cracked pipe boot (the rubber seal around vent pipes), fixing a small section of flashing around a chimney, or replacing a few shingles lost in a windstorm. These are cost-effective and should be done immediately to prevent water from reaching the wood deck.
  • Major Repairs: Fixing a valley where two roof planes meet, addressing leaks that have reached the internal rafters, or replacing large sections of ridge caps. If these repairs are needed on an older roof, we will likely discuss the cost of repairing vs replacing your roof with you to ensure you aren’t throwing good money after bad.

Structural issues and safety considerations

If you see sagging in your roofline or daylight visible through the boards in your attic, the situation has moved beyond shingles. Sagging often indicates that the plywood decking or even the rafters have been weakened by long-term moisture.

In the Portland area, moss is a major culprit. It acts like a sponge, holding water against the shingles and eventually wicking it underneath. Once the underlayment fails, the wood begins to rot. If the structural deck is compromised, a “re-roof” (adding a new layer over the old) is not an option. A full tear-off is required to replace the rot and ensure your home is safe. Failing seals around skylights or dormers can also lead to hidden mold growth that requires professional remediation if left too long.

Long-Term Financial Benefits of a New Roof

While a new roof is a significant investment, it provides a “reset button” for your home’s protection. For our clients in Beaverton and Gresham, the peace of mind that comes with a 20-to-50-year warranty is often the biggest selling point.

ROI and property value increases

A new roof is one of the few home improvements that almost everyone agrees adds value. Real estate experts often note that a new roof can recoup 60% to 70% of its cost in home value. For a buyer, seeing a brand-new roof means they won’t have to worry about a major capital expense for decades. It builds immediate confidence. Furthermore, modern materials are far more advanced than those from 20 years ago, offering better wind resistance and specialized coatings that reflect heat, keeping your home more comfortable.

Avoiding the “stacked repair” trap

The “stacked repair” trap is a cycle we hate to see our neighbors fall into. It starts with a $500 fix, then a $1,200 fix a year later, then another $800 fix. Within a few years, you’ve spent thousands of dollars, yet you still have an old roof that could leak at any time. By choosing replacement when the signs point that way, you avoid emergency repair premiums—which are always higher when every roofer in town is busy during a storm—and you prevent the interior damage (ruined drywall, insulation, and flooring) that usually follows a major leak.

Frequently Asked Questions about Roofing Decisions

When is a repair more cost-effective than a replacement?

A repair is usually the winner if your roof is less than 12-15 years old and the damage is localized (like a single leak or a few missing shingles). If the overall health of the shingles is good—meaning they aren’t brittle and haven’t lost their granules—a targeted repair can easily extend the life of the roof for another decade. We generally recommend repair if the total cost stays well under 30% of what a new roof would cost.

How do I know if my roof damage is widespread?

Look for “the big three”:

  1. Granules: Check your gutters and downspouts. If they are filled with what looks like sand, your shingles are bald and failing.
  2. Curling and Cracking: If the edges of your shingles are turning upward or look like they are “clawing,” the asphalt has dried out.
  3. Multiple Leaks: If you have water stains appearing in different rooms or different parts of the attic, the underlayment is likely failing across the entire system.

Does homeowners insurance cover replacement for old roofs?

Insurance is designed to cover “sudden and accidental” damage—like a tree falling or a major windstorm ripping off shingles. It generally does not cover standard wear and tear or a roof that has simply reached the end of its life. However, if an older roof is damaged by a covered storm event, your policy type matters. A “Replacement Cost Value” (RCV) policy may pay for a new roof regardless of age, while an “Actual Cash Value” (ACV) policy will only pay what the old roof was worth at the time of damage, leaving you to cover the difference.

Conclusion

Deciding on the cost of repairing vs replacing your roof doesn’t have to be a stressful “guessing game.” At Raindrop Roofing NW, we believe in the power of local accountability. As a multi-generational, family-owned business based right here in Beaverton, we treat every roof like it’s over our own heads. We don’t use high-pressure sales tactics because we plan to be here serving the Portland-Metro community for another thirty years.

Whether you need a simple shingle replacement in Tigard or a full architectural shingle installation in Vancouver, our team provides transparent, honest assessments. We’ll tell you if a repair is all you need, and we’ll explain exactly why if a replacement is the safer bet for your family’s future.

Don’t wait for the next big Oregon storm to find out where your roof stands. Schedule a free inspection with Raindrop Roofing NW today and let us give you the clarity and craftsmanship you deserve.

https://www.raindropnw.com/wp-content/uploads/2026/07/pexels-photo-37677394.avif 627 940 SEO Stats https://www.raindropnw.com/wp-content/uploads/2024/05/logo-raindrop-space-300x92.png SEO Stats2026-07-02 13:41:042026-07-02 13:41:04The Definitive Guide to Cost of Repairing vs Replacing Your Roof

A Quick Start Guide to Preventing Roof Damage From Rain

Roofing

Why Portland’s Rain and Humidity Are So Hard on Your Roof

How persistent rain and humidity stress your roof is one of the most underestimated problems homeowners in the Portland metro and Beaverton area face — and it rarely looks like an emergency until serious damage has already set in.

Here is a quick breakdown of the main ways moisture wears down your roof:

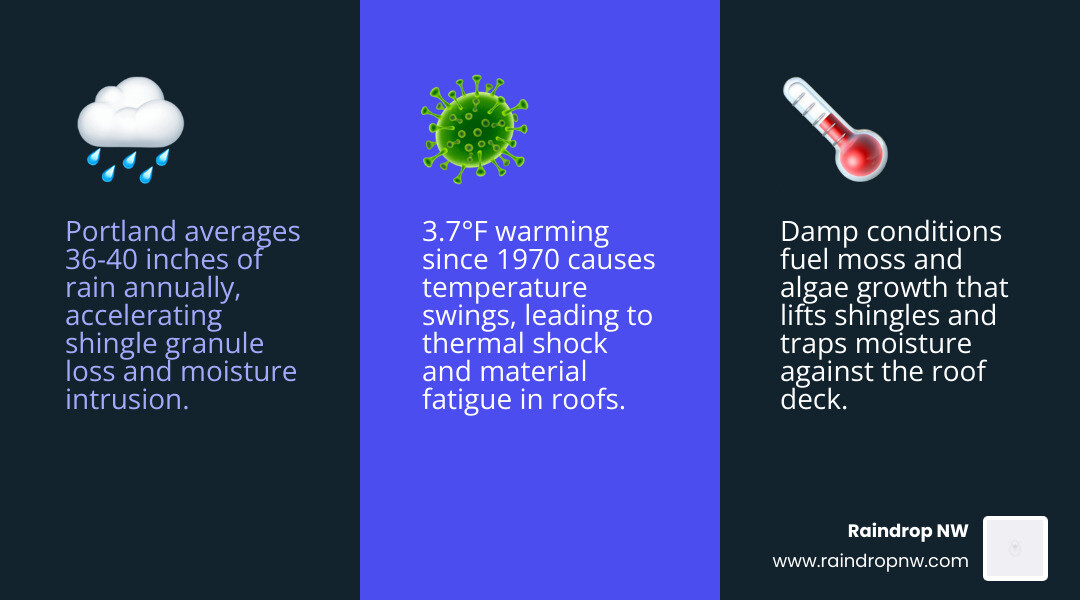
  • Water absorption – Roofing materials soak up moisture during rain, and in the Pacific Northwest’s climate, they rarely get enough dry time to fully recover between storms
  • Biological growth – Persistent humidity feeds moss, algae, and lichen, which physically lift shingle edges and trap even more water against the surface
  • Attic condensation – Warm, humid air rises into your attic and condenses on cooler surfaces, slowly rotting the wood decking from the inside out
  • Material breakdown – Repeated wet-dry cycles cause microscopic cracking in asphalt shingles, weakening the fiberglass mat and accelerating granule loss
  • Flashing and sealant failure – Constant moisture exposure degrades the seals around vents, pipes, and roof transitions, opening the door to leaks

The result? Roofs in high-humidity regions like ours experience up to 50% more frequent moisture-related damage than roofs in drier climates, and asphalt shingles can lose up to 30% of their expected lifespan when exposed to persistent moisture and biological growth.

I’m Torrey Yungeberg, owner of Raindrop Roofing NW, and after years of inspecting roofs across Beaverton and the greater Portland metro, I’ve seen how persistent rain and humidity stress your roof in ways that most homeowners simply don’t notice until the damage reaches their ceilings. In this guide, I’ll walk you through exactly what’s happening to your roof and what you can do about it.

infographic showing how rain and humidity cycle through a residential roof causing moss growth, condensation, and material

How Persistent Rain and Humidity Stress Your Roof

When we think of roof damage, we often picture dramatic events: massive windstorms ripping off shingles, heavy branches crashing through the ceiling, or golf-ball-sized hail denting metal panels. However, in our corner of the Pacific Northwest—stretching from Beaverton and Hillsboro to Lake Oswego and Tigard—the most relentless threat is far quieter.

It is the slow, steady combination of persistent rainfall and year-round ambient humidity. Because our weather patterns keep materials damp for weeks or even months at a time, your roof is under constant physical stress. This slow-motion wear and tear directly impacts How Portland Weather Affects Roof Lifespan, making proactive moisture management essential for local homeowners.

The Science Behind How Persistent Rain and Humidity Stress Your Roof

To understand why moisture is so destructive, we have to look at the anatomy of a standard asphalt shingle. Shingles are constructed with a tough fiberglass mat at their core, which is coated in protective asphalt and topped with ceramic granules.

When your roof is subjected to endless dampness, water molecules slowly find their way into the microscopic spaces within the asphalt coating. As the weather fluctuates—even slightly—the shingles undergo wet-and-dry cycles.

During these cycles, the materials expand as they absorb moisture and contract as they dry. Over time, this movement causes microscopic cracks to develop in the asphalt layer. Once these tiny fractures form, the fiberglass mat becomes exposed to water, which weakens the shingle’s structural integrity.

If moisture gets past the shingles and reaches the underlying wood decking, wood rot can begin. Wood begins to decay when its moisture content exceeds 30%, a threshold that is easily reached in poorly ventilated roofs during our wet seasons.

Why Portland Metro Humidity Accelerates Material Breakdown

In drier parts of the country, a heavy rainstorm is followed by sunshine and dry air, allowing the roofing system to dry out completely. In the Portland metro area, however, our relative humidity levels frequently hover above 75% for much of the year, and during cool, damp mornings, it can easily exceed 90%.

This high relative humidity slows down the evaporation process. When moisture cannot evaporate, it remains trapped in the overlapping layers of your shingles, around the valleys, and beneath the underlayment.

This constant state of dampness accelerates the wear of your roof’s underlayment—the secondary water-resistant barrier beneath your shingles. As the underlayment softens and degrades from prolonged moisture exposure, it loses its ability to protect the wood decking.

Furthermore, when warm, humid air from inside your home rises into a cool attic, it meets the cold underside of the roof deck. Without sufficient airflow to sweep this humid air away, it condenses into liquid water, mimicking a roof leak and rotting your roof from the inside out.

Common Types of Moisture Damage in Pacific Northwest Homes

Because our climate rarely allows for rapid drying, moisture damage in local homes tends to compile quietly. Left unaddressed, these issues can lead to expensive structural repairs.

Understanding the specific ways water compromises your home is the first step in learning How to Protect Your Home from Water Damage Through Your Roof.

Biological Growth and Shingle Lifting

One of the most visible consequences of our humid environment is the rapid growth of moss, algae, and lichen. Moss spores thrive in cool, damp, shaded environments, and they easily establish a foothold on roofs shaded by our local Douglas firs and big-leaf maples.

Moss does not just look unsightly; it acts like a literal sponge. It holds water directly against the surface of your shingles, preventing them from drying. As the moss grows, its root-like structures (rhizoids) work their way under the edges of the shingles.

As these structures expand, they lift the shingle edges. Once a shingle is lifted, its factory-applied sealant bond is broken, making it highly vulnerable to being torn off by wind. More importantly, lifted shingles create direct pathways for wind-driven rain to slide underneath, leading to hidden leaks.

Additionally, you might notice dark, vertical streaks on your roof. This is often caused by Gloeocapsa magma, a hardy type of blue-green algae that feeds on the limestone filler used to manufacture modern asphalt shingles. As the algae consumes this filler, it weakens the shingle structure and reduces its ability to reflect sunlight, increasing your attic’s temperature.

Attic Condensation and Structural Wood Rot

While exterior issues are easier to spot, some of the most severe damage occurs out of sight in your attic. When high humidity levels combine with poor attic ventilation, warm, moist air from cooking, showering, and heating becomes trapped.

As this air hits the cold roof decking, condensation forms. This moisture quickly saturates the wood decking and rafters. Mold can begin growing on these damp wooden surfaces within 24 to 48 hours.

Over time, this constant moisture exposure leads to structural wood rot, causing the roof deck to soften, warp, and sag. If you have ever seen a roofline that looks wavy or uneven, you are likely looking at structural decking damage caused by trapped attic moisture.

How Different Roofing Materials Respond to Constant Wetness

Not all roofing materials handle the Pacific Northwest’s damp climate in the same way. When choosing a roof or planning maintenance, it is helpful to understand how different systems perform under persistent moisture stress.

Roofing Material Moisture Resistance Susceptibility to Biological Growth Primary Vulnerability in Wet Climates
Asphalt Shingles Moderate High (Moss & Algae) Granule loss, shingle lifting, and adhesive degradation
Metal Roofing High Low Sealant failure at fasteners and transition points
Concrete/Clay Tile High Moderate (Moss in joints) Underlayment wear due to heavy weight and moisture retention

Understanding these differences is key to implementing effective Water Damage Prevention Tips for Pacific Northwest Homeowners.

Asphalt Shingles and Granule Loss

Asphalt shingles remain the most popular choice in Beaverton and Portland due to their cost-effectiveness and versatility. However, they require the most vigilance in our wet climate.

The constant rain washes away the protective ceramic granules over time. When these granules erode, the underlying asphalt is left exposed to UV rays (even on cloudy days), which dries out the asphalt and causes the shingles to curl, crack, and become brittle.

Because many asphalt shingles contain limestone filler, they are also the primary target for Gloeocapsa magma algae, which accelerates the breakdown of the shingle’s water-resistant properties.

Metal and Tile Roofing Performance

Metal roofing is highly resistant to moisture and biological growth, as its smooth surface makes it difficult for moss to gain a foothold. However, metal roofs are not entirely immune to our climate.

They rely heavily on rubber washers and sealants around screws and fasteners. In high-humidity environments, these sealants can degrade over time, and the metal panels undergo minor thermal expansion and contraction, which can loosen fasteners and allow water to seep in.

Tile roofs (concrete or clay) are incredibly durable and can easily handle heavy rain. However, tiles are semi-porous and can absorb moisture, making them heavy when wet.

Because tiles do not create a completely airtight seal, water frequently gets beneath them, placing a heavy reliance on the underlayment. In our humid climate, if the underlayment degrades, the structural decking underneath can suffer from hidden rot long before any damage is visible on the tiles themselves.

Warning Signs of Humidity-Related Roof Stress

Catching moisture damage early can save you thousands of dollars in structural repairs. Because water behaves unpredictably—often entering at one point of the roof and traveling along rafters before dripping onto your ceiling—homeowners must keep an eye out for both interior and exterior warning signs.

Knowing what to look for is a major part of understanding How Inspections Prevent Costly Repairs.

Interior Indicators of Attic Moisture

You do not have to climb onto your roof to check its health. Often, the earliest warning signs of humidity-related stress appear inside your home or attic:

  • Water stains and ceiling spots – Dark, circular stains or bubbling paint on your ceilings or upper walls indicate that water has penetrated the roof deck and is soaking through your drywall.
  • Damp insulation – Fiberglass insulation acts like a sponge. If you climb into your attic and find that the insulation feels damp, clumped, or compressed, it is actively absorbing moisture from condensation or a roof leak.
  • Musty odors – A persistent, musty smell in your attic or upper closets is a strong indicator of mold or mildew growth, which thrives in stagnant, humid air.
  • Dark discoloration on wood decking – Inspect the underside of your roof decking in the attic. Look for dark streaks, black mold spots, or white, powdery mildew, which indicate that the wood is staying damp.

Exterior Clues of How Persistent Rain and Humidity Stress Your Roof

On a dry day, take a walk around your yard and inspect your roof from the ground using binoculars. Look for these common signs of moisture stress:

  • Dark streaks and moss patches – Heavy green patches of moss, especially in valleys or on north-facing slopes, mean your roof is trapping moisture.
  • Curling, cupping, or buckling shingles – When shingles absorb water and dry unevenly, their edges will begin to curl upward or cup, indicating they are reaching the end of their useful life.
  • Cracked flashing and failing pipe boots – Flashing around chimneys and vents is your roof’s weakest point. Additionally, the rubber seals (pipe boots) around plumbing vents typically last only 8 to 12 years in our climate before cracking due to temperature swings and moisture exposure.
  • Clogged or sagging gutters – If your gutters are filled with pine needles, leaves, and shingle granules, water will back up under the edge of your roof, rotting the fascia boards and roof edge.

Actionable Steps to Protect Your Roof from Constant Moisture

While we cannot change our Pacific Northwest weather, there are several practical, proactive steps we can take as homeowners to minimize the impact of rain and humidity.

Maintaining a consistent maintenance schedule is key, and keeping up with the recommended Roof Inspection Frequency for Pacific Northwest Homes ensures that minor issues are caught before they turn into major structural failures.

Improving Attic Ventilation and Drainage

The secret to a long-lasting roof in a wet climate is balance: keeping water out on the outside, and letting moisture escape from the inside.

  • Ensure proper attic airflow – Your attic should have a continuous flow of air. Cool air should enter through your soffit vents (near the eaves) and exit through your ridge vents (at the peak of the roof). Check your attic to make sure insulation is not blocking your soffit vents, as this is the single most common cause of attic condensation.
  • Clean gutters at least twice a year – Clogged gutters cause standing water to pool along your roof’s edge. Clean your gutters in the late spring and late fall, and consider installing high-quality gutter guards if your home is surrounded by trees.
  • Extend your downspouts – Ensure that your downspout extensions direct water at least 3 to 5 feet away from your home’s foundation to prevent soil saturation and basement moisture issues, which can rise and increase your home’s overall humidity.
  • Trim overhanging tree branches – Keep branches trimmed back at least 6 to 10 feet from your roof. This allows more sunlight and wind to reach the shingles, which helps them dry faster, while also reducing the amount of leaves and needles that fall onto your roof and clog your gutters.

Frequently Asked Questions about Roof Moisture Damage

Can humidity damage my roof even when it is not raining?

Yes, absolutely. High relative humidity can cause significant damage to your roof even during dry spells. When the air is highly humid, warm air inside your home carries moisture up into the attic.

When evening temperatures drop, the roof deck cools down quickly, causing that trapped humid air to condense into liquid water on the underside of your roof. This daily condensation cycle keeps the wood damp, promoting wood rot and mold growth without a single drop of rain falling.

How does moss damage asphalt shingles over time?

Moss acts like a thick, wet sponge. It holds moisture directly against the shingles, preventing them from drying out. As the moss grows, its physical structure works its way under the shingles, lifting them up and breaking their wind seals.

During cold weather, the water trapped within the moss can freeze and expand, cracking the shingles and widening existing gaps, which allows water to leak directly into your home.

How often should I have my roof inspected in the Portland metro area?

Because of our unique climate, we highly recommend having your roof professionally inspected at least once a year, preferably in the autumn before our heavy winter rains begin.

If your roof is more than 10 to 15 years old, or if your property has heavy tree cover, semi-annual inspections (spring and fall) are ideal to ensure that any moss growth, clogged valleys, or failing sealants are addressed before the wet season starts.

Conclusion

Living in the Pacific Northwest means accepting that rain and humidity are simply part of our daily lives. However, we do not have to let the damp climate compromise the safety and value of our homes. By understanding how persistent moisture stresses your roofing materials, keeping an eye out for early warning signs, and maintaining proper attic ventilation and gutter drainage, you can protect your roof and significantly extend its lifespan.

At Raindrop Roofing NW, we believe in local accountability. As a multi-generational, family-owned roofing company based right here in Beaverton, we are truly local. We are committed to long-term service and standing behind our craftsmanship. We understand the unique challenges our local climate places on your home, and we are here to help you navigate them with transparency, honesty, and expert care.

If you are concerned about how recent wet seasons have affected your roof, or if you want to ensure your attic is properly ventilated before the next big storm, we are here to help. Schedule a professional roof inspection and maintenance service with Raindrop NW today, and let us give you the peace of mind that comes with a strong, dry, and healthy roof.

https://www.raindropnw.com/wp-content/uploads/2026/06/photo-1711384694158-9794cd76b487.jpeg 720 1080 SEO Stats https://www.raindropnw.com/wp-content/uploads/2024/05/logo-raindrop-space-300x92.png SEO Stats2026-06-30 09:53:352026-06-30 09:53:35A Quick Start Guide to Preventing Roof Damage From Rain

The Definitive Guide to Roofing Budget Planning

Roofing

What to Include in Your Roofing Budget (And Why It Matters More Than You Think)

What to include in your roofing budget goes well beyond just the shingles on top — and for most Oregon homeowners, the full picture comes as a surprise. Here’s a quick overview of everything that belongs in a complete roofing budget:

Core budget items for a roof replacement:

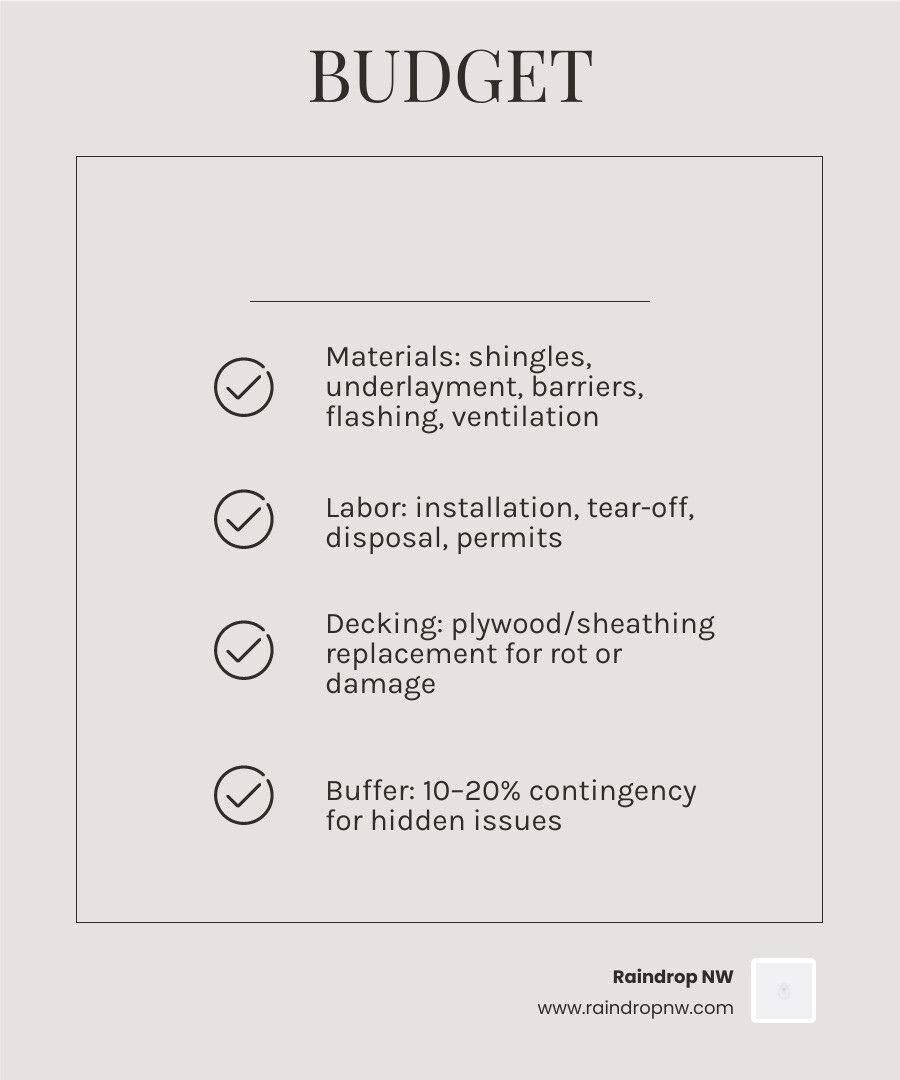
  1. Roofing materials — shingles, underlayment, ice and water barrier, starter shingles, hip and ridge shingles, flashing, and ventilation components
  2. Roof decking — assessment and replacement of any damaged plywood or sheathing found during tear-off
  3. Labor and installation — typically the largest single cost, often accounting for around 60% of the total project
  4. Tear-off and disposal — removing your old roof and hauling away the debris
  5. Permits and administrative fees — required by most municipalities in Oregon and Southwest Washington
  6. Contingency buffer — set aside 10–20% for hidden damage like dry rot that only shows up once the old roof comes off
  7. Optional upgrades — premium materials, improved ventilation systems, or roof coatings that extend long-term lifespan

Most homeowners focus on the material cost alone — and that’s exactly where budget surprises come from. A roof replacement is one of the most significant investments you’ll make in your home, and the Pacific Northwest’s wet winters and wind-driven rain make getting it right even more important. If your budget doesn’t account for every layer of the system, you’re likely to face unexpected costs mid-project — or worse, a roof that underperforms because corners were quietly cut.

I’m Torrey Yungeberg, owner of Raindrop Roofing NW, and after years of helping Portland-area homeowners navigate full roof replacements, I’ve seen how a clear, complete picture of what to include in your roofing budget protects families from stressful surprises and bad contractor experiences. Let’s walk through everything you need to plan your project with confidence.

Infographic showing all components of a roofing replacement budget including materials labor tear-off permits and

Core Components: What to Include in Your Roofing Budget

roofing system components explained for residential roof replacement

When planning a project of this scale, it helps to understand that a roof is not a single product. It is a highly engineered, multi-layered system designed to shed water, resist high winds, and keep your attic dry and well-ventilated. When you receive a professional estimate, the final number is divided into two primary categories: materials and labor.

A common misconception is that the physical materials make up the bulk of your invoice. In reality, the material allocation accounts for roughly 40% of your total quote, while the labor ratio represents about 60%. This labor-heavy split reflects the intense physical demands, high risk, and specialized skill required to tear off old materials and install a new, structurally sound system.

To help you visualize how these pieces fit together, we recommend consulting our comprehensive Roof Replacement Cost Guide for Homeowners. Understanding this balance of structural integrity, material choice, and skilled labor ensures you are comparing quotes fairly rather than simply choosing the lowest bid.

Essential Materials: What to Include in Your Roofing Budget

To build a roof that can survive decades of Northwest Oregon rain, wind, and occasional winter ice, your budget must include a variety of essential materials. Each component serves a distinct purpose:

  • Roof Decking or Sheathing: This is the structural wooden foundation (typically plywood or OSB sheets) that attaches to your home’s rafters. All other roofing components are nailed into this layer.
  • Roof Underlayment: Acting as your second line of defense against wind-driven rain, synthetic or felt underlayment is installed directly over the wood decking. Skipping or using subpar underlayment can void your manufacturer warranties.
  • Ice and Water Shield: This self-adhering, rubberized waterproof membrane is non-negotiable in vulnerable areas. It is applied along the eaves, valleys, and around penetrations (like chimneys and pipes) to prevent water from backing up under the shingles due to ice dams or heavy pooling.
  • Starter Shingles: Specially designed shingles installed along the eave and rake edges of your roof. They provide the initial sealant line to prevent high winds from lifting the main shingles.
  • Main Shingles: The visible outer layer. While asphalt shingles remain the most popular choice due to their balance of performance and value, your choice of style will directly influence your budget. You can learn more about how these decisions shape your estimate in our guide on How Material Choice Impacts Your Roof Cost.
  • Hip and Ridge Shingles: These are thicker, pre-bent shingles designed specifically to cover the peaks and ridges of your roof. They seal the joints where different roof planes meet and add a finished, cohesive look.
  • Flashing: Custom-shaped metal pieces (usually aluminum or steel) installed in high-risk leak areas such as valleys, chimney bases, skylights, and roof-to-wall intersections.
  • Roof Ventilation: A healthy roof needs to breathe. Your system must include intake vents (usually at the soffits) and exhaust vents (such as ridge vents) to keep air moving. This prevents attic heat buildup in the summer and damaging condensation in the winter.

If you are considering upgrading the look and durability of your home, you might also wonder: Are Designer Shingles Worth the Extra Cost? Premium architectural options offer enhanced wind resistance and deeper shadow lines, which can elevate your home’s curb appeal while offering superior protection.

Labor and Installation: What to Include in Your Roofing Budget

Because labor represents the majority of your project’s financial allocation, it is crucial to understand the variables that contractors calculate when pricing the physical installation. It is not just about the square footage of your home’s footprint.

The complexity of your roof’s design plays a massive role. A simple, low-slope ranch home is far easier and faster to roof than a multi-gabled Tudor with a steep roof pitch. Steeper roofs require specialized safety staging, harnesses, and slower, more meticulous footwork, which naturally increases the labor percentage.

Furthermore, roof height and overall accessibility influence the installation timeline. If your home is a multi-story structure with tight access between neighboring properties in Portland or Lake Oswego, getting materials up to the roof and throwing old materials down safely takes extra time and equipment. When we calculate labor, we look at the total “squares” (a roofing square is a standard unit equal to 100 square feet) alongside these unique architectural features. For a deeper dive into regional installation factors, check out our resource on How Much Does a New Roof Cost in the Pacific Northwest?.

Hidden Expenses and Contingencies to Anticipate

If every roof replacement went perfectly according to plan, budgeting would be simple. However, the true condition of your roof’s underlying structure cannot be fully known until the old shingles are completely torn off. This is why we always advise homeowners to prepare for hidden expenses.

Structural Repairs and Decking Contingency

The most common hidden expense during a roof replacement is dry rot or water damage in the roof decking. Over years of slow, unnoticed leaks, water can seep past old underlayment and soften the plywood sheathing underneath.

Statistically, about one in five roofs (20%) require some level of decking replacement once the tear-off phase is complete. If a contractor lays new shingles over rotted wood, the nails will not hold, compromising the structural stability of your entire roof.

To avoid mid-project panic, you should always include a 10% to 20% contingency buffer in your initial budget. This ensures that if we discover rot, we can replace the damaged sheets of plywood immediately without halting construction or causing financial stress. If you are currently trying to decide whether your roof needs immediate attention or if a simple fix will do, take a look at our guide: Should I Repair or Replace My Roof?.

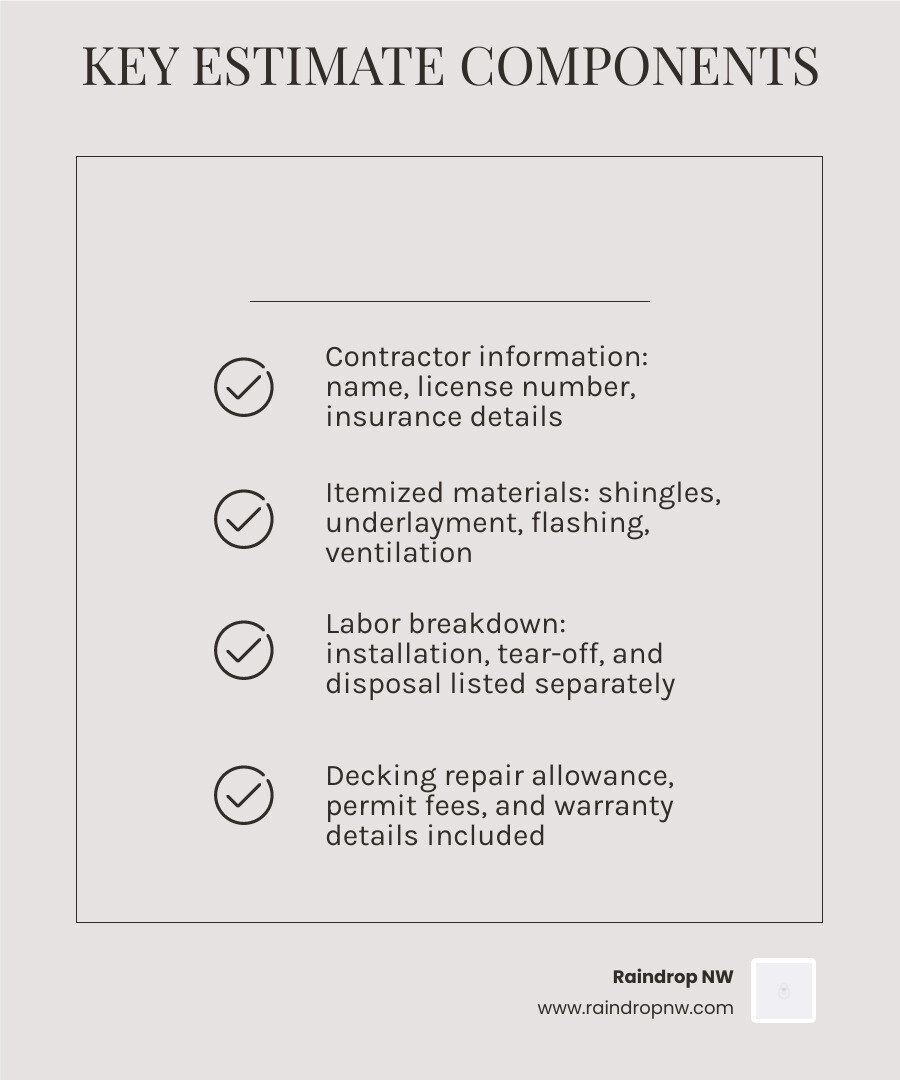
Disposal, Permits, and Administrative Fees

Another set of line items that must be explicitly detailed in your budget includes waste disposal and municipal permits.

Tearing off a roof generates tons of heavy debris. Your budget needs to account for dumpster rental fees, labor to load the waste, and local landfill tipping fees. Additionally, most cities and counties across the Portland metro area—from Hillsboro and Beaverton down to Oregon City and West Linn—require official building permits for a full roof replacement. A professional, licensed contractor should always handle pulling these permits and scheduling the required municipal inspections to ensure your new roof is fully compliant with local building codes.

Material Selection and Long-Term Investment Value

The materials you choose have a direct relationship with both your upfront budget and the long-term value of your home. To help you evaluate your options, we have compiled a relative comparison of the most common roofing materials used in our region.

Material Type Relative Lifespan Maintenance Requirements Best Suited For
3-Tab Asphalt Shingles Standard (Shortest) Moderate Budget-conscious projects, temporary fixes
Architectural Shingles Long Low to Moderate Standard residential homes, excellent overall value
Standing-Seam Metal Very Long Very Low Modern homes, long-term owners, high wind/snow areas
Cedar Shakes Moderate to Long High Historic homes, natural aesthetic preference
Clay / Concrete Tile Extremely Long Low Mediterranean or custom architectural styles

Comparing Asphalt Shingles and Premium Alternatives

Asphalt shingles remain the most popular choice across the Pacific Northwest because of their exceptional durability and cost-effectiveness. Modern architectural shingles are engineered with composite materials that resist algae growth and can withstand high winds.

However, if you plan on staying in your home for decades, premium alternatives like standing-seam metal or concrete tile are worth considering. While standing-seam metal requires a larger upfront investment, it offers incredible durability and can easily outlast two or three asphalt shingle lifecycles. Metal also provides excellent fire resistance and sheds heavy Northwest rain and snow effortlessly. For homeowners planning to move within ten years, architectural asphalt shingles usually provide the best return on investment, whereas metal or tile makes the most financial sense for forever homes.

Navigating Insurance Claims and Coverage

If your roof replacement is prompted by sudden storm damage—such as a fallen Douglas fir limb or severe windstorms—your homeowner’s insurance policy may help cover the cost. However, it is essential to understand that standard insurance policies do not cover normal wear and tear or aging.

When filing a claim, the age of your roof plays a major role in how your insurance provider calculates your payout. To understand how this works, we highly recommend reading about How Roof Age Affects Your Insurance Claim.

Navigating the paperwork can be overwhelming, which is why we have put together several resources to guide you through the process step-by-step. Start by reviewing Does Insurance Cover Roof Replacement? and Understanding Your Insurance Policy and Roofing Coverage. Once you are ready to move forward, our guide on How to File a Roof Damage Insurance Claim will help you work smoothly with your adjuster.

Extending Roof Lifespan to Maximize Your Investment

Once your new roof is installed, protecting that investment should be your top priority. Routine maintenance is the single most effective way to extend your roof’s life expectancy from 10–15 years to 25 or more years.

Proactive repairs—such as clearing moss, cleaning gutters, and replacing worn pipe boots—are incredibly cost-effective compared to reactive, emergency repairs. In fact, ignoring minor issues can turn a simple fix into a catastrophic mold or structural issue. Annual inspections and professional roof coatings are excellent tools to keep your system performing at its best. To learn more about keeping your system in peak condition, read our expert tips on How to Extend the Life of Your Roof.

Frequently Asked Questions About Roofing Budgets

How much of a budget buffer should I set aside for unexpected roof damage?

We strongly recommend setting aside a contingency fund of 10% to 20% of your total project estimate. This buffer is specifically designed to cover unexpected dry rot, damaged structural rafters, or ventilation issues that are completely hidden from view until the old shingles are removed. Having this safety net ensures your project continues smoothly without delay.

Does a standard roofing estimate include old roof tear-off and disposal?

A professional, reputable roofing estimate should always explicitly include the tear-off of your existing roof, dumpster rentals, and all environmental disposal fees. Be sure to review your quotes carefully; if a bid seems unusually low, check to make sure the contractor hasn’t left out disposal fees, leaving you with a pile of shingles on your lawn and an unexpected bill.

Can I save money by installing new shingles over my existing roof?

While some local building codes allow for a roof overlay (installing a second layer of shingles over the first), we almost never recommend it. Overlays trap heat, which can reduce the lifespan of your new shingles by 15% to 20% and often void the manufacturer’s warranty. Additionally, an overlay prevents us from inspecting your wooden decking for hidden rot, and the extra structural load can strain your home’s framing.

Conclusion

Planning a roofing budget can feel daunting, but breaking it down into clear, manageable components is the best way to protect your home and your wallet. From the initial tear-off to the final ridge cap shingle, every layer of your roofing system plays a critical role in keeping your family dry.

At Raindrop Roofing NW, we believe in absolute transparency. As a truly local, family-owned business based right here in Beaverton, Oregon, we are deeply committed to serving our neighbors across the Portland metro area with honesty and long-term accountability. Unlike large, out-of-state corporate entities, we live and work in the communities we serve, and we stand behind our certified craftsmanship for decades to come.

Ready to plan your project with a team you can trust? Schedule a professional consultation with Raindrop NW today, and let us help you build a roof that is budget-smart and built to last.

https://www.raindropnw.com/wp-content/uploads/2026/06/photo-1763665814485-a0a1b6f51ed7.jpeg 720 1080 SEO Stats https://www.raindropnw.com/wp-content/uploads/2024/05/logo-raindrop-space-300x92.png SEO Stats2026-06-29 10:02:582026-06-29 10:02:58The Definitive Guide to Roofing Budget Planning

The Willamette Valley Survival Guide for Your Home’s Roof

Roofing

Why the Portland Metro Climate Is Uniquely Hard on Your Roof

How Portland metro climate affects your roof is one of the most important things to understand as a homeowner in the Willamette Valley. Here’s a quick summary:

  • Heavy rainfall – Portland averages 36-40 inches of rain per year, accelerating shingle degradation and moisture intrusion
  • Moss and algae growth – The damp, shaded environment is ideal for biological growth that lifts shingles and traps moisture against your roof deck
  • Temperature swings – Portland has warmed 3.7°F since 1970, bringing heatwaves followed by cool, wet seasons that cause thermal shock and material fatigue
  • Wind and debris – Seasonal windstorms and Portland’s tree-lined streets send branches and organic debris onto roofs, clogging gutters and accelerating decay
  • Humidity cycles – Repeated wet-dry cycles break down sealants and granules faster than in drier climates, shortening roof lifespan by 10-15 years compared to drier regions

If you live in the Portland metro area, your roof is working harder than you might think. The Pacific Northwest’s mix of relentless rain, biological growth, and increasingly extreme summer heat creates a set of challenges that simply don’t exist in most other parts of the country. A roof that might last 30 years in Arizona or Colorado can show signs of serious failure in 15-20 years here — not because of poor materials, but because of what our climate puts those materials through every single season.

The good news is that knowing what you’re up against is the first step to doing something about it.

I’m Torrey Yungeberg, owner of Raindrop Roofing NW, a family-owned company based in Boring, Oregon — and after years of inspecting and replacing roofs across the Portland metro, I’ve seen how Portland metro climate affects your roof in ways that catch homeowners completely off guard. In the sections below, I’ll walk you through exactly what’s happening to your roof and what you can do to protect it.

Infographic showing Portland's annual rainfall, temperature trends, and key roofing climate risks in the Willamette Valley

How portland metro climate affects your roof

Living in the Portland Metro area, from the busy streets of Beaverton to the quiet neighborhoods of Damascus, means accepting that water is a constant neighbor. While we all love our green summers, the 36 to 40 inches of rain we receive annually isn’t just hitting your roof; it’s testing its engineering every single day.

In drier regions, an asphalt shingle roof might stay flexible and intact for its entire rated lifespan. However, in our neck of the woods, that relentless moisture accelerates degradation. When shingles are constantly saturated, the protective granules—those little sand-like pebbles on top—begin to loosen and wash away. Once those granules are gone, the underlying asphalt is exposed to the elements, leading to brittleness and cracking.

This isn’t just an aesthetic issue. When your roof’s primary defense system is weakened, moisture intrusion becomes inevitable. In the Willamette Valley, we often see roofs fail 10 to 15 years earlier than they would in a drier state. This is why understanding More info about residential roofing is vital for anyone living in Clackamas, Oregon City, or Hillsboro.

How portland metro climate affects your roof through persistent moisture

The real danger in Portland isn’t always the “big storm”; it’s the persistent, light drizzle that keeps everything damp for months on end. This constant wetness leads to water pooling in areas with poor drainage, which is a death sentence for standard shingles.

When water sits, it finds the smallest path of least resistance. We frequently see flashing failure around chimneys and vents in homes across Lake Oswego and West Linn. Flashing is designed to redirect water, but when it’s subjected to months of moisture, the sealants can pull away, allowing water to seep into the roof deck.

Once moisture gets under the shingles, it starts to rot the wooden structure underneath. You might not see a leak in your living room for years, but the plywood decking could be turning into a sponge. This is why we emphasize More info about roof repairs and maintenance as a proactive measure rather than a reactive one.

The impact of humidity and damp cycles

Humidity in the NW Oregon region plays a sneaky role in roof decay. We experience high humidity during our long rainy seasons, followed by rapid drying periods. These wet-dry cycles cause roofing materials to expand and contract repeatedly.

Over time, this “breathing” of the materials leads to:

  • Sealant breakdown: The caulking around your roof penetrations becomes brittle and cracks.
  • Shingle curling: The edges of the shingles lift up, making them vulnerable to wind.
  • Granule loss: You’ll often find piles of granules in your gutters after a heavy rain, which is a clear sign your roof is losing its protective “sunscreen.”

The Green Menace: Moss and Algae Growth in NW Oregon

If you’ve lived in Portland, Gresham, or Tualatin for more than a week, you know that if something stays still long enough, moss will grow on it. While it might look charming on a stone wall, moss is a “green menace” when it comes to your roof.

Moss thrives in our damp, shaded environment. It loves the north-facing slopes of roofs in tree-heavy areas like Camas and Ridgefield. Unlike grass, moss doesn’t have traditional roots; it has rhizoids that actually grip and penetrate the surface of your shingles.

How portland metro climate affects your roof by fueling moss growth

The primary way how portland metro climate affects your roof regarding moss is through the “sponge effect.” Moss absorbs and holds water. When a thick layer of moss sits on your roof, it keeps the shingles underneath saturated for weeks or even months.

This constant moisture does several things:

  1. Lifts Shingles: As moss grows, it gets under the lip of the shingle and physically pries it up. This creates a perfect entry point for wind-driven rain.
  2. Promotes Rot: The moisture trapped by moss eventually reaches the roof deck, fueling wood-decaying fungi that eat away at your home’s structure.
  3. Increases Weight: Wet moss is incredibly heavy. A roof covered in it is carrying a significant “biological load” that it wasn’t necessarily designed to support long-term.

Regular check-ups are the only way to catch this early. You can find More info about roof inspections and certifications to see how we identify these issues before they require a full replacement.

Preventing algae and lichen streaks

Have you ever noticed those ugly black streaks on a roof in Wilsonville or Sherwood? That’s not dirt or soot; it’s likely Gloeocapsa magma, a type of blue-green algae. While it doesn’t cause the structural damage that moss does, it eats away at the limestone filler in asphalt shingles, weakening them over time.

To combat this, we recommend:

  • Zinc or Copper Strips: Installing these at the roof ridge allows metallic particles to wash down the roof during rain, creating an environment where algae and moss can’t survive.
  • Soft Washing: Never, ever use a high-pressure washer on your roof. It will strip the granules and ruin the shingles. We use gentle, pH-balanced solutions to neutralize growth safely.
  • Debris Removal: Keeping pine needles and leaves off the roof prevents the organic “compost” that moss loves to grow in.

Temperature Fluctuations and Thermal Shock in the Willamette Valley

It’s a common misconception that Portland roofs only have to worry about the rain. In reality, our warming climate is introducing a new threat: thermal shock. Since 1970, Northwest Oregon has warmed by about 3.7°F, and we are seeing more frequent triple-digit heatwaves in the summer.

When your roof goes from a cool, damp 55°F morning to a blistering 100°F afternoon, the materials undergo rapid expansion. Then, when a sudden “cool down” storm hits, they contract just as fast. This is thermal shock.

Thermal expansion and contraction cycles

The materials on your roof—the shingles, the metal flashing, the plastic vents—all expand and contract at different rates. This constant movement can lead to:

  • Loosened Fasteners: Nails can “back out” of the wood, creating small holes where water can enter.
  • Adhesive Failure: The seal strips that hold shingles together can break, making the roof susceptible to wind damage.
  • Material Fatigue: Much like bending a paperclip back and forth, the shingles eventually become brittle and crack.

For those considering a new roof in Beaverton or Vancouver, choosing materials designed for these swings is essential. Check out More info about new replacement roofs for modern options that handle thermal stress better than the materials of 20 years ago.

Attic ventilation and heat management

One of the best ways to protect your shingles from “baking” is proper attic ventilation. In many older homes in Eastmoreland or Westmoreland, the attics lack sufficient airflow. When heat gets trapped in your attic, it reaches temperatures far higher than the outside air, essentially cooking your shingles from the inside out.

We follow the 1-to-300 rule: for every 300 square feet of attic floor space, you need at least 1 square foot of net free vent area. Proper baffle installation ensures that your insulation doesn’t block the soffit vents, allowing cool air to enter at the bottom and hot air to escape through the ridge vents at the top. This simple balance can add a decade to your roof’s life.

Climate-Resilient Materials and Maintenance Strategies

Given how portland metro climate affects your roof, you can’t just pick the cheapest material and hope for the best. You need a system designed for the Pacific Northwest.

Material Type Realistic Lifespan in Portland Moss Resistance Best For
3-Tab Asphalt Shingles 15-20 Years Low Budget-conscious repairs
Architectural Shingles 25-30 Years Moderate Most residential homes
Metal Roofing 40-70+ Years High Long-term durability & moss prevention
Synthetic Composites 50+ Years High Premium protection & aesthetics

Best practices for Portland homeowners

Whether you are in Sandy, Boring, or Battle Ground, a little bit of maintenance goes a long way. We recommend a “twice a year” rule for gutter cleaning—once in the late fall after the leaves have dropped, and once in the spring to clear out any winter debris and moss spores.

Other essential tips include:

  • Trim Overhanging Branches: Trees provide shade, which moss loves, and they drop debris that traps moisture. Keep branches at least 3-5 feet away from the roofline.
  • Inspect After Storms: High winds in the Columbia River Gorge or the Willamette Valley can lift shingles. A quick visual check from the ground can save you thousands in interior repairs later.
  • Debris Removal: Don’t let “valleys” in your roof fill up with pine needles. These act as dams, forcing water under your shingles.

To learn more about the specific products we trust, visit More info about roof types and products.

Professional maintenance benefits

We’ve found that regular professional maintenance can extend a roof’s lifespan by 30-50%. That’s the difference between replacing your roof every 18 years or every 28 years. In Portland’s climate, a “set it and forget it” mentality is the most expensive mistake a homeowner can make.

Professional maintenance isn’t just about cleaning; it’s about preserving your warranty. Most shingle manufacturers require proof of maintenance to honor their long-term claims. We provide the documentation and the expertise to ensure your home stays dry through every atmospheric river and summer heatwave.

Frequently Asked Questions about Portland Roofing

What are the most common signs of climate damage on a Portland roof?

Look for “balding” shingles where granules have washed away, curling edges, or dark patches that indicate moss or algae. Inside your home, look for yellow or brown water stains on the ceiling or a sudden spike in your heating and cooling bills, which could indicate failing attic insulation due to moisture.

How often should I have my roof inspected in the Portland Metro area?

Because of our unique rainfall and moss issues, we recommend a professional inspection at least once a year. Ideally, this should happen in the spring so you can address any damage caused by winter storms and treat for moss before the summer growing season.

Is moss growth actually dangerous for my roof’s structure?

Yes. It is more than just an eyesore. Moss acts as a sponge, holding water against your roof and shingles. Over time, this constant moisture rots the wooden decking (the structural “skin” of your house) and can lead to mold growth in your attic, which is a health hazard for your family.

Conclusion

At Raindrop NW, we understand that your roof is the most important part of your home’s defense system. As a truly local, independently owned company based in Beaverton, we’ve seen exactly how portland metro climate affects your roof across every neighborhood from Camas to Newberg. Unlike the big out-of-state firms, we are your neighbors, and we are committed to long-term accountability and craftsmanship.

Our family-owned, multi-generational team is here to help you navigate the challenges of the Willamette Valley climate. Whether you need a small repair in Tigard or a full replacement in Vancouver, we provide transparent service and expert advice.

Don’t wait for a leak to tell you there’s a problem. Protect your investment and your family today. Schedule your free estimate with Raindrop NW and let us ensure your roof is ready for whatever the Oregon sky throws at it.

https://www.raindropnw.com/wp-content/uploads/2026/06/pexels-photo-13793186.avif 650 918 SEO Stats https://www.raindropnw.com/wp-content/uploads/2024/05/logo-raindrop-space-300x92.png SEO Stats2026-06-26 12:00:402026-06-26 12:00:40The Willamette Valley Survival Guide for Your Home’s Roof

The Definitive Guide to Roofing Estimates

Roofing

I need a roof replacement in the Portland metro area. How do I go about understanding roofing estimates and what to look for?

Understanding roofing estimates and what to look for is one of the most important steps you can take before committing to a roof replacement or major repair. A professional roofing estimate is not just a price — it is a written plan that tells you exactly what work will be done, what materials will be used, and what protections you have after the job is finished.

Here is what every roofing estimate should include:

  • Contractor information — company name, license number, insurance details, and contact info
  • Itemized materials — shingle brand and model, underlayment type, flashing, drip edge, ridge cap, and ventilation
  • Labor breakdown — installation, tear-off, and disposal listed separately
  • Decking repair allowance — a pre-agreed per-sheet price for any damaged decking found after tear-off
  • Permit fees — pulled by the contractor, not you
  • Waste factor — typically 10–15% added to material quantities
  • Timeline — projected start and completion dates
  • Warranty details — both manufacturer coverage and workmanship guarantee
  • Payment schedule — a reasonable deposit (10–30%) with the balance due at completion

If an estimate is missing several of these items, that is a problem worth paying attention to before you sign.

I’m Torrey Yungeberg, owner of Raindrop Roofing NW, and after years of leading roofing projects across the Portland metro and serving on the boards of both the Oregon Chapter of National Women in Roofing and the Associated Roofing Contractors of Oregon and Southwest Washington, I’ve seen how confusing understanding roofing estimates and what to look for can be for homeowners. In this guide, I’ll walk you through every section of a roofing estimate so you know exactly what you’re comparing — and what to question.

Anatomy of a professional roofing estimate showing 9 key line items every homeowner should check infographic

Estimate vs. Quote vs. Bid: What is the Difference?

Before diving into the fine print, it is helpful to clarify the terminology. Homeowners often use the words “estimate,” “quote,” and “bid” interchangeably, but in the professional roofing world, these documents serve different purposes.

  • Roofing Estimate: This is an educated approximation of the project scope and cost based on an initial physical inspection. An estimate recognizes that there are hidden variables—such as rotten roof decking or multiple layers of old shingles hidden beneath the surface—that cannot be fully verified until the old roof is torn off.
  • Roofing Quote: A quote is a fixed-price offer for a highly specific, defined scope of work. Once you sign a quote, the price for that exact scope is locked in, assuming no hidden structural issues are discovered during the process.
  • Roofing Bid: A bid is a formal proposal submitted by a contractor, often in a competitive situation. It outlines how they plan to execute the project, the specific materials they will use, and their pricing structure.

When planning your project, understanding these nuances helps you anticipate where variable costs might arise. This is especially true in the Pacific Northwest, where our high-moisture climate frequently conceals hidden water damage beneath older shingles. For a deeper dive into regional pricing variables, read our guide on How Much Does a New Roof Cost in the Pacific Northwest.

Key Components of Understanding Roofing Estimates and What to Look For

When you receive a professional roofing proposal, it should be a multi-page, detailed document rather than a single-page sheet with a handwritten total. A comprehensive estimate protects both you and the contractor by establishing clear expectations.

Every professional estimate must prominently feature:

  • Complete Company Information: This includes the business name, physical address, phone number, email, and website.
  • Licensing and Credentials: In Oregon, contractors must display their Construction Contractors Board (CCB) license number. In Washington, they must display their Department of Labor & Industries (L&I) registration.
  • Insurance and Bonding Verification: The estimate should state that the contractor carries active general liability insurance and workers’ compensation.
  • Project Timeline: It should clearly outline the estimated start date and the number of working days required to complete the project, weather permitting.
  • Payment Terms: A structured payment schedule detailing the deposit required, milestone payments (if any), and when the final balance is due.

To understand how these components fit into your overall financial planning, check out our Roof Replacement Cost Guide for Homeowners.

Material Specifications: Understanding Roofing Estimates and What to Look For

The materials section is where many low-ball estimates hide their cost-cutting measures. A professional estimate must specify the exact manufacturer, product line, and color of every component being installed. Vague descriptions like “install architectural shingles” are a major red flag.

When reviewing the materials section, look for these specific line items:

  • Field Shingles: The estimate must name the brand (such as GAF, Owens Corning, or CertainTeed) and the specific product line. To see how these choices affect your investment, read about How Material Choice Impacts Your Roof Cost.
  • Underlayment: The barrier installed directly on the wood decking. High-quality synthetic underlayment is highly recommended over traditional organic felt paper due to its superior tear resistance and moisture protection.
  • Ice and Water Shield: A self-adhering waterproof membrane. In our local climate, this should be specified for installation in critical leak-prone areas, including valleys, roof penetrations, and along the eaves.
  • Drip Edge: A metal flashing installed along the roof edges to direct water away from the fascia boards and into the gutters. Most modern building codes require a drip edge, yet budget contractors frequently leave it off their estimates.
  • Flashing Replacement: Flashing prevents water from entering transitions around chimneys, dormers, and skylights. A quality estimate will specify the replacement of old flashing rather than reusing corroded or bent metal.
  • Ventilation Calculations: The estimate should detail the types of vents being installed (ridge vents, intake vents, or box vents) to ensure your attic space meets local building codes for balanced airflow.
  • Waste Factor: Roofing materials are ordered with an extra percentage to account for cuts, valleys, and starter courses. A standard waste factor is 10% for simple roofs, but complex roofs with multiple valleys and dormers can require 15% to 20%.

Labor, Tear-Off, and Decking: Understanding Roofing Estimates and What to Look For

Labor is a significant portion of your roofing project, typically accounting for 35% to 45% of the total cost, while materials make up about 40% to 50%. A clear estimate should break down the labor phases so you know exactly what you are paying for.

  • Tear-Off and Disposal: The estimate must state whether the crew is tearing off the existing roof down to the bare wood decking or performing an overlay (installing new shingles over old ones). Overlays are generally discouraged as they add excessive weight and hide underlying structural rot. The estimate should also include the cost of dumpster rentals and local disposal fees.
  • Decking Repair Allowance: Because we cannot see through shingles, the true condition of your roof’s plywood decking remains a mystery until the tear-off phase. A professional estimate handles this by including a clear, pre-negotiated rate for decking replacement (usually priced per sheet of plywood or per board foot of spaced sheathing) so you are not surprised by a massive, unpriced change order later.
  • Property Protection: The process of tearing off an old roof is messy. Your estimate should detail how the crew plans to protect your landscaping, siding, windows, and outdoor furniture during the project.
  • Cleanup Scope: Ensure the estimate explicitly states that the contractor is responsible for daily cleanup, magnetic sweeping to collect stray nails, and hauling away all debris.

Red Flags to Watch Out For in a Roofing Proposal

As you review proposals from different contractors, keep an eye out for warning signs that indicate a contractor may be cutting corners, underinsured, or using high-pressure sales tactics.

  • Lump Sum Pricing: A single total price with no breakdown of materials, labor, permits, or disposal is a major warning sign. Vague estimates protect the contractor, while detailed estimates protect the homeowner.
  • Missing Permit Line Item: If the estimate does not mention building permits, or if the contractor asks you to pull the permit, walk away. This is often an attempt to bypass code inspections or hide unlicensed work.
  • Excessive Upfront Deposits: While a deposit is standard to secure your spot on the schedule and order materials, asking for more than 30% upfront is a red flag. Never pay for the entire project before the work is completed and fully inspected.
  • High-Pressure, Today-Only Discounts: If a salesperson tells you that a price is only valid if you sign the contract right then and there, they are trying to prevent you from getting other estimates. Reputable contractors provide estimates that are valid for at least 30 to 90 days.
  • No On-Roof Physical Inspection: Be wary of estimates generated solely via satellite imagery without a representative physically walking the roof or inspecting the attic space. Satellite tools are great for measurements, but they cannot detect soft decking, rotted fascia, or ventilation issues.
  • Unlicensed or Uninsured Status: Always verify the contractor’s license number directly on the state’s licensing portal. If they cannot provide an active certificate of general liability and workers’ compensation insurance, do not allow them onto your property.

How to Compare Multiple Roofing Bids Side-by-Side

We always recommend obtaining at least three written estimates. However, comparing them is not as simple as looking at the bottom-line price. You must normalize the scopes of work to ensure you are comparing “apples to apples.”

Use the scorecard below to compare your bids:

Comparison Variable Estimate A Estimate B Estimate C
Shingle Brand & Model Specified (Premium) Specified (Standard) Vague (“Architectural”)
Underlayment Type Synthetic Synthetic 15# Felt Paper
Ice & Water Shield Valleys & Eaves Valleys Only None Listed
Flashing Replacement All New Metal Reusing Old Not Mentioned
Ventilation Changes Added Ridge Vents None None
Workmanship Warranty 10 Years 5 Years 1 Year
Permit Responsibility Contractor Contractor Homeowner
Decking Replacement Rate Clear Per-Sheet Rate Clear Per-Sheet Rate “TBD” (No Rate Listed)

When you line up your estimates this way, you will often find that the cheapest estimate is actually the most expensive in the long run because it skips critical components like new flashing, synthetic underlayment, and proper ventilation.

Additionally, pay close attention to the warranty stack. A complete roofing warranty has multiple layers:

  1. Manufacturer Product Warranty: Covers defects in the shingles themselves (typically 20 to 50 years).
  2. Contractor Workmanship Warranty: Covers installation errors (we recommend looking for a minimum of 5 to 10 years).
  3. Manufacturer Certified System Warranty: Offered only by certified contractors (like GAF Master Elite or Owens Corning Preferred), which binds the manufacturer to back the contractor’s workmanship.

Frequently Asked Questions about Roofing Estimates

Navigating the roof replacement process brings up plenty of questions. Here are the answers to the most common inquiries we receive from local homeowners.

How long is a roofing estimate typically valid?

Most roofing estimates are valid for 90 days. The roofing industry is subject to fluctuations in petroleum prices (which directly impact asphalt shingle manufacturing costs) and seasonal labor demands. If you receive an estimate in the winter but wait until the peak summer season to sign, the contractor may need to issue an updated proposal to reflect current material and labor rates.

Should the contractor or the homeowner pull the building permit?

The contractor should always pull the building permit under their own business name and license. When a contractor pulls the permit, they are legally registering themselves as the party responsible for code compliance, safety regulations, and passing the final city or county inspection. If a contractor asks you to pull the permit as an “owner-builder,” they are transferring all code and safety liability to you—which is a massive risk.

How does insurance coverage affect my roofing estimate?

If your roof replacement is the result of storm, wind, or tree damage, your homeowner’s insurance policy will likely play a major role.

  • Adjuster Scope: Your insurance adjuster will inspect the damage and write an initial estimate of the repair costs.
  • Overhead and Profit (O&P): If your project is complex and requires multiple trades, your insurance estimate should include an additional percentage for overhead and profit.
  • Supplements: It is common for a roofing contractor to discover additional storm damage once the shingles are removed. A reputable contractor will document this damage with photos and submit a “supplement” directly to your insurance company to ensure the additional work is covered.

To make sure you are fully protected throughout this process, we recommend reading our resources on Understanding Your Insurance Policy and Roofing Coverage as well as our step-by-step guide on How to File a Roof Damage Insurance Claim.

Conclusion

Taking the time to understand your roofing estimate ensures that your home is protected by high-quality materials and skilled craftsmanship. A roof is a complex system designed to shed water, vent heat, and protect your family for decades—not just a layer of shingles nailed to plywood.

At Raindrop NW, we believe in complete transparency. As a family-owned, truly local roofing company based right here in Beaverton, Oregon, we are proud of our deep roots in the Portland metro area. With our multi-generational ownership, our accountability is entirely to our local community. We don’t believe in high-pressure sales pitches or hidden fees; we believe in clear, itemized proposals, certified craftsmanship, and long-term relationships with our neighbors.

If you are ready to work with a local team that values clarity and quality, Schedule a professional consultation with Raindrop NW today. We will provide you with a detailed, itemized estimate so you can make the absolute best decision for your home.

https://www.raindropnw.com/wp-content/uploads/2026/06/pexels-photo-7578909.avif 529 940 SEO Stats https://www.raindropnw.com/wp-content/uploads/2024/05/logo-raindrop-space-300x92.png SEO Stats2026-06-25 12:41:052026-06-25 12:41:05The Definitive Guide to Roofing Estimates

When Should You Replace Your Roof?

Roofing

How to Determine the Lifespan of Your Roofing Material

When should you replace your roof? Here’s the short answer most homeowners need before diving deeper:

Replace your roof when one or more of these conditions apply:

  • Your asphalt shingles are 20+ years old (or 25+ for architectural shingles)
  • You see curling, buckling, or missing shingles across multiple areas
  • You find granules collecting in your gutters
  • Your roofline is sagging or you can see daylight through the attic boards
  • You have active leaks or spreading water stains on interior ceilings
  • Repair costs would exceed 30% of the cost of a full replacement
  • Your roof has sustained storm damage affecting more than 25–30% of the surface

If only one small area is damaged and your roof is under 15 years old, a repair is likely all you need. But if several of these warning signs are stacking up — especially on an older roof — replacement is almost always the smarter long-term move.

Your roof is the first line of defense between your family and everything Oregon’s weather throws at it — heavy rain, moss-promoting moisture, and the occasional freeze-thaw cycle that quietly works against shingles season after season. Most homeowners don’t think much about their roof until something goes wrong. But by then, what could have been a straightforward replacement has often turned into a much bigger problem: rotted decking, attic mold, or water damage that’s worked its way into the walls.

The good news is that knowing the right time to replace your roof isn’t complicated once you understand what to look for. Age, material, visible damage, and a few interior clues tell most of the story. This guide walks you through all of it — from how long different roofing materials actually last in the Pacific Northwest, to how to decide between a repair and a full replacement, to what your insurance company may or may not cover based on your roof’s age.

I’m Torrey Yungeberg, owner of Raindrop Roofing NW, and after years of inspecting roofs across Beaverton and the greater Portland metro, I’ve seen how understanding when should you replace your roof can save homeowners thousands of dollars in preventable damage. Let’s walk through exactly what to look for — and what it all means for your home.

Roof replacement decision timeline infographic showing age thresholds, warning signs, and repair vs replace criteria

different roofing materials side by side showing asphalt shingles metal panels and clay tiles

Every roofing material comes with its own natural expiration date. While a roof in a mild climate might stretch to its maximum rated lifespan, our damp Pacific Northwest environment can sometimes shave a few years off that estimate if the system is not properly maintained.

When we evaluate a home in Beaverton or Portland, the very first thing we look at is the material type. Your roof’s starting point dictates how we calculate its remaining years and how we plan for its eventual replacement. To understand how your specific material impacts your long-term planning, you can read our guide on How Material Choice Impacts Your Roof Cost.

Asphalt Shingles vs. Premium Materials

The material on your roof determines how many decades of protection you can expect. Here is a breakdown of typical lifespans by material:

  • Standard 3-Tab Asphalt Shingles: These are the most traditional, flat shingles. They typically last between 15 and 20 years.
  • Architectural (Dimensional) Shingles: Thicker and more durable than 3-tab shingles, these are the modern standard for residential homes. They generally last 25 to 30 years under normal conditions.
  • Metal Roofing (Standing Seam & Panels): Highly durable, lightweight, and fire-resistant. A quality metal roof easily lasts 40 to 70 years.
  • Clay and Concrete Tile: Extremely heavy and durable, often found on Mediterranean-style homes. These roofs last 50 to 100 years, though the underlying felt underlayment may need replacement around the 35-year mark.
  • Natural Slate: The gold standard of longevity. A well-maintained slate roof can last 100 years or longer, though individual slates may need periodic maintenance or replacement.

How Portland Weather Affects Roof Lifespan

Our local climate plays a major role in how quickly these materials age. In the Pacific Northwest, we do not experience the aggressive UV degradation of desert regions, but we do deal with constant moisture, heavy winter rainfall, and persistent shade.

These factors create a perfect breeding ground for moss, mold, and algae. Moss is not just a cosmetic issue; it holds water directly against the shingles, working its roots underneath them and lifting them up over time. Additionally, the Portland metro area experiences frequent winter freeze-thaw cycles. When water gets trapped under a loose shingle or in a tiny crack and freezes, it expands, cracking the shingle or loosening the adhesive seal.

To learn more about how our regional climate shapes your roof’s longevity, check out our resource on How Portland Weather Affects Roof Lifespan.

When Should You Replace Your Roof? Key Warning Signs

You do not always need to climb onto your roof to know it is in trouble. Often, the earliest warnings are visible from your driveway, your backyard, or even inside your attic. Keeping a close eye on these physical indicators is the best way to catch a failing roof before it causes structural damage to your home. For a complete look at keeping your home safe, refer to The Ultimate Guide to Roof Care in Portland Oregon.

Visual Warning Signs on the Shingles

When we perform a visual inspection from the ground or a ladder, we look for several key signs of shingle degradation:

  • Curling, Cupping, or Buckling: As shingles reach the end of their lifespan, the asphalt dries out and the edges curl upward (cupping) or the middle sections bow (buckling). This leaves your roof vulnerable to wind uplift and water intrusion.
  • Missing Shingles or Bare Patches: High winds can tear away shingles that have lost their adhesive grip. Missing shingles leave the underlying underlayment and wood decking completely exposed to the elements.
  • Granule Loss in the Gutters: Asphalt shingles are coated with mineral granules to protect them from UV rays. As they age, these granules loosen. If you find piles of coarse, black sand in your gutters during cleaning, your shingles are losing their protective barrier.
  • Heavy Moss and Algae Growth: While dark streaks (algae) are mostly cosmetic, thick clumps of green moss are a serious hazard. Moss acts like a wet sponge, keeping the roof constantly damp and rotting the structure underneath.

Structural and Interior Warning Signs

Sometimes the most critical warning signs are found inside the house. We always recommend inspecting your attic space with a flashlight, especially during or immediately after a heavy rainstorm:

  • A Sagging Roofline: If you stand back from your home and notice a dip or a sag along the ridge or in the valleys, this is a structural warning sign. It usually indicates that long-term water damage has rotted the plywood decking or joists underneath. This requires immediate professional attention.
  • Daylight Through the Roof Boards: If you go into your attic, turn off the lights, and see beams of daylight peeking through the roof boards, water can get in those same gaps.
  • Active Leaks and Water Stains: Spreading brown circles on your ceilings or water running down your interior walls are clear indicators of a compromised roof.
  • Attic Mold or Mildew: If your attic has a musty smell, visible mold on the rafters, or damp insulation, it is a sign of water intrusion or poor attic ventilation. Poor ventilation can trap heat and moisture, cutting your roof’s expected lifespan in half.

Repair vs. Replacement: The Decision Framework

One of the most common questions we hear is: “Can I just patch this, or do I need a whole new roof?” It is a vital question. No homeowner wants to invest in a full replacement if a simple, targeted repair will do. Conversely, spending money on repeated repairs for a roof that is fundamentally failing is just throwing good money after bad. To help you weigh these options, we have built a comprehensive guide on Should I Repair or Replace My Roof?.

Applying the 30% Damage Rule

In the roofing industry, we use a general rule of thumb to help guide this decision: the 30% rule.

If the damage is localized to a single area — such as a few shingles damaged by a fallen tree branch, or a single leaking pipe boot — and the affected area accounts for less than 30% of the total roof surface, a repair is usually the most logical and cost-effective choice.

However, if the damage is widespread, or if the roof is showing systemic signs of aging (like curling and granule loss) across more than 30% of its surface, a full replacement is the safer, more economical option. In fact, many local building codes and jurisdictions require a complete roof replacement if the damaged area exceeds 25% to 30% of the total roof surface.

Evaluating the Financial Factors of Repairing vs. Replacing

When deciding between repair and replacement, look beyond the immediate cost of the project. Consider the long-term financial picture:

  • The Cost of Repeated Repairs: A single minor repair is inexpensive. But if you find yourself calling a roofer every winter to patch new leaks, those costs quickly add up. Eventually, the cumulative cost of these patches will exceed the cost of a new, warrantied roof.
  • Home Resale Value: If you plan to sell your home within the next few years, an aging or patchy roof can be a major dealbreaker for buyers. A new roof dramatically improves curb appeal and typically recoups 61% to 66% of its investment value during a home sale.
  • Energy Efficiency: Modern roofing systems utilize advanced underlayments and ventilation techniques. A compromised roof with poor ventilation traps heat in the summer and loses warm air in the winter, driving up your energy bills. Replacing an old roof can improve your home’s energy efficiency, reducing heating and cooling costs.

For a deeper look at budgeting and financial planning for your home’s roof, read our Roof Replacement Cost Guide for Homeowners.

Navigating Homeowners Insurance and Roof Age

Understanding how your homeowners insurance policy interacts with your roof is essential, especially as your roof gets older. Many homeowners assume that insurance will cover a replacement whenever the roof fails, but policies have strict guidelines regarding wear and tear versus sudden storm damage. To protect your home and your wallet, we recommend reading How to File a Roof Damage Insurance Claim.

How Roof Age Affects Your Insurance Claim

Insurance companies are in the business of assessing risk, and an old roof represents a high risk. As a result, the age of your roof directly impacts how your policy handles claims:

  • Actual Cash Value (ACV) vs. Replacement Cost Value (RCV): If you have an RCV policy, your insurance will cover the cost of a new roof (minus your deductible) if it is damaged by a covered peril, like wind or hail. However, many insurance companies automatically transition older roofs (typically those over 15 to 20 years old) to an ACV policy. Under ACV, the insurer depreciates the value of your roof based on its age, meaning they will only pay what the old, worn roof was worth at the time of damage, leaving you to cover the remaining balance out of pocket.
  • Non-Renewal Risk: Insurance carriers have tightened their standards significantly. In multiple states, insurance companies are issuing non-renewal notices to homeowners with roofs that are 20 years or older, requiring a full replacement before they will renew the policy.
  • Premium Discounts: On the bright side, installing a new roof — especially one with modern, impact-resistant materials — can lead to substantial premium discounts, often saving you money on your annual insurance costs.

To understand how the age of your system specifically changes your policy terms, read our guide on How Roof Age Affects Your Insurance Claim.

Planning Your Project: Timing and Preparation

Once you have determined that a replacement is necessary, the next step is planning the project. A roof replacement is a major home improvement undertaking, and timing it correctly can save you stress, time, and money. To understand how to schedule your project, refer to our guide on Roof Inspection Frequency for Pacific Northwest Homes.

Best Time of Year to Replace Your Roof

In the Pacific Northwest, weather is the primary factor when scheduling a reroofing project. While professional crews can technically install a roof year-round, certain seasons offer distinct advantages:

  • Late Spring (April–May) and Early Fall (September–October): These are generally the ideal times to replace a roof in our region. The weather is typically mild and dry, which is crucial because asphalt shingle adhesive requires warm, consistent temperatures to seal and bond properly.
  • Summer Peak Season: Summer is incredibly popular for roofing, but high demand means contractor schedules fill up fast. Booking your project 6 to 8 weeks in advance is highly recommended if you want a summer installation.
  • Off-Peak Scheduling: Scheduling your replacement in the late winter or early spring can sometimes yield quicker turnaround times and better scheduling flexibility, as contractors are not in their peak summer rush.

Proactive Maintenance to Extend Roof Lifespan

If your roof is still in its middle years and you want to delay a full replacement for as long as possible, proactive maintenance is your best tool. Taking care of your roof today keeps it strong for tomorrow. To learn more, check out our guide on How to Extend the Life of Your Roof.

  • Keep Gutters Clear: Clogged gutters cause water to back up under the edge of your roof, rotting the fascia boards and the lower edge of your roof decking. Clean your gutters at least twice a year.
  • Treat Moss Early: Never pressure wash an asphalt shingle roof, as this strips away the protective granules. Instead, use gentle, roof-safe chemical treatments to kill moss, and install zinc or copper strips along the ridge line to prevent future growth.
  • Trim Tree Branches: Keep tree branches trimmed back at least several feet from your roof. This prevents branches from scraping against shingles during high winds and reduces the amount of shade, leaves, and pine needles accumulating on your roof.
  • Schedule Regular Inspections: Having your roof professionally inspected every few years allows you to catch minor issues — like a cracked pipe boot or a loose flashing joint — before they turn into major leaks.

Frequently Asked Questions about Roof Replacement

To help you make the most informed decision, we have answered some of the most common questions homeowners ask when trying to determine when should you replace your roof. To learn more about professional roof assessments, see How Often Should You Have Your Roof Inspected?.

How do I know when should you replace your roof if there are no active leaks?

A roof does not have to leak to be ready for replacement. If your asphalt roof is over 20 years old, it has likely reached the end of its reliable service life. Over time, shingles lose their flexibility and wind resistance. Waiting for an active leak means waiting for water to damage your drywall, insulation, and framing, which increases the scope and cost of the project. A proactive attic inspection can also reveal hidden rot or slow, structural leaks that have not yet stained your ceilings.

How does a homeowner decide when should you replace your roof after storm damage?

If your roof has sustained wind or hail damage, look at the extent of the impact. If high winds have torn away a few shingles on a single slope, a simple repair is usually best. However, if the storm has lifted shingles across multiple slopes, or if hail has bruised and cracked shingles across the entire surface, a full replacement is necessary. We recommend having a professional roofer inspect the damage and document it with photos before you file a claim with your insurance provider.

How can I determine the age of my roof if I don’t have records?

If you recently bought your home or do not have the original installation paperwork, you can find your roof’s age through a few public and private resources:

  1. County Building Permits: Check with your local county building permits office (such as Washington County or Multnomah County). Roof replacements typically require a permit, and these public records will show exactly when the last permit was issued and completed.
  2. Home Inspection Report: Review the home inspection report from when you purchased the property; inspectors usually estimate the remaining life and age of the roof.
  3. Prior Owners or Real Estate Agents: Your real estate agent may be able to contact the previous owner’s agent to request the installation date or the name of the roofing company that performed the work.
  4. Professional Inspection: A professional roofing contractor can examine the wear, adhesive condition, and shingle pliability to give you a highly accurate estimate of the roof’s age and remaining lifespan.

Conclusion

Deciding when should you replace your roof is one of the most significant maintenance decisions you will make for your home. While it can feel overwhelming, keeping a close eye on your roof’s age, watching for key warning signs like curling shingles or granule loss, and applying simple decision frameworks like the 30% rule can give you complete confidence in your next steps.

At Raindrop Roofing NW, we are proud to be a truly local, family-owned business serving Beaverton, Portland, and our surrounding Oregon communities. Unlike companies that have been bought out by out-of-state investment firms, we live and work right here in the Pacific Northwest. We understand our unique climate, we stand behind our certified craftsmanship, and we are committed to providing honest, pressure-free advice.

If you are unsure about the true condition of your roof, we would love to help. We offer professional, honest inspections to let you know whether your roof has years of life left, needs a simple repair, or is ready for a full upgrade.

Ready to get an honest assessment of your home’s roof? Schedule a Professional Roof Replacement with Raindrop Roofing NW today, or contact us to book your free inspection!

https://www.raindropnw.com/wp-content/uploads/2026/06/pexels-photo-4446026.avif 627 940 SEO Stats https://www.raindropnw.com/wp-content/uploads/2024/05/logo-raindrop-space-300x92.png SEO Stats2026-06-24 10:27:082026-06-24 10:27:08When Should You Replace Your Roof?

In Depth Guide to Roof Styles for Rain

Roofing

Which Roof Style Is Better for Rain? Here’s What Oregon Homeowners Need to Know

Which roof style is better for rain is one of the most practical questions you can ask before replacing or installing a roof in the Pacific Northwest. In Beaverton and the greater Portland metro, rain isn’t a seasonal inconvenience — it’s a year-round reality. Choosing the wrong roof shape or material can mean the difference between a dry home and a slow, expensive leak.

Here’s a quick answer before we dive deeper:

Best Roof Styles for Rain — At a Glance

Roof Style Rain Performance Best For
Hip Roof Excellent — drains to all four sides High-wind, storm-heavy areas
Gable Roof Very good — fast runoff on two slopes Most Oregon homes
A-Frame / Vertical Metal Excellent — steep pitch sheds water fast Heavy rain and snow zones
Flat / Low-Slope Moderate — relies on internal drainage Commercial, modern builds
Gambrel / Saltbox Good — asymmetric slopes aid runoff Specialty residential

The short answer: pitched roofs outperform flat roofs in rainy climates, and among pitched styles, hip and vertical metal roofs offer the strongest all-around protection. But the full picture depends on your roof’s pitch, materials, installation quality, and how well your gutters and drainage systems are set up — all of which we break down below.

I’m Torrey Yungeberg, owner of Raindrop Roofing NW, and after years of replacing and repairing roofs across Oregon and Southwest Washington, I’ve seen which roof styles hold up and which ones fail when which roof style is better for rain is what’s really at stake. Let’s walk through everything you need to make a confident, informed decision.

infographic showing roof styles ranked by rain runoff performance and drainage efficiency infographic

Pitched vs. Flat Roofs: Which Roof Style Is Better for Rain?

comparing low-slope and steep-pitched residential roofs in the rain

When evaluating roof geometries, the most fundamental dividing line is between flat (low-slope) roofs and pitched (steep-slope) roofs. In wet regions like Tigard, Lake Oswego, and Hillsboro, this distinction dictates how water behaves the moment it hits your home.

Pitched roofs rely on gravity to shed water naturally. When rain falls on a pitched roof, it immediately flows downward toward the gutters. Flat roofs, on the other hand, do not have the luxury of instant gravity-driven shedding. Instead, they function as managed drainage systems.

To understand how these two systems compare in real-world conditions, it is helpful to look at our Flat Roof Vs Pitched Roof Comparison. While a pitched roof is highly forgiving, a flat roof requires precise detailing, specialized waterproof membranes, and regular maintenance to prevent catastrophic leaks. The financial and labor differences between these systems over time are further detailed in our Flat Vs Pitched Roof Cost And Maintenance Comparison.

Comparing Slopes to See Which Roof Style Is Better for Rain

The term “flat roof” is actually a bit of a misnomer. In professional roofing, no roof is completely flat. Even low-slope systems must have a minimum slope of 1/4 inch per foot to allow water to migrate toward drains, scuppers, or gutters.

However, because low-slope systems drain water so slowly, they are highly sensitive to any structural sag or debris blockages. If a drain becomes clogged with pine needles or leaves—a common occurrence in the heavily wooded neighborhoods of Beaverton and West Linn—water will quickly pool. Standing water (ponding) that remains on a roof for more than 48 hours accelerates the deterioration of the roofing membrane, strains the seams, and increases the likelihood of water finding a way into your attic.

Steep-pitched roofs suffer from none of these issues. Because water is cleared from the surface almost instantly, there is virtually no opportunity for ponding. For areas that experience consistent, heavy rain, a pitched roof is undeniably the safer, more reliable choice.

Comparing Common Roof Shapes: Gable, Hip, and A-Frame

Beyond the basic flat-versus-pitched debate, the specific shape of your pitched roof plays a massive role in how it handles wind-driven rain and storms. Let’s compare the three most common shapes: Gable, Hip, and A-frame.

Feature Gable Roof Hip Roof A-Frame / Vertical Roof
Number of Slopes 2 4 2 (Very Steep)
Wind Resistance Moderate (vulnerable at gable ends) Excellent (aerodynamic) Good
Rain Runoff Speed Fast Fast Extremely Fast
Gutter Complexity Simple (two straight runs) Moderate (wraps around house) Simple (two straight runs)
Infiltration Risk Low-Moderate Extremely Low Extremely Low

Gable Roofs: Simple Design and Quick Runoff

The gable roof is the classic “doghouse” shape: two sloping sides meeting at a center ridge, creating a triangle wall (the gable end) on each side.

Gable roofs are highly popular because they are cost-effective to build and excel at shedding water quickly down their two slopes. However, they have a distinct structural vulnerability: the flat, vertical gable end walls. During strong winter storms in the Willamette Valley, wind-driven rain can slam directly into these vertical walls. If the siding, house wrap, or flashing at the rake board intersection is not perfectly sealed, water can easily seep behind the exterior finish. Furthermore, high winds can catch the underside of a gable roof, creating uplift pressure that threatens to damage shingles.

Hip Roofs: Multi-Directional Drainage for Storms

A hip roof slopes downward on all four sides from a central ridge or point. This design completely eliminates the vertical gable end walls, removing one of the most common water-infiltration points on a home.

Because it has slopes on all four sides, a hip roof is highly aerodynamic. Wind flows up and over the roof from any direction, which significantly reduces the risk of shingles blowing off during severe windstorms. Additionally, a hip roof distributes rainwater evenly to all four sides of the house. This simplifies your gutter layout on rectangular home footprints, preventing any single gutter run from becoming overwhelmed during a cloudburst.

A-Frame and Vertical Roofs: Maximum Shedding Efficiency

An A-frame roof features extremely steep slopes that often extend all the way down near the ground level. Originally designed for heavy snow regions to prevent roof collapse, A-frames are also incredibly effective in rainy climates because water has absolutely no time to sit on the surface.

When combined with metal roofing, we often look at how panel orientation affects performance. In vertical metal roofing systems, the panels run vertically from the ridge down to the eaves. This orientation allows water, pine needles, and storm debris to slide off naturally along the vertical seams.

Some structures use horizontal panels (where the panels run side-to-side), but in wet climates, horizontal panels can trap water and debris at the overlapping seams. For maximum rain protection, a vertical panel orientation on a steep pitch is the gold standard.

Material Performance in Wet Climates

While the shape of your roof determines how water flows, the material you choose determines how well the system resists moisture penetration over decades of wet winters. Our local climate in the Pacific Northwest presents unique challenges, which you can read about in our guide on How Portland Weather Affects Roof Lifespan.

Choosing Materials Based on Which Roof Style Is Better for Rain

When matching materials to your roof style, the primary goal is minimizing potential leak points.

Metal roofing, specifically standing seam metal, is widely regarded as the ultimate rain-resistant material. Standing seam systems feature continuous vertical metal panels that run from the ridge to the eaves, connected by raised, interlocking seams. Because the fasteners are completely concealed beneath the metal panels, there are zero exposed nail holes where water could eventually seep in.

For a detailed breakdown of how metal holds up compared to traditional options in our region, check out our analysis of Metal Roof Durability Vs Shingle In Oregon Rain and our comprehensive Asphalt Shingle Vs Metal Roof Comparison.

Another metric to consider is the runoff coefficient, which measures the percentage of water that successfully drains off a roof surface rather than being absorbed. Standing seam metal roofs have a runoff coefficient of 95% or more, making them incredibly efficient. Clay and concrete tiles are also excellent, with a runoff coefficient of 85% to 90%. Their curved shapes help channel water away quickly, though they are much heavier and require a reinforced roof structure.

Asphalt Shingles: Versatile and Reliable Protection

Despite the premium performance of metal, asphalt shingles remain the most popular roofing choice for homeowners in Gresham, Oregon City, and Beaverton. They offer an outstanding balance of affordability, durability, and classic aesthetic appeal.

Modern architectural shingles (also known as dimensional shingles) are far superior to the flat, three-tab shingles of the past. They consist of multiple laminated layers of asphalt and fiberglass, providing excellent wind resistance and a thick barrier against heavy downpours.

In our damp climate, shaded roofs are highly susceptible to moss, mold, and algae growth, which trap moisture and rot the shingles. To combat this, we recommend choosing shingles treated with copper or zinc granules, which naturally inhibit algae growth. You can explore these specialized options in our guide to Premium Shingle Options For Pacific Northwest Homes.

Critical Installation Features for Rain Protection

Even the most rain-resistant roof shape and material will fail if the underlying installation features are neglected. True rain protection is a complete system, starting from the wood deck up.

Underlayment and Ice-and-Water Shields

Before shingles or metal panels are installed, a secondary water barrier must be applied to the plywood roof deck. In the past, builders used simple felt paper. Today, we use advanced synthetic underlayments, which are far more tear-resistant and completely waterproof.

Crucially, areas prone to water accumulation—such as valleys (where two roof slopes meet), eaves, and around chimneys—require a self-adhering ice-and-water shield. This thick, rubberized membrane sticks directly to the wood deck, sealing tightly around every single nail driven through it. If wind-driven rain manages to get beneath your shingles, this self-healing barrier ensures the water cannot penetrate the wood structure below.

Flashing and Ventilation in Wet Climates

Flashing consists of thin metal pieces installed at intersections, walls, valleys, and penetrations (like pipes and vents) to direct water away from vulnerable seams. In rainy climates, flashing must be installed with meticulous care:

  • Step Flashing: Used where a roof slope meets a vertical wall. Each shingle must have its own piece of L-shaped metal flashing woven into it to prevent water from running behind the siding.
  • Valley Flashing: Metal valley liners channel the massive volume of water that collects where two roof slopes meet, preventing wear on the shingles in these high-flow channels.

Equally important is attic ventilation. In a wet climate, warm, moist air from your home can rise into the attic. If the attic is not properly ventilated with intake vents at the soffits and exhaust vents at the ridge, this moisture will condense on the underside of your roof deck. Over time, this condensation causes mold, wood rot, and structural failure—essentially creating a “leak” from the inside out.

Rainwater Collection and Gutter Performance

If you are interested in sustainability or organic gardening, your roof style and material will directly impact your ability to collect rainwater.

Because standing seam metal roofs have a runoff coefficient of 95% or more and do not leach chemicals, they are the absolute best choice for rainwater harvesting. Clay and concrete tiles are also highly efficient (85-90% runoff), though they can accumulate moss if not cleaned annually, which can degrade water quality.

Asphalt shingles have a runoff coefficient of approximately 90%. However, new asphalt shingles release petroleum-based adhesives and oils for the first few years after installation. While perfectly fine for shedding rain off your home, water harvested from asphalt roofs should only be used for lawn irrigation, not for growing edible vegetables or consumption, unless passed through advanced filtration systems.

To handle our heavy rainfall, your gutters must be sized correctly. While standard 5-inch gutters work for many homes, steep roofs or homes with large surface areas often require 6-inch seamless gutters to prevent water from overflowing and eroding your home’s foundation.

Frequently Asked Questions About Roof Styles and Rain

Which roof style is best for heavy rain and wind?

A hip roof is widely considered the best style for combined heavy rain and high winds. Its four-sided, aerodynamic slope allows wind to pass over harmlessly while shedding rain evenly in all directions, eliminating vulnerable vertical gable walls.

Do flat roofs leak more than pitched roofs?

Generally, yes. Because flat roofs have very little slope, they rely on mechanical drainage rather than gravity. If drains are blocked by debris, water will pool, which severely tests the integrity of the waterproof membrane and increases the risk of leaks over time.

Is a vertical metal roof better than an A-frame roof for rain?

An A-frame refers to the steep triangular shape of the roof, while “vertical” refers to the orientation of the metal panels. For the best performance, you want both: a steeply pitched roof (like an A-frame or steep gable) fitted with vertical standing seam metal panels, allowing water to shed instantly along the seams.

Conclusion

Choosing the right roof style and material is your home’s first and most critical line of defense against the relentless Pacific Northwest rain. Whether you prefer the unmatched durability of a standing seam metal roof on a steep pitch, or the classic, cost-effective protection of architectural asphalt shingles on a beautiful hip roof, investing in a high-quality system pays off in long-term peace of mind.

At Raindrop Roofing NW, we are proud to be a truly local, family-owned company based right here in Beaverton, Oregon. We don’t believe in high-pressure sales or out-of-state corporate shortcuts. Instead, we focus on honest craftsmanship, transparent communication, and roofing systems engineered specifically to withstand our unique climate.

If you want to ensure your home is fully protected for the next rainy season, we invite you to Schedule a New Roof Consultation with our experienced team today. We’ll provide a thorough, professional assessment of your roof and help you choose the perfect style for your home.

https://www.raindropnw.com/wp-content/uploads/2026/06/c88bce318215ec1eca0c9d4877fa412a5a61adde.jpg 1024 1536 SEO Stats https://www.raindropnw.com/wp-content/uploads/2024/05/logo-raindrop-space-300x92.png SEO Stats2026-06-22 12:34:492026-06-22 12:34:49In Depth Guide to Roof Styles for Rain

A Comprehensive Guide to New Roof Cost in the Pacific Northwest

Roofing

What Does a New Roof Actually Cost in the Pacific Northwest?

If you’re wondering how much does a new roof cost in the Pacific Northwest, here’s a quick answer before we dive deeper:

Roof Type Typical PNW Cost Range
Asphalt (3-tab) shingles $9,000 – $13,000
Architectural shingles $10,000 – $19,000
Metal roofing $15,000 – $60,000+
Cedar shake $20,000 – $40,000+
Tile or slate $25,000 – $100,000+
Flat/low-slope (TPO/PVC) $9,000 – $18,000
Commercial roofing $15,000 – $150,000+

Costs reflect 2026 pricing for the Portland metro, Seattle, and Vancouver WA areas. Final price depends on roof size, pitch, materials, and site conditions.

Your roof takes the full force of everything the Pacific Northwest throws at it — persistent rain, windstorms, moss, and the occasional stretch of heavy snow. Over time, even a well-built roof reaches the end of its useful life, and when that day comes, most homeowners have one pressing question: how much is this going to cost? The answer isn’t always simple. PNW roofing costs run noticeably higher than the national average, driven by the region’s wet climate, strict building codes, and the skilled labor needed to do the job right in a moisture-heavy environment.

For Oregon homeowners especially, choosing the right contractor matters just as much as choosing the right material. Roofing is one of the largest investments you’ll make in your home, and the last thing you want is to hand that job to a company that won’t be around to honor its warranty.

I’m Torrey Yungeberg, owner of Raindrop Roofing NW — a family-owned company rooted in the Portland metro area — and I’ve spent years helping Oregon and Southwest Washington homeowners navigate exactly this question of how much does a new roof cost in the Pacific Northwest, from the first estimate all the way through final installation. Let’s walk through everything you need to know to plan your project with confidence.

Infographic showing 2026 Pacific Northwest roof replacement cost ranges by material type

How Much Does a New Roof Cost in the Pacific Northwest?

When evaluating the investment required for a roof replacement, it is essential to look at the regional factors that make our corner of the country unique. In the Pacific Northwest, a standard residential roof replacement is a highly customized project. The total cost is determined by a combination of material choices, the physical footprint of your home, and local regulatory requirements.

To get a baseline understanding of how these elements come together, we recommend starting with our Roof Replacement Cost Guide for Homeowners. This resource breaks down how square footage, regional labor rates, and baseline material selections establish the foundation of your estimate.

Understanding the Average Cost Range for a New Roof in the Pacific Northwest

Whether you own a classic Craftsman in Portland, a ranch-style home in Gresham, or a modern build in Vancouver WA, the average cost range for a new roof is highly dependent on your home’s architectural style and total square footage. Standard single-family homes in our region generally require a more substantial investment than homes of similar sizes in drier parts of the country.

This difference in cost is primarily due to the necessity of heavy-duty weatherproofing. In areas like Lake Oswego, West Linn, and Beaverton, we must prepare every roof to handle months of consistent moisture. This means that even a standard architectural shingle installation requires premium underlayment, enhanced ventilation, and robust flashing systems to prevent water from finding its way into your attic.

Regional Factors That Impact How Much Does a New Roof Cost in the Pacific Northwest

Our local climate is the single most influential factor driving up the cost of a new roof in the Pacific Northwest. While a contractor in a dry, southwestern state might get away with basic felt paper and standard shingles, doing so in Western Oregon or Southwest Washington is a recipe for premature roof failure.

Our region’s persistent drizzle, combined with periods of freezing temperatures in the winter, creates a high-risk environment for mold, mildew, and wood rot. Furthermore, Washington is classified as a Tier 2 state with a high cost multiplier. This designation reflects the strict moisture-mitigation codes and high safety standards mandated for high-precipitation zones.

When you factor in the skilled labor required to navigate these strict building codes, the cost to replace a roof in Beaverton, Hillsboro, or Camas naturally trends higher than the national average. However, this upfront investment ensures your home remains entirely watertight through decades of wet winters.

How Material Choice Impacts Your Roof Cost

The materials you select for your home will have the most significant impact on both the initial cost of your project and the long-term value of your investment. To understand how these decisions shape your budget, you can read our guide on How Material Choice Impacts Your Roof Cost.

Asphalt Shingles vs. Metal Roofing

For the majority of homeowners in the Portland-metro area and Clark County, the choice comes down to traditional asphalt shingles or a modern metal roofing system.

  • Architectural Asphalt Shingles: This remains the most popular option across our service areas, from Tigard to Ridgefield. Modern architectural shingles are highly durable and offer excellent wind and algae resistance. If you are considering a premium look, you might wonder Are Designer Shingles Worth the Extra Cost?—often, the answer is yes, as they offer enhanced thickness, superior wind ratings, and a striking aesthetic that mimics natural slate or wood shake.
  • Metal Roofing: Standing seam metal roofing represents a higher upfront investment, but it offers unmatched longevity. A properly installed metal roof can easily last twice as long as an asphalt roof, making it an incredibly cost-effective choice over time. For a detailed breakdown of these two popular options, check out our Asphalt Shingle vs Metal Roof Comparison.

Premium Materials: Tile, Slate, and Cedar Shake

If you own a high-end property in areas like West Linn or Lake Oswego, premium materials may be on your radar:

  • Clay and Concrete Tile: These materials offer beautiful, classic aesthetics and can last for more than half a century. However, they are incredibly heavy. If your home was not originally engineered for a tile roof, you will need to invest in structural reinforcement before installation.
  • Slate: Natural slate is the gold standard of roofing, often lasting well over a century. It requires highly specialized craftsmanship to install, placing it at the top of the cost scale.
  • Cedar Shake: Known for its natural beauty, cedar shake is a historic favorite in the Pacific Northwest. However, in our damp climate, cedar requires rigorous, ongoing maintenance to prevent moss, rot, and decay. For homeowners who want that premium look without the high maintenance, we often recommend exploring modern synthetic options. You can read more about these in our article on Premium Shingle Options for Pacific Northwest Homes.

Flat and Low-Slope Roofing Systems

Many modern homes in Portland and commercial properties in Beaverton feature flat or low-slope roof lines. These roofs cannot shed water using gravity the way a pitched roof does, meaning they require specialized single-ply membranes like TPO (Thermoplastic Polyolefin) or PVC (Polyvinyl Chloride) to remain watertight.

The installation of these systems is highly technical, requiring hot-air welding to fuse the seams together. To understand how flat roofs compare to traditional sloped designs in terms of long-term care, take a look at our Flat vs Pitched Roof Cost and Maintenance Comparison and our companion piece on Flat Roof vs Pitched Roof Comparison.

Key Factors Influencing PNW Roof Replacement Costs

Aside from the materials you choose, several structural and logistical factors will influence the final cost of your roof replacement.

  • Roof Size and Square Footage: Roofing is calculated by the “square,” which equals 100 square feet of roof surface. Naturally, a larger home in Sherwood or Oregon City will require more materials and labor than a smaller cottage.
  • Pitch and Slope: The steepness of your roof plays a major role in labor costs. Steeper roofs require specialized safety equipment, staging, and harness systems. Additionally, working on a steep slope is slower and more physically demanding, which increases the overall labor hours required to complete the job safely.
  • Design Complexity: A simple gable roof with two flat slopes is straightforward to install. However, if your home features multiple valleys, dormers, chimneys, skylights, or intersecting rooflines, the installation requires significantly more flashing, cutting, and detail work, which increases both material waste and labor costs.

Hidden Costs: Tear-Off, Decking Repairs, and Ventilation

When planning your roofing budget, it is critical to account for potential hidden costs that may only become visible once the old roof is removed.

  • Tear-Off and Disposal: Removing and responsibly disposing of your old roofing layers is a labor-intensive process. If your home has multiple layers of old shingles (a common issue with older homes in Eastmoreland or historic Vancouver), the tear-off process will require additional labor and higher disposal fees at the local transfer station.
  • Decking Repairs: Once the old shingles are removed, we inspect the wooden roof deck underneath. In the wet Pacific Northwest, it is common to find areas of dry rot or water damage, especially around chimneys, valleys, or failed gutters. Replacing damaged plywood sheets is essential to ensure the new roof has a solid, structural foundation.
  • Attic Ventilation: A roof cannot function properly without balanced intake and exhaust ventilation. Without it, heat and moisture build up in your attic, leading to mold growth, wood rot, and the premature failure of your new shingles. Upgrading your ventilation system during a roof replacement is a highly recommended step that protects your investment.

Permits, Energy Codes, and Moisture Barriers

Local building regulations and state energy codes also play a role in your final project cost. For example, Washington and Oregon have strict energy codes that require specific insulation values and moisture-barrier systems during a full roof replacement.

In our wet climate, we always recommend upgrading to high-quality synthetic underlayment rather than traditional felt paper, alongside robust ice and water shields in high-risk areas like valleys and eaves. Additionally, municipal building permits in cities like Beaverton, Hillsboro, or Vancouver WA require fees and independent inspections to ensure the work is completed safely and up to current structural codes.

Commercial vs. Residential Roofing Costs in Northwest Washington

For business owners in Vancouver, Camas, or Ridgefield, commercial roofing presents a completely different set of challenges and cost structures compared to residential projects. Commercial roofs are typically much larger, often covering tens of thousands of square feet, and they frequently feature flat or low-slope profiles that require specialized membranes.

The table below outlines the primary differences between commercial and residential roofing projects in our region:

Factor Residential Roofing Commercial Roofing
Primary Materials Architectural shingles, metal, wood shake TPO, PVC, built-up roofing, metal panels
Project Lifespan Typically 20 to 50 years Typically 15 to 30+ years
Installation Complexity High pitch, multiple valleys, steep slopes Low slope, large flat areas, heavy rooftop equipment (HVAC)
Code Requirements Standard residential building codes Strict energy codes, insulation minimums, commercial permits
Disruption Level Low to moderate (completed in 1–3 days) Can impact business operations, requires safety staging

Whether you are managing a retail space in Gresham or a commercial warehouse in Vancouver, ensuring your business remains protected from the elements is essential for your bottom line.

When to Repair vs. Replace Your Roof

One of the most common dilemmas homeowners face is deciding whether they can get away with a localized repair or if they need to invest in a complete roof replacement.

If your roof is relatively new and has suffered minor, localized damage—such as a few shingles blown loose during a winter windstorm in Camas, or a small leak around a chimney pipe boot—a professional repair is usually the most logical and cost-effective choice.

However, if your roof is approaching the end of its natural lifespan (typically 20 to 25 years for standard asphalt shingles) and is showing signs of widespread wear, a replacement is the safer long-term investment. Look out for warning signs like curling or missing shingles, heavy granule loss in your gutters, persistent leaks in multiple locations, or structural sagging.

Additionally, building codes in many local municipalities enforce the “25 percent rule.” This rule states that if more than 25 percent of a roof is damaged, a full replacement is required by law to bring the entire structure up to current safety and energy codes. For detailed guidance on caring for your roof and identifying early signs of trouble, read The Ultimate Guide to Roof Care in Portland Oregon.

Frequently Asked Questions about PNW Roofing Costs

What is the best time of year to replace a roof in the Pacific Northwest?

While we can install roofs year-round by carefully monitoring weather patterns and utilizing dry weather windows, the ideal time to schedule a replacement is from late spring through early fall (typically May through October). Dry, warm weather allows the shingles’ self-sealing adhesive strips to activate and bond properly, ensuring maximum wind resistance right from the start. Scheduling your project during the spring or summer also minimizes the risk of weather-related delays.

Does homeowners insurance cover roof replacement in Oregon and Washington?

Homeowners insurance is designed to cover sudden, accidental damage caused by covered perils—such as a major windstorm, a fallen Douglas fir tree, or a severe hailstorm. Insurance will generally not cover a roof replacement if the damage is the result of normal wear and tear, age, or a lack of regular maintenance (such as letting moss rot the shingles over several years). Keeping records of regular roof inspections can help support your case if you ever need to file a storm-damage claim.

How can I prevent moss and algae growth on my new PNW roof?

Moss is a constant battle for homeowners in our damp, shaded neighborhoods. To protect your new investment, we recommend installing zinc or copper strips along the roof ridges; rainwater will wash trace minerals down the roof, creating an environment where moss cannot grow. Additionally, choosing premium, algae-resistant shingles featuring advanced copper-infused granule technology can keep your roof looking clean and structurally sound for years to come.

Conclusion

Investing in a new roof is one of the most significant decisions you will make for your home or commercial property. In the Pacific Northwest, cutting corners with cheap materials or inexperienced labor almost always leads to costly water damage and premature roof failure down the road.

At Raindrop Roofing NW, we believe in doing things right the first time. As a truly local, independently owned, family roofing company based in Beaverton, Oregon, we are deeply committed to serving our communities across the greater Portland metro area and Southwest Washington. Unlike large, out-of-state corporate operations, we live and work in the communities we serve, and we stand behind our craftsmanship for the long haul. You can learn more about the advantages of working with a local team by reading about the Benefits of Choosing a Truly Local Independent Roofer.

If you want to make an informed decision for your home, we invite you to learn How to Choose the Right Roofing Contractor. When you are ready to take the next step, our experienced team is here to provide a thorough, honest assessment of your roof’s current condition.

Schedule a Free Roof Inspection and Estimate with Raindrop Roofing NW today, and let us help you protect your home for decades to come.

https://www.raindropnw.com/wp-content/uploads/2026/06/photo-1770742186509-4cad218a9653.jpeg 720 1080 SEO Stats https://www.raindropnw.com/wp-content/uploads/2024/05/logo-raindrop-space-300x92.png SEO Stats2026-06-19 11:14:022026-06-19 11:14:02A Comprehensive Guide to New Roof Cost in the Pacific Northwest
Page 4 of 12«‹23456›»
Search Search
  • Plant & PlantJuly 15, 2015 - 3:40 pm

Categories

  • Chimneys
  • general
  • Gutter Cleaning
  • Gutter Maintenance
  • Gutters
  • Low Slope Roofing
  • News
  • Personal
  • Residential Roofing
  • Roof Inspections
  • Roof Leak Repair
  • Roof Maintenance
  • Roof Replacement
  • Roofing
  • Roofing Services
  • Shingle Roofing
  • Uncategorized

CLICK FOR A FREE ESTIMATE

CLICK NOW

Phone: (503)526-3887
Email:
info@raindropnw.com

Mon–Fri: 9:00am – 5:00pm
8305 SW Cirrus Dr.
Beaverton, OR 97008

Raindrop Roofing NW LLC BBB Business Review

 
Previous Previous Previous Next Next Next

©2026 Copyright - RAINDROP ROOFING NW | PORTLAND, OR
  • Link to X
  • Link to Instagram
  • Link to Youtube
  • Link to Facebook
  • Link to WhatsApp
Scroll to top Scroll to top Scroll to top

This site uses cookies. By continuing to browse the site, you are agreeing to our use of cookies.

AcceptDecline

Cookie and Privacy Settings


How we use cookies

We may request cookies to be set on your device. We use cookies to let us know when you visit our websites, how you interact with us, to enrich your user experience, and to customize your relationship with our website.

Click on the different category headings to find out more. You can also change some of your preferences. Note that blocking some types of cookies may impact your experience on our websites and the services we are able to offer.

Essential Website Cookies

These cookies are strictly necessary to provide you with services available through our website and to use some of its features.

Because these cookies are strictly necessary to deliver the website, refusing them will have impact how our site functions. You always can block or delete cookies by changing your browser settings and force blocking all cookies on this website. But this will always prompt you to accept/refuse cookies when revisiting our site.

We fully respect if you want to refuse cookies but to avoid asking you again and again kindly allow us to store a cookie for that. You are free to opt out any time or opt in for other cookies to get a better experience. If you refuse cookies we will remove all set cookies in our domain.

We provide you with a list of stored cookies on your computer in our domain so you can check what we stored. Due to security reasons we are not able to show or modify cookies from other domains. You can check these in your browser security settings.

Analytics & Advertising Cookies

These cookies help us understand how visitors use our website (Google Analytics) and measure how well our advertising works, including the Meta (Facebook/Instagram) Pixel. They are only used if you allow them.

You can turn analytics and advertising cookies on or off here:

Other external services

We also use different external services like Google Webfonts, Google Maps, and external Video providers. Since these providers may collect personal data like your IP address we allow you to block them here. Please be aware that this might heavily reduce the functionality and appearance of our site. Changes will take effect once you reload the page.

Google Webfont Settings:

Google Map Settings:

Google reCaptcha Settings:

Vimeo and Youtube video embeds:

Privacy Policy

You can read about our cookies and privacy settings in detail on our Privacy Policy Page.

Footer
Accept settingsDecline