• Link to X
  • Link to Instagram
  • Link to Youtube
  • Link to Facebook
  • Link to WhatsApp
CALL: (503)526-3887 or EMAIL: info@raindropnw.com
RAINDROP ROOFING NW | PORTLAND, OR
  • Home
  • About Us
    • About Raindrop Roofing NW
    • Our Team
    • Areas We Serve
    • Who We Support
    • Our Commitment to a Greener Future
    • Careers
    • Blog
  • Residential Roofing
    • Services
      • New / Replacement Roofs
      • Repairs and Maintenance
      • Remodels and Additions
      • Balconies, Patios, and Flat Decks
      • Roof Inspections and Certifications
    • Financing
    • Roof Gallery
    • Roof Types and Products
    • Manufacturer-Certified Roofing Contractor
    • Owner Resources
  • Commercial Roofing
    • Services
      • New and Replacement Roofs
      • Estimates and Inspections
      • Warranties
      • Real Estate Partnerships
      • Roof Certifications
    • Commercial Gallery
    • Roof Types and Products
    • Featured Project
  • Reviews
  • Contact Us
  • Menu Menu
You are here: Home1 / Roofing

The Ultimate Guide to How to Extend the Life of Your Roof in Rainy Climates

Roofing

Why Rainy Climates Are So Hard on Oregon Roofs

If you’re trying to figure out how to extend the life of your roof in rainy climates, here’s the short answer:

  1. Schedule professional inspections at least once a year — ideally in late summer or early fall before the heavy rain season begins.
  2. Clean your gutters at least twice a year — more often if you have trees overhanging your roof.
  3. Control moss and algae growth — treat it annually and consider zinc or copper strips near the ridge line.
  4. Maintain proper attic ventilation and insulation — this prevents moisture buildup, mold, and premature shingle aging from the inside out.
  5. Address minor damage immediately — a missing shingle or cracked piece of flashing becomes a much bigger problem after a wet Oregon winter.
  6. Trim tree branches to at least 6–10 feet from your roof surface — overhanging limbs deposit debris, trap moisture, and scrape away protective granules.
  7. Choose materials suited for high-rainfall conditions — architectural shingles, metal roofing, and quality underlayments all perform better in persistent wet weather than entry-level alternatives.

Most Oregon roofs don’t fail overnight. They wear out gradually — through skipped maintenance, ignored moss, and gutters that quietly overflow from October through May. In the Portland metro area, where rainfall averages around 36 inches a year and the wet season runs for nearly half the year, that slow, steady moisture exposure puts real stress on every layer of your roof. Asphalt shingles absorb water during extended rain, then dry out and contract — a repeated cycle that creates microscopic cracks over time. Wood decking can begin to decay once its moisture content exceeds 30%, a threshold that’s surprisingly easy to reach here without adequate ventilation or surface protection. And once mold takes hold on a wet surface, it can begin growing within just 24 to 48 hours. The good news? With the right habits and the right local team, most roofing systems can last well beyond their expected lifespan — some homeowners extend roof life by five, ten, or even fifteen years with consistent proactive care.

I’m Torrey Yungeberg, owner of Raindrop Roofing NW, and after years of protecting homes across Beaverton, Portland, and the surrounding Oregon communities, I’ve seen what the Pacific Northwest climate does to roofs that aren’t given the right attention — and I’ve put together everything you need to know about how to extend the life of your roof in rainy climates right here. Let’s walk through it together.
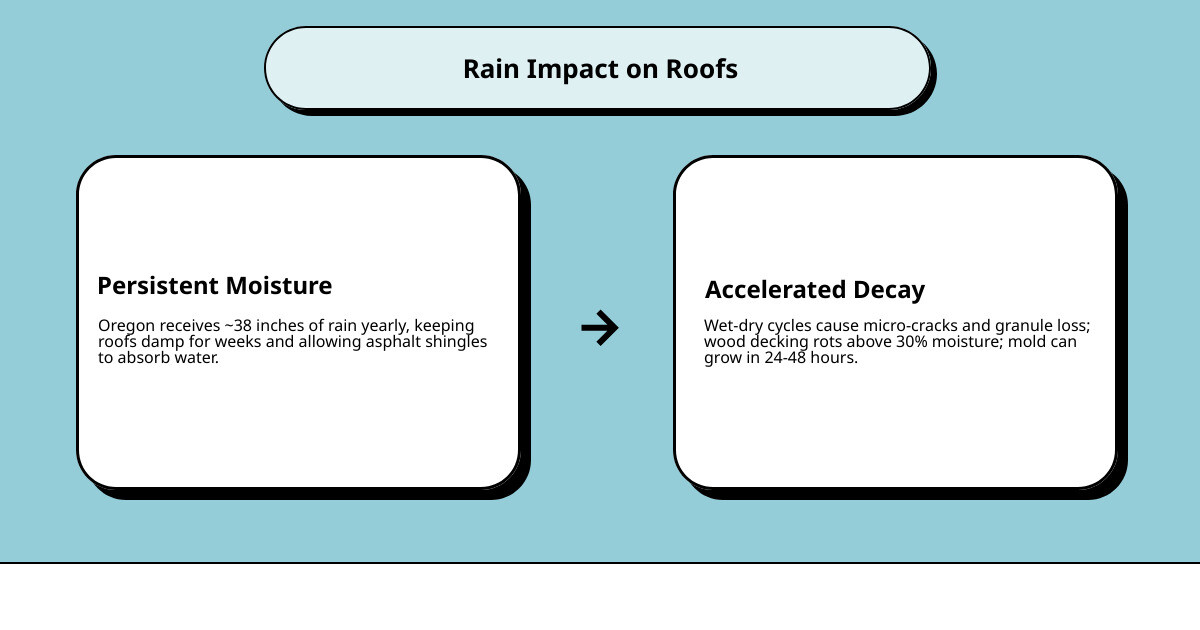
Infographic showing how persistent Pacific Northwest rain impacts roof layers from shingles to decking over time infographic

Understanding Roof Lifespan and Rain Damage in the Pacific Northwest

To understand how to protect your roof, we first have to look at what we’re up against. In the Pacific Northwest, we receive an average of approximately 38 inches of precipitation annually, with rainfall concentrated heavily from October through May. This isn’t just a heavy storm here and there; it is a persistent, months-long drizzle that keeps roofs damp for days or weeks on end.

While asphalt shingles are the most common roofing material in Portland and Beaverton, they behave differently under constant moisture than they do in drier climates. Over time, asphalt shingles absorb minute amounts of water. As we transition through our 18 to 36 freeze-thaw events each winter, that absorbed water expands and contracts. This cycle creates microscopic cracks in the shingle body, loosening the protective mineral granules on the surface.

When those granules wash away, the underlying asphalt is exposed directly to UV rays and rain, accelerating the aging process. If water manages to seep past the shingles and underlayment, it hits the plywood or OSB roof sheathing. Wood decays rapidly when its moisture content exceeds 30%. In consistently wet climates, roof sheathing can easily reach this decay threshold during extended rain seasons if there isn’t adequate ventilation to dry it out. Once wood rot begins, the structural integrity of your roof is compromised. Furthermore, because mold begins growing on wet surfaces within 24 to 48 hours, a minor, unaddressed leak can quickly turn into a health hazard for your household. To see a deeper dive into this process, check out our guide on How Portland Weather Affects Roof Lifespan.

How to Extend the Life of Your Roof in Rainy Climates by Spotting Early Warning Signs

You don’t have to wait for water to start dripping into your living room to know your roof is struggling. In fact, if you wait for a visible ceiling stain, the underlying structural wood may have been rotting for months. Spotting early warning signs is the absolute cornerstone of knowing how to extend the life of your roof in rainy climates.

Here is what you should look for from the safety of the ground using a pair of binoculars, or during a quick walk around your property:

  • Granule Loss in the Gutters: If you clean your gutters and find piles of dark, sand-like granules, your shingles are losing their protective coating.
  • Curling, Cupping, or Clawing Shingles: When shingles absorb too much moisture or suffer from intense attic heat, their edges curl upward or cup downward. This makes them highly vulnerable to being lifted and torn away by seasonal windstorms.
  • Dark Streaks and Moss Patches: Dark streaks are usually blue-green algae, which is mostly cosmetic but holds moisture. Moss, on the other hand, is a structural threat. It acts like a sponge, holding water directly against the shingle surface and lifting the shingle edges, allowing wind-driven rain to blow underneath.
  • Water Stains on Attic Sheathing: Grab a flashlight and head up to your attic during a heavy rainstorm. Look for damp spots, white mineral tracks, or dark water stains along the rafters and underside of the roof deck.

Catching these issues early is the most cost-effective way to preserve your home. For more tips on identifying hidden moisture pathways, read our article on How to Protect Your Home from Water Damage Through Your Roof.

How to Extend the Life of Your Roof in Rainy Climates Through Proactive Maintenance

Proactive maintenance isn’t just about fixing things when they break; it’s about preventing the conditions that cause failure in the first place. Homeowners who implement regular maintenance programs enjoy 25% to 40% longer roof life compared to those who take a reactive approach. When you consider that a new roof is a major investment, spending a little time and attention on maintenance is incredibly smart.

First, keep your roof clean of organic debris. When autumn leaves, pine needles, and twigs pile up in the valleys of your roof, they create small dams. These dams trap water, forcing it to pool and back up under the shingles.

Second, handle moss with extreme care. Never, under any circumstances, allow someone to pressure wash your asphalt shingle roof. The high-pressure water stream will strip away the protective granules instantly, effectively ruining the shingles and voiding your manufacturer warranty. Instead, use a gentle soft-wash treatment or manual removal with a soft-bristle broom, followed by an eco-friendly moss-preventative treatment. Applying zinc or copper strips near the ridge of your roof is an excellent long-term strategy. When rain runs over these metal strips, it carries trace minerals down the roof slope, creating an environment where moss and algae cannot grow.

Third, manage your trees. Trim back overhanging branches so they maintain at least a 6-to-10-foot clearance from your roof. This prevents branches from scraping against your shingles during high winds and drastically reduces the amount of debris falling onto your roof. For a comprehensive overview of local roof care, explore How to Extend the Life of Your Roof and The Ultimate Guide to Roof Care in Portland Oregon.

The Role of Attic Ventilation and Insulation in Wet Climates

We often focus entirely on what is happening on top of the roof, but what is happening underneath is just as critical for roof longevity. In wet climates, your attic space can easily become a trap for warm, humid air generated by daily household activities like showering, cooking, and washing dishes.

If your attic lacks proper ventilation, this moisture-laden air rises and condenses on the cold underside of your roof deck. This constant condensation leads to wood rot, mold growth, and structural sagging. Proper attic ventilation works on a simple principle: intake vents (usually under the eaves or soffits) draw cool, dry air in, while exhaust vents (along the ridge or roof peaks) allow warm, moist air to escape. The industry standard is the 1:300 rule, which means you need 1 square foot of net free ventilation area for every 300 square feet of attic floor space.

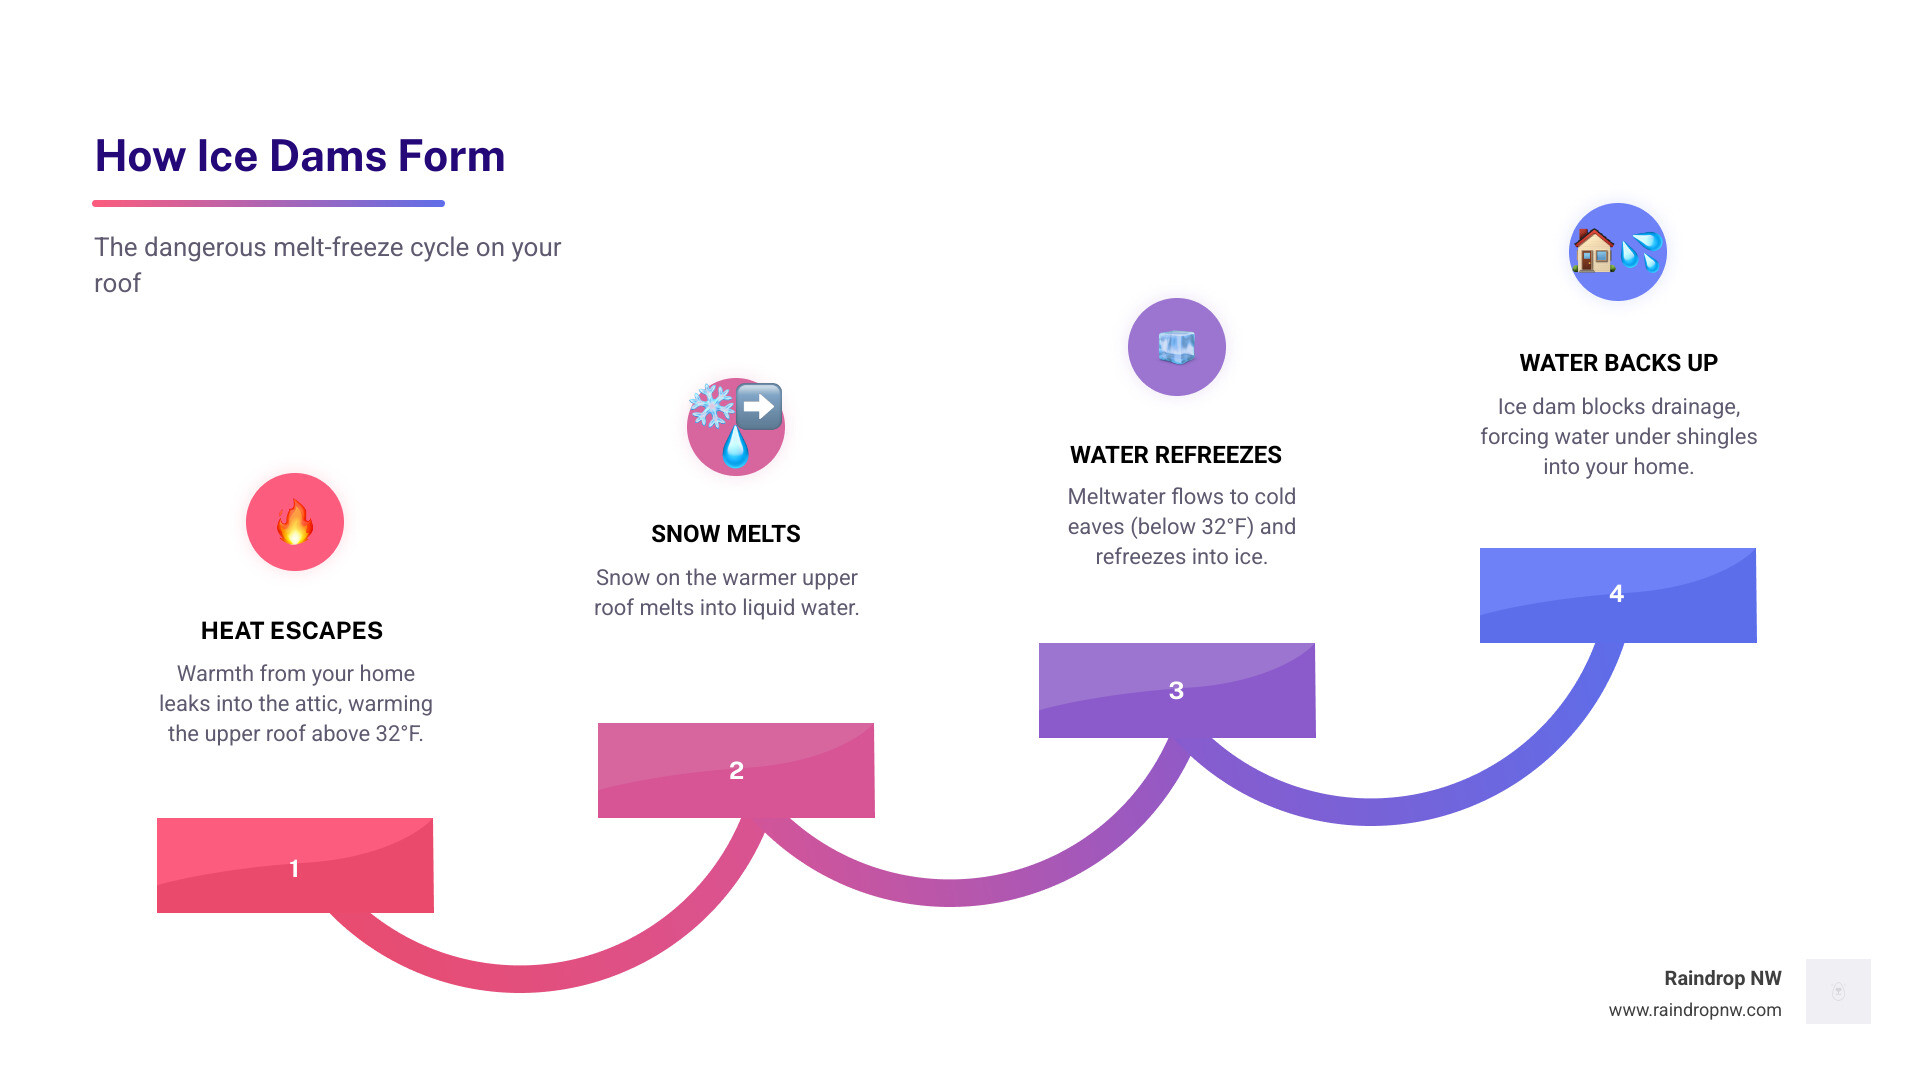
Proper insulation is the partner to good ventilation. If your insulation R-value is too low, warm air from your living space escapes into the attic. During the winter, this heat warms the roof deck, melting the snow on your roof. As the melted water runs down to the colder eaves, it refreezes, forming ice dams. These ice dams trap water on the roof, forcing it to back up under the shingles and leak into your home. To learn how to balance your attic system, read about How Ventilation Reduces Moisture Damage and How Ice Dams Form and What to Do About Them.

Managing Water Smartly: Gutters, Downspouts, and Drainage

Your roof and your gutters are a single, unified water-management system. If your gutters are clogged, damaged, or improperly sloped, even the highest-quality roof will suffer. When water cannot flow freely through your gutters, it backs up under the lower edge of your roof (the eaves), saturating the fascia boards, rotting the roof deck, and eventually finding a path inside your walls.

To keep this water-management system working flawlessly:

  • Clean Gutters at Least Twice a Year: Clean them once in the late spring to clear out maple seeds and blossoms, and at least once (often twice) in the late autumn after the leaves have fallen.
  • Upgrade to Seamless Gutters: Traditional sectional gutters have seams that collect debris and eventually leak. Seamless gutters, custom-fit to your home, eliminate these weak points entirely.
  • Install Downspout Extensions: Ensure your downspouts discharge water at least 3 to 5 feet away from your home’s foundation. This prevents water from pooling around your basement or crawlspace.
  • Consider Gutter Guards: If your home is surrounded by Douglas firs or maples, high-quality gutter guards can keep debris out while allowing water to flow freely, reducing your cleaning chores.

By keeping your gutters clear, you protect both your roofline and your foundation. Check out our Gutter Maintenance Tips for Homeowners and learn How Gutter Maintenance Prevents Foundation Damage to keep your home dry.

Choosing the Best Roofing Materials and Coatings for High-Rainfall Areas

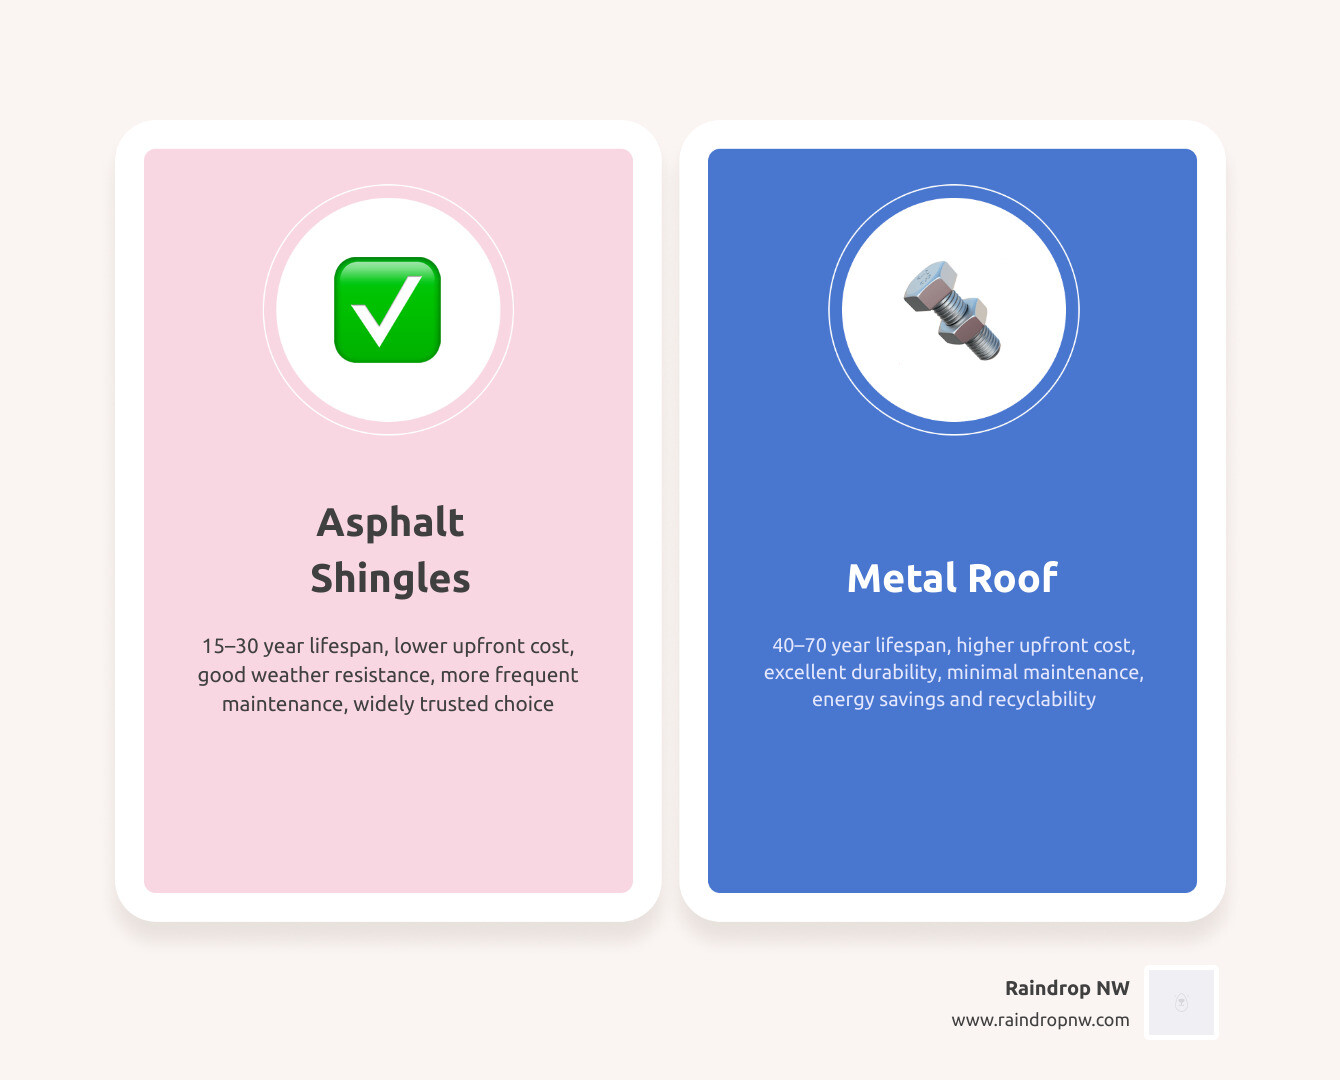
If you are planning a roof replacement or looking to protect an existing low-slope roof, selecting the right materials for our wet climate is essential. Traditional 3-tab shingles are budget-friendly but don’t hold up as well to persistent rain and wind as modern alternatives. Modern architectural shingles are thicker, offer better wind resistance, and often feature built-in algae-resistant copper granules.

For flat or low-slope sections of your home, single-ply membranes like PVC or TPO are excellent because their heat-welded seams form a continuous, waterproof barrier. Additionally, silicone roof coatings are outstanding for restoring older low-slope roofs, as they resist ponding water and reflect UV rays.

Material Type Average Lifespan in Wet Climates Key Benefits in Rainy Areas Maintenance Needs
Architectural Shingles 20–30 Years Double-layered thickness, wind-resistant, copper granules inhibit algae growth. Regular debris removal, annual moss prevention treatments.
Metal Roofing (Standing Seam) 40–80 Years Sheds water and snow rapidly, highly resistant to moss and rot. Periodic fastener checks, cleaning of valleys and seams.
PVC / TPO Membranes 20–30+ Years Heat-welded seams create a completely waterproof barrier; ideal for flat roofs. Semi-annual drain clearing, inspection of welded seams.
Silicone Coatings Adds 10–15 Years Seamless application over existing flat roofs; completely resists ponding water. Occasional washing to maintain reflectivity.

Professional Inspections: The Key to Catching Problems Early

While ground-level checks are great, there is no substitute for a professional, hands-on roof inspection. A certified roofer has the training and safety equipment to walk your roof and examine the components that are invisible from the ground.

We recommend having your roof professionally inspected once a year, preferably in the late summer or early fall. In our wet climate, inspections should focus heavily on flashing — the metal pieces installed around chimneys, skylights, dormers, and valleys. Flashing is your roof’s primary defense against water intrusion, and if the sealant around it has cracked or rusted, water will find a way in. Inspections also cover pipe boots (the rubber collars around plumbing vents), which tend to crack and fail after 10 to 12 years of UV and rain exposure.

To learn more about what a thorough inspection entails, see How Often Should You Have Your Roof Inspected and explore our guide on Roof Inspection Frequency for Pacific Northwest Homes.

How to Extend the Life of Your Roof in Rainy Climates: Repair vs. Replacement

At some point, every homeowner faces the question: Should I repair my roof, or is it time for a full replacement?

If your roof is relatively young (under 15 years old) and the damage is localized — such as a few shingles damaged by a falling branch or a small leak around a chimney — a professional repair is usually the best and most cost-effective path. We can replace the damaged shingles, install new flashing, and reseal the area to give your roof many more years of service.

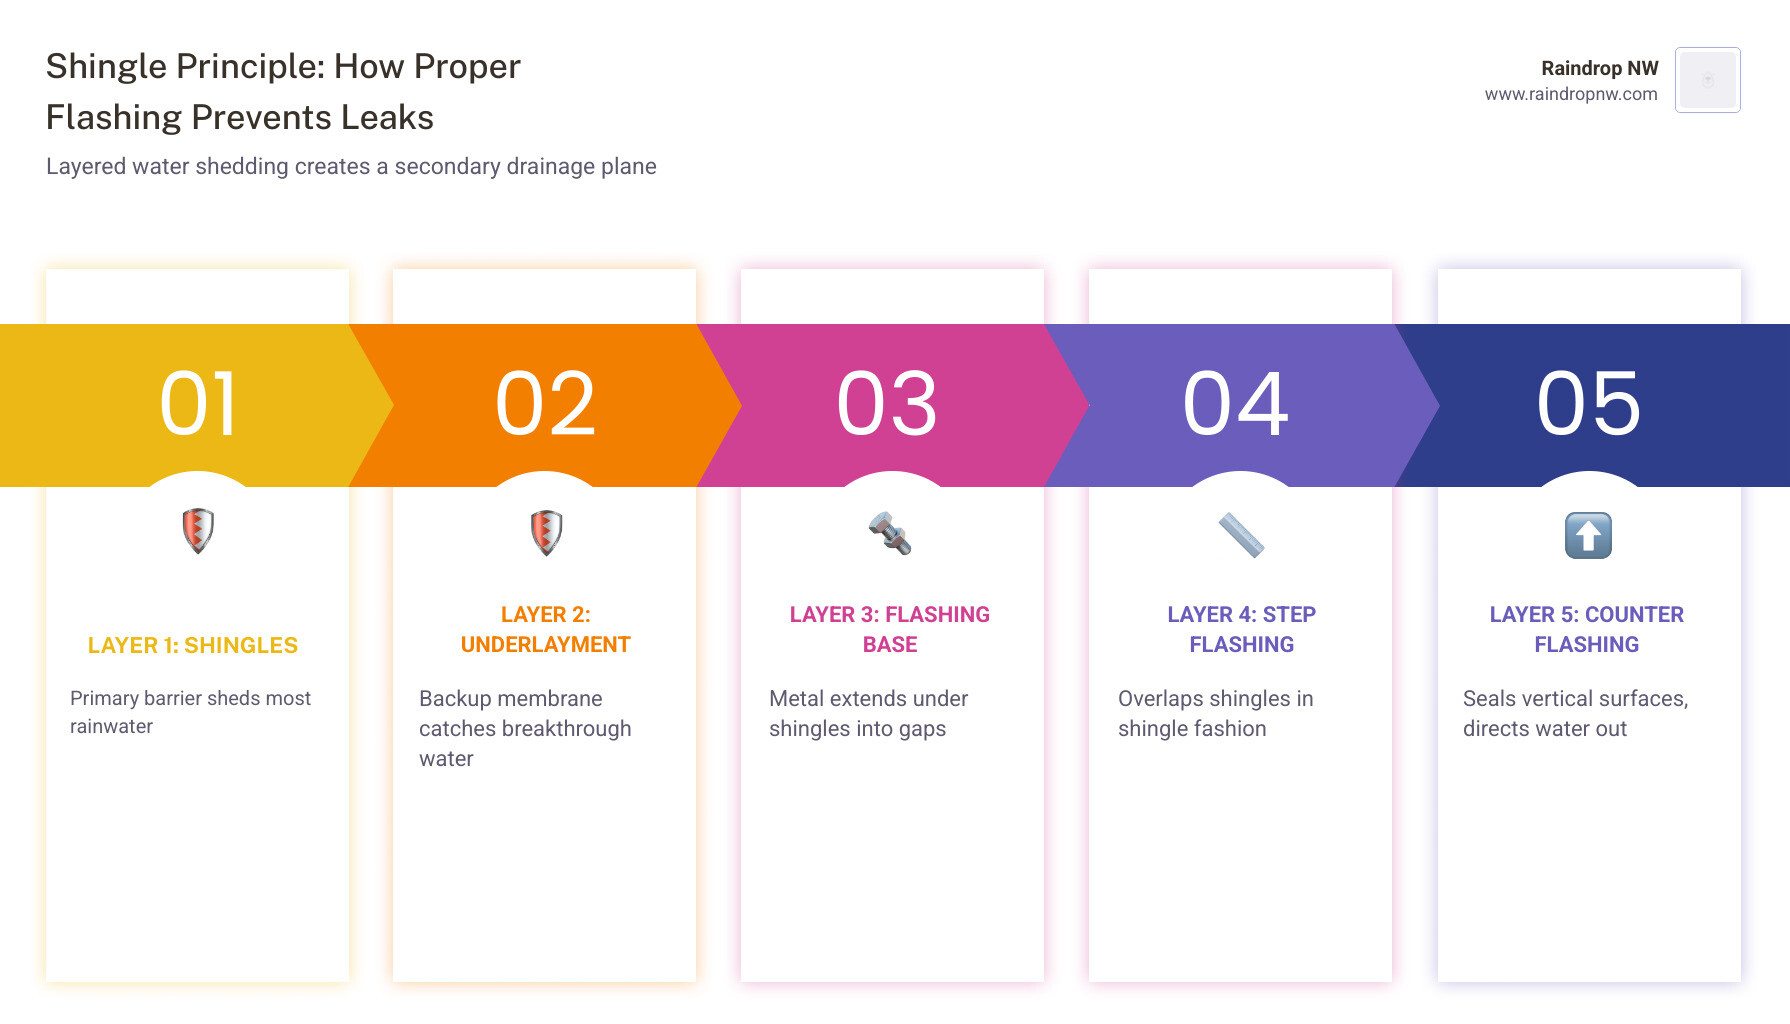
However, if your asphalt shingle roof is approaching 20 years of age, has widespread curling or bald spots, or has suffered multiple recurring leaks, a replacement is often the safer, more economical choice in the long run. Continually patching an old, failing roof can end up costing more than a replacement, and it leaves your home vulnerable to sudden water damage. To understand how we catch these issues early, read How Regular Inspections Catch Problems Early and learn How Proper Flashing Prevents Leaks.

The Long-Term Value of Proactive Roof Care

Taking a proactive approach to your roof is one of the most financially rewarding decisions you can make as a homeowner. A few hundred dollars spent on routine gutter cleaning, moss treatments, and minor repairs can postpone a major roof replacement by years.

Furthermore, maintaining a detailed log of your roof’s maintenance history — including professional inspection reports, receipts, and before-and-after photos — is incredibly valuable. If your roof is ever damaged in a major windstorm, having proof of regular maintenance shows your insurance company that the damage was caused by the storm, not by neglect, making the claims process much smoother. A well-maintained roof preserves your home’s equity, improves its energy efficiency, and provides invaluable peace of mind when the winter rains arrive. For additional home protection tips, read our Water Damage Prevention Tips for Pacific Northwest Homeowners and download The Hillsboro Homeowners Handbook to Roof Longevity.

Frequently Asked Questions about Wet Climate Roof Care

How often should I clean my gutters in the Pacific Northwest?

You should clean your gutters at least twice a year: once in the late spring to clear out tree seeds and pollen, and once in the late fall after all the leaves have dropped. If your home is situated directly under heavy tree cover, you may need to clean them three or four times a year to prevent water from backing up under your shingles.

Does moss growth really damage my roof shingles?

Yes, absolutely. Moss is not just a cosmetic issue. It acts like a sponge, holding moisture directly against your shingles and preventing them from drying out. As the moss grows, its roots can lift and loosen the shingles, creating direct pathways for wind-driven rain to leak into your roof deck.

Can poor attic ventilation cause roof leaks?

Yes. Poor ventilation traps warm, moist air inside your attic. During cold weather, this moisture condenses on the underside of your roof deck, leading to wood rot, mold, and structural damage that looks exactly like a roof leak. It can also cause ice dams to form on your eaves, forcing water under your shingles.

Conclusion

Your roof is your home’s primary shield against the relentless Pacific Northwest rain. By understanding how to extend the life of your roof in rainy climates — through consistent gutter cleaning, moss control, attic care, and annual inspections — you can keep your home dry and safe for decades.

At Raindrop Roofing NW, we are proud to be a truly local, family-owned roofing company based right here in Beaverton, Oregon. Unlike companies owned by out-of-state investment firms, we are deeply committed to our local communities, including Portland, Hillsboro, Tigard, Tualatin, and Vancouver. We bring decades of experience, certified craftsmanship, and a transparent, neighborly approach to every home we serve.

Don’t wait for the next heavy rainstorm to find out if your roof is ready. Schedule professional roof maintenance and repairs with Raindrop NW today, and let our family protect yours.
https://www.raindropnw.com/wp-content/uploads/2026/06/photo-1728762796149-04f90fde1f8a.jpeg 720 1080 SEO Stats https://www.raindropnw.com/wp-content/uploads/2024/05/logo-raindrop-space-300x92.png SEO Stats2026-06-18 13:05:252026-06-18 13:05:25The Ultimate Guide to How to Extend the Life of Your Roof in Rainy Climates

Step-by-Step Guide to Flat Roof Challenges in the Pacific Northwest

Roofing

Why Flat Roof Challenges in the Pacific Northwest Catch Homeowners Off Guard

The flat roof challenges in the Pacific Northwest are some of the most demanding roofing problems any homeowner can face — and they often go unnoticed until serious damage has already set in.

Here is a quick look at the biggest challenges flat roofs face in this region:

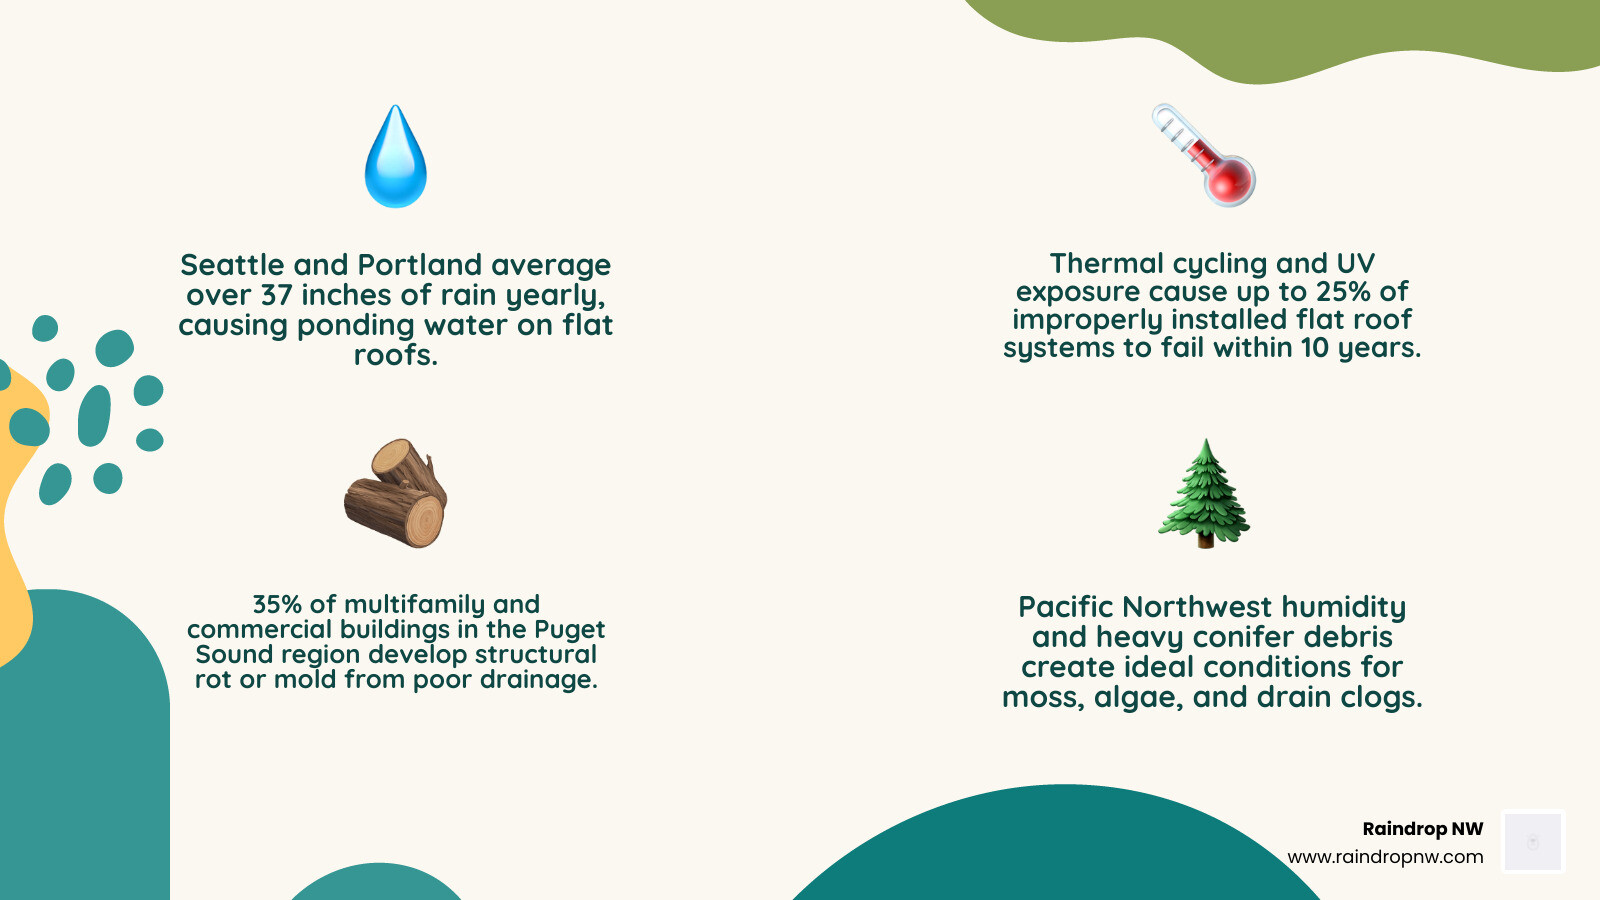
  • Ponding water — Flat roofs lack the natural slope to shed rainfall, and Seattle and Portland averages over 37 inches of rain per year means water can sit for days.
  • Condensation and rot — Without proper insulation design, warm indoor air hits a cold roof deck and creates hidden moisture that silently destroys structural wood.
  • Seam separation — Thermal cycling and UV exposure cause membrane seams to pull apart, with up to 25% of improperly installed systems failing within 10 years.
  • Moss, algae, and debris buildup — Pacific Northwest humidity and tree canopy create ideal conditions for organic growth that traps moisture and clogs drains.
  • Poor drainage design — Approximately 35% of multifamily and commercial buildings in the Puget Sound region develop structural rot or mold linked directly to inadequate drainage.
  • Membrane degradation — Even in overcast conditions, UV radiation breaks down roofing membranes at a molecular level, shortening lifespan significantly.

Flat roofs are common on modern homes, commercial buildings, garages, and additions across Oregon and Southwest Washington. They offer real advantages — rooftop equipment access, clean architectural lines, and straightforward installation. But in a climate defined by persistent rain, high humidity, mild but constant temperature swings, and heavy conifer debris, a flat roof demands far more precision than most people expect. One small installation error or a clogged drain after a storm can quietly trigger severe structural damage.

I’m Torrey Yungeberg, owner of Raindrop Roofing NW, and I’ve spent years helping Oregon and Southwest Washington homeowners navigate flat roof challenges in the Pacific Northwest — from diagnosing hidden condensation rot to selecting the right membrane material for our wet winters. In the sections ahead, I’ll walk you through everything you need to know to protect your home.

Infographic showing flat roof moisture dynamics in the Pacific Northwest including ponding water condensation and seam

Flat Roof vs. Pitched Roof: The Battle Against PNW Rain

comparison of flat and pitched roof drainage systems under heavy rainfall

When choosing between roof styles in the Pacific Northwest, the fundamental battle is against water. Gravity is a pitched roof’s best friend; rainwater hits the slopes and immediately runs down into the gutters. On a low-slope or flat surface, water moves slowly, if at all.

Understanding how these two designs handle our relentless rain is essential for long-term property protection. You can read a detailed breakdown of these structural differences in our Flat Roof vs Pitched Roof Comparison.

Drainage and Ponding Water Risks

On a flat roof, “flat” is actually a misnomer. To function correctly, every flat roof must have a slight pitch—at least a 1/4-inch drop per foot—to guide water toward the drains. When a roof lacks this subtle slope, or if the framing sags over time, water pools in low areas. This is known as ponding water.

Building codes generally define acceptable ponding as water that remains on a flat roof for up to 48 hours after rainfall before evaporating or draining. In our damp, overcast winters, evaporation is virtually nonexistent. When water sits on a membrane for days or weeks, it exerts constant hydrostatic pressure on the seams.

Over time, this standing water accelerates membrane breakdown, dissolves adhesives, and finds even the microscopic gaps in your roof’s armor. Furthermore, the immense weight of ponding water can cause the roof deck to bow, creating a deeper depression that collects even more water. To safeguard your home, check out our Water Damage Prevention Tips for Pacific Northwest Homeowners.

Lifespan and Maintenance Realities

Because flat roofs must work significantly harder to keep water out, they naturally have a higher failure rate and shorter average lifespans than pitched roofs. In fact, flat roofs in the Pacific Northwest experience a 30-40% higher failure rate due to ponding water compared to pitched systems.

While a high-quality architectural shingle or metal pitched roof can easily last 30 to 50 years with minimal care, flat roofs require a much more hands-on approach. The combination of standing water, organic debris, and constant dampness creates a perfect breeding ground for moss and algae.

Douglas Fir needles and deciduous leaves easily accumulate on flat surfaces, forming a wet, heavy blanket that clogs scuppers and drains, trapping moisture directly against the membrane. You can explore how regional weather patterns specifically influence these timelines in our guide on How Portland Weather Affects Roof Lifespan.

Understanding Flat Roof Challenges in the Pacific Northwest

To truly understand why low-slope roofs struggle in places like Beaverton, Portland, and Vancouver, we have to look at the science of how these systems age under our unique environmental conditions.

Condensation and Flat Roof Challenges in the Pacific Northwest

One of the most insidious flat roof challenges in the Pacific Northwest is interior condensation. Traditional pitched roofs feature an attic space that acts as a buffer zone. Warm, moist air rising from your living spaces is vented out of the attic before it can cause trouble.

Most flat roofs do not have this attic buffer. Instead, they consist of a “compact” or “closed” cavity design. If the insulation is installed incorrectly, warm, humid indoor air rises and strikes the underside of the cold roof deck. Because the waterproof membrane on top acts as a vapor barrier, this moisture has nowhere to escape. It condenses back into liquid water, saturating the plywood decking, insulation, and joists.

To prevent this hidden rot, we highly recommend a “warm roof design.” This engineering approach places rigid Polyisocyanurate (PolyISO) insulation directly on top of the roof deck, beneath the waterproof membrane. This keeps the structural wood deck at a consistent, warm temperature, preventing the dew point from ever forming inside the wood cavity. You can learn more about how proper air movement protects your home in our article on How Ventilation Reduces Moisture Damage.

Mitigating Drainage and Flat Roof Challenges in the Pacific Northwest

Because gravity won’t do the heavy lifting, flat roofs require active, engineered drainage solutions. If a flat roof is built perfectly flat without tapered insulation or sloped joists, structural rot and mold are almost guaranteed. In the Puget Sound and Portland-metro regions, poor drainage design is responsible for structural rot in roughly 35% of low-slope buildings.

To mitigate this, modern installations utilize tapered PolyISO insulation panels. These panels are pre-cut with a built-in slope that is laid out like a puzzle across the roof deck, directing all water toward scuppers, gutters, or internal drains.

Additionally, we always recommend installing secondary (overflow) scuppers. These are emergency drainage outlets placed a couple of inches higher than your primary drains. If a heavy storm dumps leaves and pine needles that clog your main drain, the secondary scupper ensures water can still escape before its weight threatens the structural integrity of your home.

Best Flat Roof Materials for Wet Climates

Choosing the right material is the single most important decision you will make for a flat roof in our wet climate. Here is how the most common flat roof systems stack up:

Material Type Typical Lifespan (PNW) Pros Cons Best Suited For
PVC (Single-Ply) 20 – 30 Years Heat-welded seams, highly chemical/algae resistant, handles ponding water beautifully Premium material option Residential flat roofs, commercial buildings, multi-family
TPO (Single-Ply) 15 – 25 Years Highly reflective, heat-welded seams, efficient installation Can become brittle over time; harder to weld as it ages Modern residential additions, light commercial
EPDM (Synthetic Rubber) 15 – 25 Years Highly flexible, handles thermal expansion well Seams rely on adhesives/tape which can break down in wet climates Large commercial structures with minimal penetrations
Modified Bitumen (Torch-down) 15 – 20 Years Durable, multi-ply thickness, highly puncture-resistant Seams can separate; open-flame installation hazard Small residential roofs, garages, detached carports
Built-Up Roof (BUR / Hot-Tar) 10 – 15 Years Thick, multi-layered protection Heavy, rigid, loses elasticity quickly in wet climates Older commercial buildings (largely outdated)

For a broader look at what to expect when planning a commercial or large-scale low-slope project, check out our guide on Commercial Roofing Options and What to Expect.

Single-Ply Membranes: PVC and TPO

For the vast majority of flat roofs in our region, single-ply synthetic membranes like Polyvinyl Chloride (PVC) and Thermoplastic Polyolefin (TPO) are the superior choice.

Unlike older systems that rely on adhesives or glues at the seams, PVC and TPO seams are fused together using specialized hot-air welding equipment. This process melts the two sheets into one continuous, monolithic barrier. A hot-welded seam is actually stronger than the membrane itself, virtually eliminating the risk of seam separation during thermal movement.

PVC is particularly well-suited for the Pacific Northwest because it is completely impervious to standing water and highly resistant to organic growth like moss, mold, and algae. Furthermore, both PVC and TPO reflect up to 80% of solar radiation. This high reflectivity reduces heat absorption, keeping your home cooler in the summer and extending the overall lifespan of the roof by 5 to 10 years by minimizing UV-induced molecular breakdown.

Asphalt-Based Systems: Torch-Down and Modified Bitumen

Modified bitumen (often called torch-down) is an asphalt-based system that has been a residential default for decades. It consists of multiple layers of asphalt roll roofing modified with rubber (SBS) or plastic (APP) polymers to increase flexibility.

While modified bitumen is tough and highly resistant to punctures from falling branches, it has notable drawbacks in our climate. Because it is asphalt-based, it naturally loses its elasticity over time as it is exposed to UV rays and temperature swings.

Additionally, traditional torch-down installation requires using an open-flame propane torch to melt the asphalt seams together, which carries a fire risk during our increasingly dry summer months. For safer applications, we utilize cold-process modified bitumen, which uses liquid adhesives instead of open flames to seal the layers. However, even well-installed modified bitumen seams are more prone to moisture migration and separation over time than heat-welded PVC.

Common Installation Mistakes and Maintenance Practices

A flat roof is only as good as its installation. Because there is no slope to hide mistakes, even minor shortcuts can lead to catastrophic failures.

Poor Seam Welding and Flashing Failures

The most vulnerable parts of any flat roof are the seams and the flashing. Flashing is the material used to seal transitions—where the roof meets a wall, chimney, skylight, or plumbing pipe.

A common industry mistake is using unreinforced membranes or temporary caulking and sealants at these critical junctions. Standard sealants degrade rapidly under UV exposure and rain, cracking within a few years.

Corners, scuppers, and pipe penetrations are the true “Achilles’ heel” of flat roofs. Professional installers use pre-fabricated, reinforced PVC boots and custom-welded flashings to ensure these high-risk areas remain completely watertight. If you suspect your roof is showing its age, read our list of Signs Your Commercial Roof Needs Attention. To understand how we seal these vulnerable areas, explore How Proper Flashing Prevents Leaks.

Inadequate Slope and Lack of Tapering

When reframing a flat roof or preparing for a replacement, failing to address structural sag is a recipe for disaster. Over decades, wood joists naturally settle and sag. If a roofing contractor simply rolls a new membrane over an uneven, saggy deck without installing tapered insulation or adjusting the framing, water will immediately pool in those low spots. This leads to a spongy roof deck, rot in the underlying plywood, and eventual structural failure.

Routine Inspections and Debris Removal

To get the full 20 to 30 years out of a high-quality PVC or modified bitumen roof, routine maintenance is non-negotiable.

  • Clear debris twice a year — Wet leaves and pine needles trap moisture and clog drains. Clean your roof every spring and fall.
  • Inspect seams and flashing — Look closely for any signs of peeling, bubbling, or cracking around transitions.
  • Check scuppers and drains — Ensure water can flow freely off the roof.
  • Treat moss early — Use eco-friendly, roof-safe treatments to prevent roots from degrading the membrane.

Regular professional checkups are the best way to catch minor wear before it turns into a major headache. Learn more about How Inspections Prevent Costly Repairs.

Frequently Asked Questions About Low-Slope Roofs

Navigating flat roof care can raise a lot of questions. Here are some of the most common inquiries we receive from local property owners:

How long does a flat roof last in the Pacific Northwest?

On average, a high-quality single-ply PVC or modified bitumen roof will last 20 to 30 years in our climate, provided it is properly sloped, insulated, and maintained. Traditional hot-tar built-up roofs (BUR) have a much shorter lifespan of only 10 to 15 years due to their rigid nature and vulnerability to moisture retention.

What are the signs that a flat roof is failing?

Keep an eye out for these critical red flags:

  • A “spongy” feel when walking on the roof, indicating rotted plywood decking beneath the membrane.
  • Interior water stains or mold on your ceilings or upper walls.
  • Blistering or bubbling, which means moisture has bypassed the membrane and is trapped underneath, vaporizing in the sun.
  • Seam separation or cracking around flashing and scuppers.

Can I convert a flat roof to a pitched roof?

Yes. Converting a flat roof to a pitched roof is entirely possible and is an excellent long-term solution for persistent drainage issues. This process involves building a new truss system directly over the existing flat structure. While it requires structural reframing and more extensive structural work, it permanently eliminates ponding water risks and can significantly boost your home’s curb appeal and resale value.

Conclusion

Managing flat roof challenges in the Pacific Northwest requires a combination of smart engineering, high-quality materials, and experienced local craftsmanship. Whether you are dealing with a historic home in Portland, a modern remodel in Beaverton, or a commercial building in Vancouver, you need a roofing partner who understands how our unique climate impacts low-slope systems.

Raindrop Roofing NW is a truly local, family-owned company committed to long-term accountability. We live, work, and raise our families right here in the Pacific Northwest, bringing decades of hands-on experience to every project. We offer certified workmanship, honest advice, and transparent, detailed inspections.

If you are concerned about ponding water, hidden condensation, or the overall age of your low-slope roof, let our family protect yours. Schedule a Professional Roof Inspection with Raindrop Roofing NW today, and we’ll help you find the perfect, long-lasting solution for your home.

https://www.raindropnw.com/wp-content/uploads/2026/06/photo-1716847214815-973025e97173.jpeg 720 1080 SEO Stats https://www.raindropnw.com/wp-content/uploads/2024/05/logo-raindrop-space-300x92.png SEO Stats2026-06-16 10:58:282026-06-16 10:58:28Step-by-Step Guide to Flat Roof Challenges in the Pacific Northwest

In-Depth Guide to Understanding Your Insurance Policy and Roofing Coverage

Roofing

What Your Homeowners Insurance Actually Covers for Your Roof

Understanding your insurance policy and roofing coverage is one of the most important things you can do as a homeowner — especially after a storm rolls through the Portland area and leaves damage behind. Most standard homeowners policies do cover roof damage, but only under specific conditions. Here is a quick summary of what you need to know:

Your roof is covered when:

  • Damage is sudden and accidental (wind, hail, falling trees, lightning, fire, weight of ice or snow)
  • The damage is caused by a named covered peril in your policy
  • The claim amount exceeds your deductible

Your roof is typically NOT covered when:

  • Damage results from normal wear and tear or aging
  • The roof was already deteriorating before the loss event
  • Damage is caused by flooding, earthquakes, or lack of maintenance
  • The damage is purely cosmetic with no functional impact

Your payout depends on:

  • Whether your policy pays Replacement Cost Value (RCV) or Actual Cash Value (ACV)
  • Your roof’s age and condition
  • Your deductible type — flat dollar amount or percentage-based
  • How thoroughly you document the damage

Most homeowners are surprised to discover that two neighbors with similar storm damage can receive very different insurance payouts — simply because of differences in their policy type, roof age, or how the claim was handled. The average cost of a roof replacement runs around $9,520, so knowing how your policy works before you need it can make a significant financial difference.

I’m Torrey Yungeberg, owner of Raindrop Roofing NW, and after years of helping Oregon and Southwest Washington homeowners navigate the intersection of roofing and insurance, I’ve seen how confusing understanding your insurance policy and roofing coverage can be — and how much money homeowners leave on the table without the right guidance. Let’s walk through everything you need to know, from covered perils to claim payouts, so you can protect your home with confidence.

Infographic showing the roof insurance claim lifecycle from storm damage to final payout infographic

Understanding Your Insurance Policy and Roofing Coverage: What is Covered?

When you open up your homeowners insurance policy, your roof is protected under what is known as Dwelling Coverage (Coverage A). This portion of your policy safeguards the physical structure of your home, including the walls, foundation, and—most importantly—the roof over your head.

However, insurance is not a maintenance plan. For your coverage to kick in, the damage must be caused by what insurers call a “covered peril.” In the Pacific Northwest, our roofs face a unique gauntlet of weather challenges. Windstorms whip through the Columbia River Gorge, heavy winter snow piles up on our shingles, and fallen Douglas fir branches are a constant hazard in heavily wooded neighborhoods from Lake Oswego to Vancouver, WA.

Standard homeowners policies typically cover roof damage caused by:

  • Windstorms and Gale-Force Winds: Strong winds can peel shingles right off the deck, break adhesive seals, or lift entire sections of roofing. Wind and hail claims are incredibly common nationwide; in fact, wind and hail claims occurred at a frequency of 2.80 per 100 insured homes over the 2019-2023 period.
  • Fallen Trees and Debris: If a massive pine or oak tree crashes onto your roof during a winter storm, your dwelling coverage will pay to repair the structural damage and replace the ruined roofing materials.
  • Weight of Ice, Sleet, or Snow: Heavy winter storms can overload your roof structure, leading to structural sagging or, in extreme cases, a cave-in.
  • Lightning and Fire: Direct lightning strikes or house fires are universally covered under standard policies.
  • Ice Dams: When snow melts and refreezes at the cold eaves of your roof, it forms an ice dam that traps water behind it. This water can back up under your shingles and rot your roof deck.

While your policy is designed to step in during these sudden disasters, water damage inside your home is often a direct consequence of a compromised roof. To understand how water behaves once it gets past your shingles and how to mitigate these risks, check out our guide on How to Protect Your Home from Water Damage Through Your Roof.

Covered Perils vs. Exclusions

The golden rule of insurance claims is that the damage must be sudden and accidental. This means a single, identifiable event caused the damage. If a windstorm rips away 15 shingles on Tuesday night, that is sudden and accidental.

Conversely, if your roof has been slowly leaking for six years because the shingles are old and brittle, your insurance provider will view this as a maintenance issue and deny the claim. Standard policy exclusions include:

  • Wear and Tear: Every roof has a natural expiration date. Standard policies exclude gradual deterioration caused by sun exposure, rain, and age.
  • Cosmetic Damage: If a hailstorm leaves tiny, harmless dents on your metal roof or vents but does not compromise their water-shedding ability, your insurer may refuse to pay for a replacement under a cosmetic damage exclusion.
  • Maintenance Neglect: If you let moss grow unchecked, fail to clean your gutters, or leave broken shingles unaddressed, the insurer can deny subsequent water damage claims, arguing that the damage was entirely preventable.
  • Mold and Rot: Mold is typically excluded unless it is the direct result of an active, sudden water leak from a covered peril (like a tree puncturing the roof).
  • Floods and Earthquakes: Standard HO-3 policies do not cover flood or earthquake damage. For flood protection, homeowners must purchase a separate policy through the National Flood Insurance Program (NFIP), which carries an average annual premium of about $888 to $939. For earthquakes—a very real threat here in the Pacific Northwest—a separate earthquake endorsement is required.

RCV vs. ACV: How Your Policy Type Affects Your Payout

When your roof claim is approved, the amount of money you actually receive depends heavily on whether you have a Replacement Cost Value (RCV) policy or an Actual Cash Value (ACV) policy. This distinction is often where homeowners experience the most significant financial surprises.

  • Replacement Cost Value (RCV): This is the gold standard of roofing coverage. An RCV policy pays to replace your damaged roof with a brand-new equivalent at today’s market prices, regardless of how old your roof was when the storm hit.
  • Actual Cash Value (ACV): An ACV policy only pays what your roof was worth at the exact moment of the loss. The insurer calculates the replacement cost and then subtracts depreciation based on the roof’s age and remaining lifespan.

When you file an RCV claim, the payout usually happens in two stages. First, the insurer sends you an ACV check (the depreciated value). Once we complete the roof replacement and submit proof of completion, the insurer releases the “recoverable depreciation” check to cover the remaining balance of the project. With an ACV policy, that depreciation is unrecoverable, meaning you must pay the difference out of pocket.

To learn more about how these payout structures affect your ability to fund a complete roof replacement, read our detailed article on Does Insurance Cover Roof Replacement?.

Understanding Your Insurance Policy and Roofing Coverage for Older Roofs

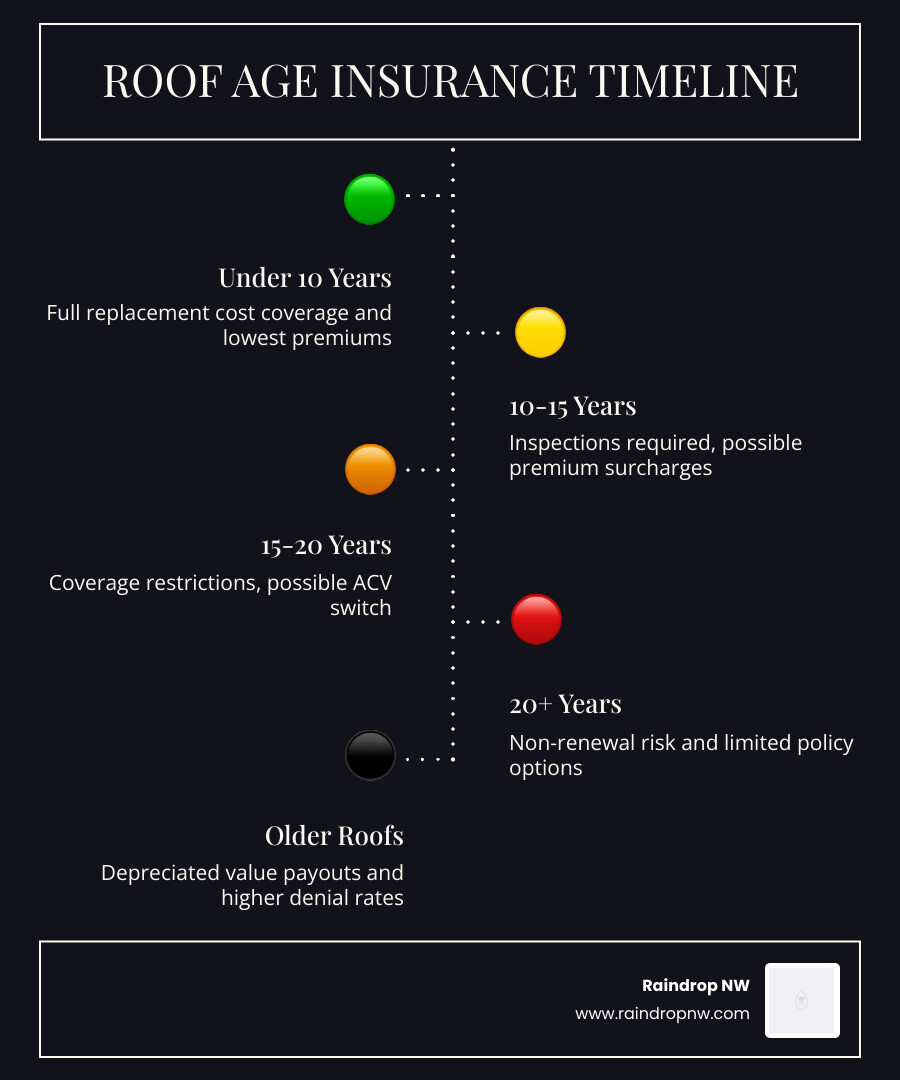
Your roof’s age is one of the most critical variables in the insurance equation. As a roof gets older, it becomes a liability for insurance companies. Many homeowners underestimate the age of their roof, which is a massive issue for the industry: inaccurate roof age costs home insurers an estimated $1.31 billion in lost premiums each year.

Because of this, insurance companies in 2026 are highly sensitive to roof age. If your roof is under 10 years old, you will likely receive full RCV coverage. However, once a roof passes the 10- or 15-year mark, carriers often implement the following:

  • Automatic Conversion to ACV: Some policies contain clauses that automatically convert your roofing coverage from RCV to ACV once the roof reaches a certain age (often 15 years for architectural shingles).
  • Limited Loss Settlement / Roof Payment Schedule: Instead of calculating custom depreciation, the insurer uses a fixed schedule. For example, a 15-year-old roof might only qualify for 30% to 40% of its replacement cost, leaving you to cover the remaining 60% to 70% out of pocket.
  • Policy Non-Renewal: If your roof is over 20 years old, your insurance company may threaten to cancel your policy entirely unless you replace the roof out of pocket.

If you suspect your aging roof might complicate an upcoming claim, explore our guide on How Roof Age Affects Your Insurance Claim.

Comparing RCV and ACV Coverage Features

Feature Replacement Cost Value (RCV) Actual Cash Value (ACV)
Replacement Terms Pays for a brand-new roof of similar quality at current market prices. Pays for the depreciated value of the roof at the time of damage.
Depreciation Impact Temporarily withheld but fully recoverable after work is completed. Permanently deducted; the homeowner must pay the depreciated difference.
Premium Differences Higher annual premiums due to comprehensive coverage. Lower annual premiums, but much higher out-of-pocket costs during a claim.
Payout Calculation Total Replacement Cost minus Deductible. (Total Replacement Cost minus Depreciation) minus Deductible.

Navigating Deductibles and the Decision to File a Claim

Your deductible is the amount of money you must pay out of pocket before your insurance company starts paying. In the past, most homeowners had a simple flat deductible, such as $1,000 or $2,000. Today, however, deductibles have become far more complex.

In areas prone to severe weather, insurers frequently use percentage-based deductibles for wind and hail damage. Instead of a flat fee, your deductible is calculated as a percentage of your home’s total insured dwelling value (usually 1%, 2%, or 5%).

If your home in West Linn or Camas is insured for $500,000 and you have a 2% wind/hail deductible, your out-of-pocket cost is $10,000 before your insurance pays a single dime. Understanding this math is crucial before you initiate a claim.

When to File a Claim vs. Paying Out of Pocket

Just because you have storm damage doesn’t mean you should immediately file an insurance claim. Every claim you file goes into a national database called the Comprehensive Loss Underwriting Exchange (CLUE). Having multiple claims on your record can cause your premiums to skyrocket or make it incredibly difficult to secure coverage in the future.

Before you call your insurance agent, we recommend using this practical decision framework:

  1. Get a Professional, Independent Inspection First: Have a trusted local contractor inspect the roof to document the exact scope of the damage.
  2. Do the Deductible Math: If the estimated cost of repairs is $2,500 and your deductible is $2,000, filing a claim to get a $500 payout is a bad financial move. The slight payout is not worth the risk of a premium increase.
  3. Assess the Damage Type: If the damage is localized to a small area, a targeted repair might be the most cost-effective path. If the damage is widespread, a full replacement is likely necessary.

To help weigh your options between making a minor fix or investing in a new system, check out our decision guide on Should I Repair or Replace My Roof?.

Step-by-Step Guide to the Roof Insurance Claim Process

If you have verified that your roof has sustained significant, storm-related damage that comfortably exceeds your deductible, it is time to file a claim. Navigating this process systematically is the best way to ensure you receive a fair settlement.

  1. Document Everything Immediately: Take clear, date-stamped photos and videos of the roof damage from the ground, any debris in your yard, and any interior water stains on your ceilings.
  2. Prevent Further Damage (Mitigation): You are contractually obligated by your insurance policy to prevent further damage to your home. If you have an active leak, you must have it temporarily tarped. Keep all receipts for emergency repairs, as your insurer should reimburse you.
  3. Contact Your Insurer: File the claim promptly. Many policies have strict time limits (often one year from the storm event) for filing weather-related claims.
  4. Prepare for the Adjuster: The insurance company will send an adjuster to inspect your roof. It is highly beneficial to have your professional roofing contractor present during this inspection. We speak the adjuster’s language and can point out less obvious structural damage, ensuring nothing is missed.

For a detailed, printable walkthrough of this entire process, refer to our comprehensive guide on How to File a Roof Damage Insurance Claim.

Understanding Your Insurance Policy and Roofing Coverage Estimates

Once the adjuster completes their inspection, you will receive an estimate document. Over 90% of insurance adjusters use a standardized estimating software called Xactimate.

When you open a Xactimate estimate, it can look like an alien language. It breaks down the project line by line, calculating the exact quantity of shingles, underlayment, drip edges, starter strips, and ridge caps required. Key elements to look for include:

  • Line Items: Ensure the estimate specifies the correct materials. For example, if you have architectural shingles, make sure the adjuster didn’t mistakenly price out cheaper 3-tab shingles.
  • Overhead and Profit (O&P): If your project requires multiple trades (e.g., roofing, gutters, and drywall repair), you are typically entitled to an additional 20% markup (10% overhead + 10% profit) to cover the coordination of the work.
  • Supplemental Claims: It is very common for a contractor to discover hidden damage—such as rotted plywood decking—only after they tear off the old shingles. When this happens, we document the rot, take photos, and submit a “supplemental claim” to your insurer to cover the extra costs before we proceed.
  • Dispute Resolution: If your insurance company’s estimate is far too low to cover a proper installation, do not sign the settlement. You have the right to invoke the Appraisal Clause in your policy, which allows independent appraisers to resolve the pricing dispute.

Frequently Asked Questions About Roof Insurance

Does homeowners insurance cover roof leaks?

Yes, but only if the leak is the direct result of a covered peril, such as a fallen tree limb puncturing the roof or wind ripping away shingles. Insurance will not cover leaks caused by old age, rusted flashing, clogged gutters, or general lack of maintenance.

What is cosmetic damage exclusion?

A cosmetic damage exclusion means your insurer will not pay to repair or replace roofing components if the damage is purely aesthetic. For example, if hail leaves shallow dents on a standing seam metal roof but does not split the metal or compromise its waterproofing, the insurer will deny the claim.

How does roof age affect my policy renewal?

Insurance companies routinely review properties during renewal cycles. If your roof is over 15 to 20 years old, the underwriter may send you a non-renewal notice, stating that they will cancel your coverage unless you replace the roof within a specified timeframe (usually 30 to 60 days).

Conclusion

Understanding your insurance policy and roofing coverage is the ultimate shield against unexpected financial stress when Northwest weather takes a turn for the worse. By knowing the difference between RCV and ACV, keeping a close eye on your roof’s age, and understanding when to file a claim, you can make smart decisions that protect both your home and your wallet.

At Raindrop Roofing NW, we are proud to be a truly local, family-owned, and independently operated company. Unlike many regional competitors who have been bought out by out-of-state investment firms, our multi-generational team lives and works right here in Beaverton and the surrounding Portland metro communities. We are committed to long-term accountability, exceptional craftsmanship, and standing by our neighbors through every storm.

If you suspect your roof has storm damage, or if you simply want a professional, honest evaluation of its condition before the next rainy season hits, we are here to help. Schedule a professional roof inspection with Raindrop Roofing NW today, and let us bring clarity and peace of mind to your roofing needs.

https://www.raindropnw.com/wp-content/uploads/2026/06/10a2f91229cb22824f31caf303598ed918697efb.jpg 1024 1536 SEO Stats https://www.raindropnw.com/wp-content/uploads/2024/05/logo-raindrop-space-300x92.png SEO Stats2026-06-15 14:13:012026-06-15 14:13:01In-Depth Guide to Understanding Your Insurance Policy and Roofing Coverage

The Ultimate Guide to How Material Choice Impacts Your Roof Cost

Roofing

Why Understanding How Material Choice Impacts Your Roof Cost Can Save You Thousands

How material choice impacts your roof cost is one of the most important things to understand before you sign a single contract or approve a single quote. The material you choose doesn’t just change the line item for shingles — it shapes your labor costs, your installation timeline, your long-term maintenance budget, your insurance premiums, and even whether your home’s structure needs reinforcement before work can begin.

Here’s a quick look at how different roofing materials compare across the factors that matter most to homeowners:

Material Lifespan Relative Upfront Cost Key Consideration
3-Tab Asphalt Shingles 15-20 years Lowest Shortest lifespan; higher long-term replacement frequency
Architectural Asphalt Shingles 25-30 years Low-Moderate Best balance of cost, durability, and curb appeal for most homes
Standing Seam Metal 50-70 years High Strong energy efficiency and insurance discount potential
Cedar Shake 20-30 years Moderate Requires regular maintenance; check local fire codes
Clay or Concrete Tile 50-100 years High Heavy; may require structural reinforcement
Natural Slate 75-150 years Highest Extremely long-lasting but demands expert installation and strong structure

Each of these materials carries a different ripple effect through your entire project. A cheaper shingle doesn’t automatically mean a cheaper roof when you factor in tear-off scope, underlayment requirements, structural needs, and how often you’ll be back on the replacement cycle. On the flip side, a premium material isn’t always the right call if your home’s structure, your neighborhood’s resale expectations, or the Oregon climate don’t support it.

This guide is written specifically for homeowners in the Portland metro area and greater NW Oregon — where rain, moss, wind, and temperature swings all play a real role in how roofing materials perform over time.

I’m Torrey Yungeberg, owner of Raindrop Roofing NW and a lifelong Oregonian with years of hands-on experience watching how how material choice impacts your roof cost plays out on real homes across our region. My team and I see the consequences of these decisions — good and bad — on every project we take on.

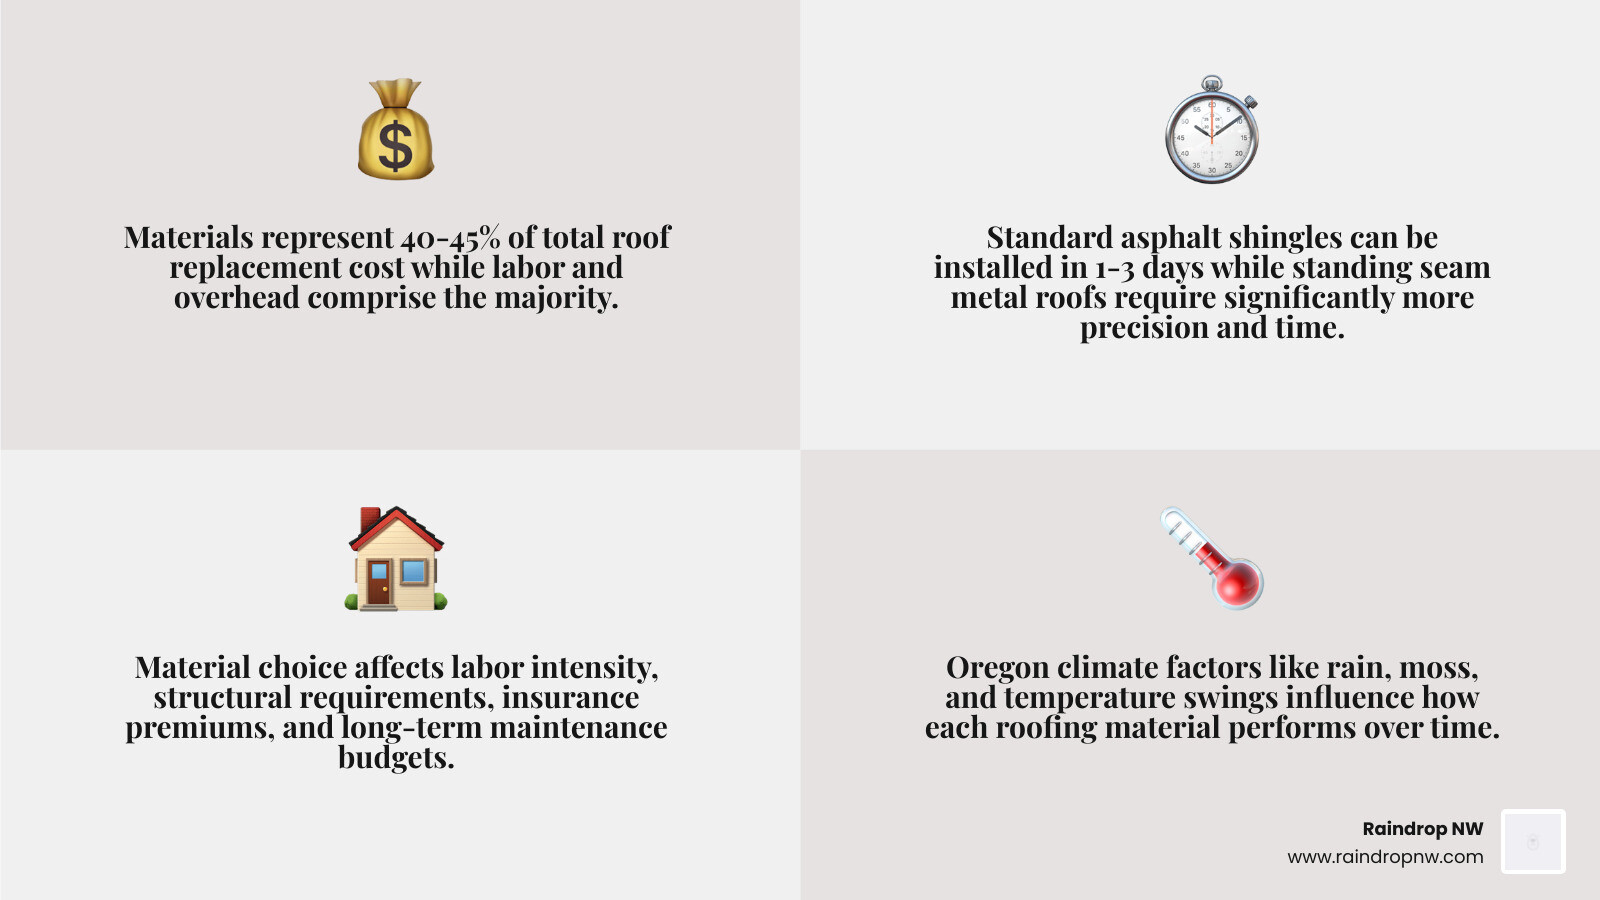
infographic showing how roofing material selection affects labor costs, lifespan, maintenance, insurance, and structural

How material choice impacts your roof cost from day one

When we sit down with a homeowner in Beaverton or Lake Oswego, the conversation often starts with the price of the “shingle.” But the surface material is just the tip of the iceberg. In 2026, materials account for approximately 40% to 45% of the total roof replacement bill, while labor and overhead make up the rest.

The material you pick dictates the labor intensity. For example, standard asphalt shingles are designed for speed and efficiency. A skilled crew can often finish a standard-sized home in one to three days. However, if you choose a standing seam metal roof, the installation speed drops because of the precision required for crimping and securing panels. This extra time on the clock directly increases your labor bill.

Waste factor is another silent budget-killer. A simple gable roof has very little waste, but a complex roof with many valleys and dormers requires more cutting. Some materials, like slate or tile, have a higher waste factor because they are fragile and can break during transit or installation. If your roof has a steep pitch, the material choice becomes even more critical. Steeper roofs require specialized safety equipment, harnesses, and more cautious material handling, which adds to the total investment.

Why how material choice impacts your roof cost goes beyond the shingles

A roof is a complete system, not just a layer of waterproof paper. When you change the surface material, you often have to change everything underneath it. This includes:

  • Underlayment: Premium materials often require high-performance synthetic underlayments or ice-and-water shields, especially in the damp Pacific Northwest.
  • Flashing: If you’re investing in a 50-year metal roof, you shouldn’t reuse old, thin flashing. You’ll need high-quality, long-lasting metal flashing at every chimney and penetration.
  • Ventilation: Different materials breathe differently. Upgrading to a premium material often triggers a need for a ventilation overhaul to meet modern building codes and ensure your warranty remains valid.
  • Disposal and Permits: Heavier materials like tile or old cedar shakes cost more to haul away and dispose of. Additionally, local jurisdictions in areas like Tigard or Hillsboro may have specific permit requirements based on the material’s weight or fire rating.

For a deeper dive into these components, check out our Roof Replacement Cost Guide for Homeowners.

How heavier and specialty materials change labor and structure needs

One of the biggest “hidden” impacts on your budget happens when you switch from a lightweight material to a heavy one. Standard asphalt shingles weigh about 2 to 3 pounds per square foot. In contrast, clay or concrete tiles can weigh between 8 and 12 pounds, and natural slate can be even heavier.

If you are moving from asphalt to tile or slate, a structural review by an engineer is often mandatory. We’ve seen cases where homes require significant structural reinforcement—adding rafters or bracing—to support the massive weight of a premium stone or tile roof. This can add thousands to the project before the first tile is even laid. Staging these materials also requires specialized equipment, like heavy-duty cranes, rather than a simple shingle ladder hoist.

Comparing common roofing materials by value, lifespan, and upkeep

In May 2026, the roofing market is seeing prices trend 12% to 18% higher than just two years ago due to labor shortages and material shifts. This makes choosing the right material for your long-term goals more important than ever.

Material Lifespan Maintenance Curb Appeal
Asphalt 20-30 Years Low Moderate
Metal 40-70 Years Very Low High/Modern
Cedar 20-30 Years High Very High/Natural
Tile 50-100 Years Moderate High/Classic
Slate 75-150 Years Low Exceptional

How material choice impacts your roof cost with asphalt shingles

Asphalt remains the most popular choice in the Portland metro area for a reason: it’s versatile. However, not all asphalt is created equal.

  • 3-Tab Shingles: These are the basic, flat shingles. They are the most affordable upfront but have the shortest lifespan (15-20 years) and the lowest wind resistance.
  • Architectural Shingles: Also known as dimensional shingles, these are the standard for most NW Oregon homes. They offer a 25-30 year lifespan and much better wind ratings (up to 130 mph).
  • Designer/Premium Shingles: These mimic the look of slate or wood shakes. They are thicker, heavier, and offer the best “curb appeal” ROI.

Deciding between these options often comes down to how long you plan to stay in your home. We explore this in detail in our Architectural vs Designer Shingle Comparison and our guide on How Shingle Grade Affects Lifespan and Appearance. If you’re looking for the best performance in our rainy climate, you might want to look at Premium Shingle Options for Pacific Northwest Homes or specifically our services for Asphalt Shingle Roofing Replacement in Savannah Oaks OR.

How material choice impacts your roof cost with metal, cedar, tile, and slate

If you’re looking beyond asphalt, you’re entering “lifetime” roofing.

Metal Roofing: Standing seam metal is a favorite in places like West Linn and Lake Oswego. It’s incredibly durable and can reduce cooling costs by 10% to 25%. While the upfront cost is higher, it often lasts 50 to 70 years. You can learn more about this in our Ultimate Metal Roofing First Addition OR guide or see why we’re considered a Best Metal Roofing Company in Raleigh Hills OR.

Cedar Roofing: Nothing beats the natural beauty of cedar, but it requires commitment. In our humid climate, cedar needs regular cleaning to prevent moss and rot. We provide specialized Cedar Roofing Installation in First Addition OR and are a Best Cedar Roofing Company in Savannah Oaks OR.

Tile and Slate: These are the heavyweights of the industry. Natural slate is the longest-lasting material, sometimes surviving 150 years. Clay and concrete tiles are also incredibly durable but require a home that can handle their weight.

Choosing the right roofing material for your climate and home style

In the Pacific Northwest, we don’t have to worry about the same hailstorms as the Midwest, but we deal with relentless moisture and the occasional heavy snow load. How material choice impacts your roof cost is often a reflection of how well that material handles our specific local “flavor” of weather.

Best material traits for hail-prone, hot/humid, and cold/snowy climates

  • Moisture and Moss: In humid or rainy areas like Portland and Gresham, algae-resistant shingles are a must. These shingles have copper granules that prevent the “black streaks” caused by algae.
  • Snow Loads: If you live in higher elevation areas like Sandy or Boring, snow shedding is a factor. Metal roofs excel here because snow slides off easily, preventing the weight from stressing your rafters.
  • Heat: In the summer, reflective “cool roofs” or metal roofing with reflective coatings can significantly lower your attic temperature.
  • Impact Resistance: While we don’t get massive hail often, falling branches are a reality. Class 4 impact-resistant shingles can sometimes qualify you for insurance premium discounts of 10% to 35%.

Matching material to architecture, resale goals, and neighborhood expectations

Your roof is roughly 40% of your home’s exterior visual. A quality roof replacement can provide a return on investment (ROI) of 60% to 70% when selling.

If you live in a neighborhood with strict HOA rules, like some parts of Tualatin or Sherwood, your material choice might be limited. However, matching the material to the architecture is key. A modern home looks fantastic with standing seam metal, while a traditional Craftsman or Tudor home might look best with thick, designer asphalt shingles or natural cedar.

The hidden project variables homeowners often miss

When we perform a free inspection, we’re looking for the things that don’t show up on a standard “per square” estimate. These variables can fluctuate wildly depending on the material you choose.

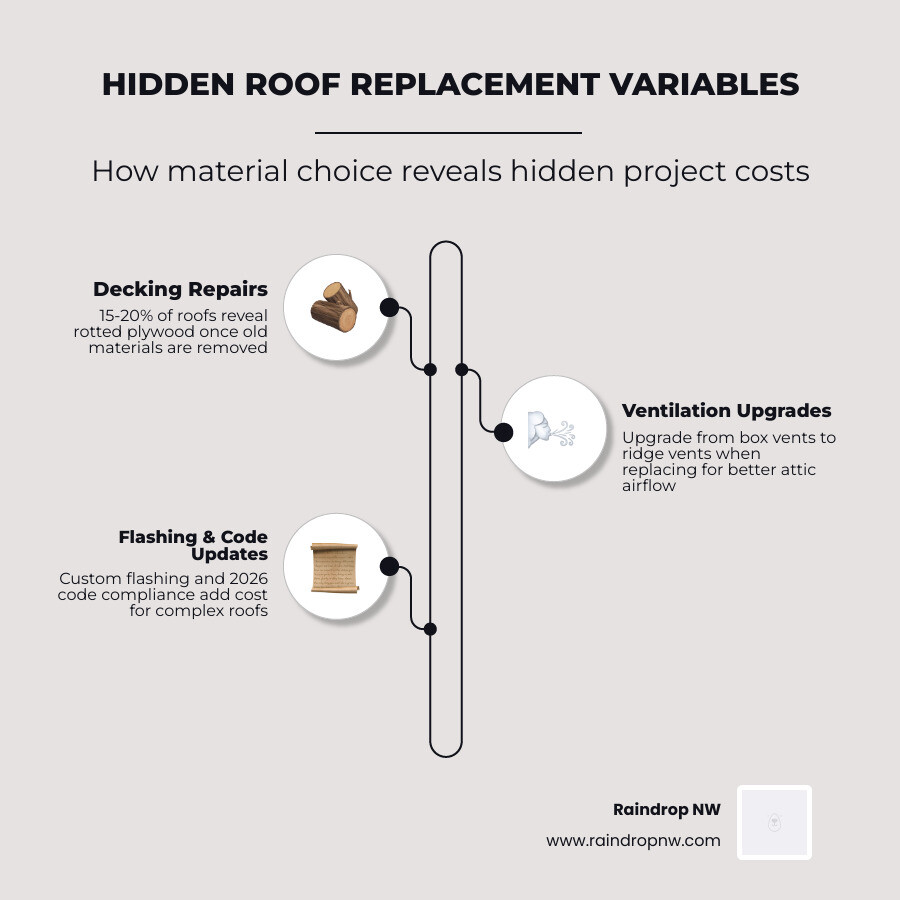
  • Decking Repairs: Once the old roof is torn off, we often find rotted plywood. This is discovered in about 15-20% of projects.
  • Ventilation Upgrades: Many older homes in Damascus or Oregon City have “choked” attics. Upgrading your material is the perfect time to switch from old box vents to a more efficient ridge vent system.
  • Flashing and Chimneys: If you have a complex roof with multiple chimneys, skylights, or dormers, the cost of custom flashing will increase.
  • Code Updates: Building codes change. Your new roof must meet 2026 standards, which might mean adding more fasteners or different types of drip edges that weren’t required 20 years ago.

How roof size, pitch, and access interact with material selection

Roofers price jobs by the “square,” which is a 100-square-foot area. But a 2,000-square-foot home doesn’t just need 20 squares of material.

  1. Pitch Multiplier: A steep roof has more surface area than a flat one for the same floor plan. A steep 12:12 pitch can require 30% more material than a shallow roof.
  2. Complexity: Every valley, dormer, and turret adds labor and waste.
  3. Access: If our trucks can’t get close to the house because of a long, narrow driveway or low-hanging trees, we have to move material by hand. This “labor carry” is a factor in the final quote.

Warranty, insurance, and energy efficiency factors to compare before you decide

Before you make your final choice, consider these three “long-term” money factors:

  1. Warranties: There’s a difference between a workmanship warranty (from us) and a manufacturer warranty (from the shingle maker). Premium materials often come with longer, non-prorated warranties.
  2. Insurance Discounts: Ask your agent if a Class 4 shingle or a metal roof will lower your premiums. In many cases, the savings over 10 years can pay for the material upgrade.
  3. Energy Efficiency: Reflective metal roofs or ENERGY STAR-rated shingles can save you $200-$600 annually on energy bills.

Questions to ask before choosing a material:

  • Is my roof structure strong enough for this weight?
  • Does this material qualify for an insurance discount?
  • What is the “true annual cost” (Price divided by Lifespan)?
  • How does this material handle moss and algae in the PNW?

infographic explaining hidden roof replacement variables like decking rot, ventilation needs, and structural reinforcement

Frequently Asked Questions about how material choice impacts your roof cost

Which roofing material is usually the most cost-effective long term?

While 3-tab shingles are the cheapest today, architectural shingles are usually the most cost-effective for the average homeowner because they last much longer for a small price increase. However, if you plan on staying in your home for 40+ years, metal roofing actually has a lower “cost per year” because you won’t have to replace it again.

Do premium roofing materials always add better resale value?

Usually, yes. A metal or designer shingle roof is a huge selling point. However, you don’t want to “over-improve” for your neighborhood. If every house on your block has standard asphalt, you might not get a 100% return on a slate roof. It’s all about balance and neighborhood fit.

What hidden issues are more common with heavier or premium materials?

Structural sagging is the biggest one. If we put heavy tile on a roof that wasn’t designed for it, the ridge line can bow. Additionally, premium materials often require custom-fabricated flashing that general contractors might not have the tools to create, which is why choosing a specialist is so important.

Conclusion

At the end of the day, how material choice impacts your roof cost is about more than just the price of the bundles at the store. It’s about the labor, the structural integrity of your home, and how much you’ll spend on maintenance over the next three decades.

In the Portland metro area, we face unique challenges like heavy rain and moss growth. Choosing a material that can stand up to the NW Oregon climate while fitting your budget is a balancing act. Whether you’re in Beaverton, Camas, or Oregon City, we’re here to help you navigate these choices with transparency and local expertise.

We believe in doing things right the first time. As a truly local, independently owned company, we aren’t answering to out-of-state investors—we’re answering to you, our neighbors.

If you’re ready to see exactly how these material choices will look on your specific home, we’d love to help. More info about residential roofing services is just a click away, or you can reach out to us for a free, no-pressure inspection to get your project started on the right foot.

https://www.raindropnw.com/wp-content/uploads/2026/06/pexels-photo-30194376.jpg 627 940 SEO Stats https://www.raindropnw.com/wp-content/uploads/2024/05/logo-raindrop-space-300x92.png SEO Stats2026-06-12 11:05:252026-06-12 11:05:25The Ultimate Guide to How Material Choice Impacts Your Roof Cost

In Depth Guide to How Portland Weather Affects Roof Lifespan

Roofing

Why Portland’s Climate Is One of the Hardest Tests a Roof Will Ever Face

Understanding how Portland weather affects roof lifespan is one of the most important things you can do as a homeowner in the Pacific Northwest. Portland’s persistent rain, high humidity, moss-friendly shade, and shifting seasons create a uniquely demanding environment — one that regularly cuts years off a roof’s life compared to drier parts of the country.

Quick answer: How does Portland weather affect roof lifespan?

  • Persistent rain — Portland averages 36 inches of rainfall and roughly 150 rainy days per year, keeping roofing materials wet for extended periods and slowing drying time
  • High humidity — Moisture lingers even between rain events, encouraging moss, algae, and lichen to take hold on shingles and under flashing
  • Moss and biological growth — Moss acts like a sponge, trapping water against the roof surface and physically lifting shingles, which accelerates decay
  • Tree canopy and shade — Roofs under heavy tree cover stay damp longer; debris clogs gutters and valleys, and biological load can reduce roof lifespan by up to 40%
  • Seasonal temperature swings — Cool, wet winters followed by warm, dry summers stress sealants, flashing, and shingle adhesives through repeated expansion and contraction
  • Shorter real-world lifespan — Asphalt shingles rated for 25–30 years by manufacturers typically last only 20–25 years in Portland conditions, and less without regular maintenance

The result? Portland roofs age faster than their manufacturer ratings suggest — and homeowners who aren’t paying attention can find themselves facing major damage long before they expected to.

I’m Torrey Yungeberg, owner of Raindrop Roofing NW, a family-owned roofing company based in Boring, Oregon, and I’ve spent years working on roofs across the Portland metro — giving me a clear, ground-level view of exactly how Portland weather affects roof lifespan in ways generic roofing advice simply doesn’t capture. In this guide, I’ll walk you through everything you need to know to protect your home and make smart, informed decisions about your roof.

Infographic showing how Portland moisture, moss, and temperature swings shorten roof lifespan by material type infographic

How Portland Weather Affects Roof Lifespan Year After Year

In May 2026, we are seeing more clearly than ever that our local climate doesn’t just “wet” a roof; it subjects it to a marathon of moisture. Portland averages about 36 to 40 inches of rain annually, spread across 150 rainy days. This means your roof is essentially under a “slow soak” for half the year.

Because our winters are mild and humid rather than freezing and dry, the moisture load stays high. Materials don’t get a chance to dry out completely between storms, creating a constant state of dampness that allows biological growth to thrive and structural components to weaken.

How Portland weather affects roof lifespan compared to drier climates

In a drier climate like Central Oregon or Arizona, a roof’s primary enemy is the sun. In the Portland metro area, it’s the lack of evaporation. Persistent moisture leads to a much higher risk of rot in the roof deck and corrosion of metal components. While a roof in a dry climate might fail because the materials become brittle from UV rays, a Portland roof often fails because moisture has found its way into the substrate, causing the wood to soften and fasteners to lose their grip.

How Portland weather affects roof lifespan through moss, algae, and lichen

If you live in neighborhoods like Lake Oswego, West Linn, or Beaverton, you know that moss is practically our unofficial state flower. But on a roof, moss is a destructive force. Moss uses “rhizoids”—root-like structures—to anchor itself into the granules of your shingles.

As the moss grows, it physically lifts the edges of the shingles. This creates a “damming” effect, where water is wicked upward and under the shingle, reaching the roof deck where it causes rot. Lichen and algae are equally problematic, as they hold moisture against the surface and accelerate the loss of protective granules.

Close-up of thick green moss growing between asphalt shingles, lifting the edges

Why seasonal temperature swings in Portland still matter

While we don’t have the extreme cold of the Midwest, our temperature fluctuations are significant. We often experience cool, damp nights followed by warm, sunny days. This creates a cycle of thermal expansion and contraction. Over time, this movement stresses the sealants around your chimney and vents, eventually causing them to crack. Furthermore, the increasing frequency of summer heatwaves in the Willamette Valley can bake shingles from the inside out if the attic isn’t properly ventilated.

Roof Lifespan by Material in Portland’s Wet Climate

When choosing a material, it’s vital to distinguish between “manufacturer ratings” and “Portland reality.” A shingle that is rated for 30 years in a lab might only give you 20 good years in the Pacific Northwest.

Material Type Manufacturer Rating Portland Reality (Maintained) Portland Reality (Unmaintained)
Asphalt (3-Tab) 20 Years 15-18 Years 10-12 Years
Asphalt (Architectural) 30 Years 22-25 Years 15-20 Years
Metal (Standing Seam) 50-70 Years 50+ Years 40 Years
Wood Shakes/Shingles 30-40 Years 25-30 Years 15-20 Years
Clay/Concrete Tile 50+ Years 50+ Years 35-40 Years

Asphalt shingles: expected lifespan in Portland vs rated lifespan

Asphalt shingles are the most common choice in areas like Tigard and Hillsboro, but they are also the most susceptible to moisture-related aging. In our climate, architectural shingles (which are thicker and more durable) are the gold standard. However, even these high-quality shingles struggle with granule loss and curling due to the constant wet-dry cycles. Without regular cleaning, an architectural roof that should last 30 years will often show signs of total failure by year 22.

Metal, tile, and wood roofs in Portland conditions

Metal roofing is increasingly popular in the Northwest because it sheds water and snow almost instantly and is immune to moss growth. Tile roofs (clay or concrete) offer incredible longevity, often lasting 50+ years, though they require a robust structure to handle the weight. Wood shakes, while beautiful and traditional in the PNW, are high-maintenance. Without specialized treatments, the natural oils in cedar can’t keep up with Portland’s moisture, leading to rot and fungal growth within 20 years.

Which roofing materials perform best in Portland and why

For the best balance of durability and cost-effectiveness in our region, we often recommend high-quality architectural shingles or standing-seam metal. These materials are designed for superior water shedding and can be treated with algae-resistant granules. To see the variety of options available for our local climate, you can check out more on roof types and products.

The Hidden Factors That Shorten Roof Life in Portland Homes

Beyond the rain itself, several “silent” factors can drastically shorten your roof’s life. At Raindrop NW, we often see roofs that should have lasted another decade fail early because of poor planning or neglect.

Why poor attic ventilation speeds up roof failure

Ventilation is just as important as the shingles themselves. In the winter, poor ventilation traps moist air from your bathroom and kitchen in the attic. This moisture condenses on the underside of your roof deck, leading to mold and wood rot. In the summer, a hot attic “bakes” your shingles from underneath, making them brittle. We follow the 1-to-300 rule (1 square foot of ventilation for every 300 square feet of attic space) to prevent this. Learn more about how ventilation reduces moisture damage.

How tree coverage and debris can cut years off a roof

In heavily wooded areas like Damascus, Boring, or the West Hills, tree canopy is a major factor. If your roof is shaded most of the day, it never dries out. Furthermore, falling needles and leaves accumulate in your roof valleys and gutters. This debris acts like a wet rag, holding moisture against the shingles 24/7. We’ve seen biological loads from unmanaged debris reduce a roof’s lifespan by as much as 40 percent.

Installation details that matter most in Portland’s climate

In a wet climate, the “extras” aren’t optional. We use synthetic underlayment instead of traditional felt because it doesn’t absorb water or rot. Proper flashing around chimneys, high-quality pipe boots, and stainless steel fasteners are critical for a roof that survives the Oregon rain. For more details on these critical components, see our guide on how to protect your home from water damage through your roof.

Early Warning Signs Portland Weather Is Damaging Your Roof

You don’t want to wait for a puddle on your living room floor to realize your roof is failing. In Portland, the signs are often subtle at first.

The first signs of moisture damage homeowners often miss

Keep an eye out for “soft spots” when walking on the roof (though we recommend letting a pro do the walking). Inside the house, look for dark streaks on your attic rafters or a faint mildew smell. These indicate that how Portland weather affects roof lifespan is already taking a toll through hidden condensation. You can find out more about what we look for during a professional roof inspection.

When to schedule inspections after Portland storms and rainy seasons

We recommend a professional check-up at least once every two years, but preferably every year for older roofs. The best times are late spring (to assess winter damage) and early fall (to prepare for the coming rains). It’s also wise to check your roof after major wind events or “atmospheric rivers.” Read more about how often you should have your roof inspected and how weather events trigger the need for inspections.

Repair or replace after Portland moisture and moss damage?

If your roof has localized damage—like a single leaky pipe boot or a few missing shingles from a windstorm—a repair is usually the most cost-effective move. However, if you see widespread moss growth, brittle shingles that crack when touched, or sagging areas in the roofline, a full replacement is likely necessary. Replacing an aging roof before it fails completely can save you thousands in interior water damage repairs.

Maintenance Steps That Extend Roof Life in Portland

The good news is that you aren’t helpless against the weather. A little bit of proactive care goes a long way in our damp environment.

The most effective maintenance routine for Portland homeowners

  1. Gutter Cleaning: Do this at least twice a year—once in late fall after the leaves drop and once in spring.
  2. Debris Removal: Use a leaf blower or a soft brush to clear valleys. Never use a pressure washer!
  3. Moss Treatment: Use zinc or copper strips at the ridge, or apply a professional, pH-balanced moss killer.
  4. Branch Trimming: Keep branches at least 6 to 10 feet away from your roof to prevent shade and physical damage.

For a deeper dive, check out our tips on how to extend the life of your roof and other water damage prevention tips.

Why regular inspections add years to a roof in wet climates

A professional eye can catch a cracked sealant or a loose flashing piece that you might miss from the ground. Catching these “small” issues early prevents them from turning into “big” structural rot problems. This proactive approach is the “gold standard” for Pacific Northwest homeowners. See why regular inspections catch problems early and learn about inspection frequency for PNW homes.

Mistakes to avoid when maintaining a Portland roof

The biggest mistake we see is homeowners using a pressure washer to “clean” moss. This blasts the protective granules off your shingles, effectively aging your roof by 10 years in a single afternoon. Another common error is ignoring “minor” gutter clogs; when gutters overflow, water backs up under the eaves, rotting the fascia boards and roof edge.

Frequently Asked Questions About How Portland Weather Affects Roof Lifespan

Is a 30-year roof really going to last 30 years in Portland?

In the real world of the Portland-Metro area, the answer is usually no. While the manufacturer’s warranty might cover defects for 30 years, the environmental stress of 150 rainy days a year usually limits the functional life of an asphalt roof to 20-25 years. Proper maintenance can push it closer to that 30-year mark, but neglect will drop it much lower.

How often should Portland homeowners have their roof inspected?

We recommend a professional inspection every 12 to 24 months. If you have heavy tree cover or an older roof (15+ years), an annual inspection is the safest bet to ensure you aren’t surprised by a sudden leak during a December downpour.

What time of year is best for roof maintenance in Portland?

September and October are the “golden months” for roof prep. The weather is usually dry enough for repairs and moss treatments to set properly before the heavy rains return in November. May and June are also excellent for clearing away the debris left behind by winter storms.

Conclusion

Planning for the long-term health of your home means respecting the power of the Oregon climate. By choosing the right materials, ensuring proper ventilation, and sticking to a consistent maintenance schedule, you can ensure your roof protects your family for decades to come.

At Raindrop NW, we’ve built our reputation on being a truly local, family-owned company that understands the specific challenges of the Portland metro. We aren’t an out-of-state firm; we live and work in the same rainy weather you do. For more local expertise, read our ultimate guide to roof care in Portland Oregon or explore our residential roofing services.

If you’re concerned about how your roof is holding up, don’t wait for the next atmospheric river to find out. Contact us today for a free, honest inspection and let’s make sure your home stays dry.

https://www.raindropnw.com/wp-content/uploads/2026/06/photo-1711384675185-f6b2f654fdba.jpeg 721 1080 SEO Stats https://www.raindropnw.com/wp-content/uploads/2024/05/logo-raindrop-space-300x92.png SEO Stats2026-06-11 12:37:232026-06-11 12:37:23In Depth Guide to How Portland Weather Affects Roof Lifespan

The Complete Guide to How Roof Age Affects Your Insurance Claim

Roofing

How Does the Age of My Roof Affect My Insurance Claim in Beaverton?

How roof age affects your insurance claim comes down to one core issue: the older your roof, the less your insurer may pay — and in some cases, the less willing they may be to cover it at all. Here’s a quick breakdown of what to expect:

Roof Age and Insurance Impact at a Glance:

Roof Age Typical Insurance Outcome
Under 10 years Full replacement cost coverage, lowest premiums
10-15 years Inspections required, possible premium surcharges
15-20 years Coverage restrictions, possible switch to actual cash value (ACV)
20+ years Non-renewal risk, limited options, ACV-only or denial

Most homeowners don’t think much about their roof’s age — until a storm rolls through and the insurance check comes back far lower than expected. That gap between the cost of a full replacement and what your insurer actually pays can be substantial. It’s not a glitch in the system. It’s how the system is designed.

Insurance companies use your roof’s age as a direct measure of risk. Older roofs are statistically more likely to fail, leak, or sustain damage in a storm. So as your roof ages past certain milestones — typically 10, 15, and 20 years — your insurer may raise your premiums, require a professional inspection, reduce your payout to the depreciated value of your roof, or decline to renew your policy altogether.

For homeowners in Beaverton and across the Portland metro, where wet winters, wind events, and moss growth can accelerate wear, understanding these thresholds before something goes wrong is genuinely important.

I’m Torrey Yungeberg, owner of Raindrop Roofing NW, and after years of working alongside Oregon homeowners navigating roof damage and insurance claims, I’ve seen how roof age affects your insurance claim outcome — often in ways families didn’t see coming. In the sections ahead, I’ll walk you through exactly what insurers look at, where the coverage gaps appear, and what you can do right now to protect yourself.

Infographic showing roof age insurance timeline from 0 to 20+ years with coverage changes at each milestone infographic

How Roof Age Affects Your Insurance Claim

roof inspection being performed by professional roofer to document damage for claim

When storm winds tear through Portland or a heavy snow and ice event hits Beaverton, your immediate instinct is to look up at your roof and worry about leaks. If you see missing shingles or sagging areas, your next step is usually to file a claim. However, the age of your roof acts as a filter through which your insurance provider views the entire event.

Insurers do not look at a 3-year-old roof and a 20-year-old roof the same way, even if both suffered damage during the exact same storm. For a newer roof, the insurance company assumes the structure was in peak condition and failed solely due to the extreme weather. For an older roof, they will scrutinize whether the damage was caused by the storm or if the roof simply failed because it had reached the end of its natural lifespan.

Understanding this distinction is key to knowing How to File a Roof Damage Insurance Claim successfully. If an adjuster determines that normal wear and tear, rot, or lack of maintenance allowed the storm to cause damage, they may deny the claim entirely. Insurance is designed to cover sudden, accidental damage—not the predictable deterioration of an aging home asset.

The RCV vs. ACV Depreciation Gap

The single most expensive surprise for homeowners during a claim is the difference between Replacement Cost Value (RCV) and Actual Cash Value (ACV).

  • Replacement Cost Value (RCV): This coverage pays to replace your damaged roof with brand-new, equivalent materials at today’s market prices, minus your deductible. The age of your roof does not reduce your final payout.
  • Actual Cash Value (ACV): This coverage pays for what your roof was worth at the moment it was damaged. The insurer calculates the cost of a new roof and then subtracts depreciation based on how old your roof is and how much of its useful life has been used up.

This gap can leave you with massive out-of-pocket expenses. If you are wondering, Does Insurance Cover Roof Replacement? the answer depends heavily on which of these two coverage types is active on your policy when you file.

Understanding how roof age affects your insurance claim under RCV policies

If you have an RCV policy, your insurer will still calculate depreciation initially, but they handle the payout in a two-step process.

First, they send you an initial check based on the ACV (the depreciated value of the roof). This allows you to get the project started. Once the work is completed by a licensed roofing contractor and a final invoice is submitted, the insurance company releases the remaining funds—known as recoverable depreciation.

Even with an RCV policy, how roof age affects your insurance claim is still relevant. If your roof is past a certain age threshold (often 15 years for standard architectural shingles), your insurer may have quietly converted your policy from RCV to ACV at your last renewal. Many homeowners do not notice this change on their policy declarations page until they file a claim and discover they cannot recover the depreciation.

How roof age affects your insurance claim under ACV policies

Under an ACV policy, depreciation is non-recoverable. The insurer calculates the straight-line depreciation of your roof and cuts you a single check for that depreciated amount, minus your deductible.

Let’s look at how this depreciation curve impacts your wallet over time, assuming a standard deductible is applied:

  • At 5 Years Old (approx. 18% depreciation): The insurer covers the vast majority of the replacement value, leaving you with a relatively small out-of-pocket responsibility beyond your deductible.
  • At 10 Years Old (approx. 36% depreciation): The depreciated value drops, meaning your insurance payout decreases and your out-of-pocket share increases.
  • At 15 Years Old (approx. 55% depreciation): The insurance payout covers less than half of the replacement value, shifting the majority of the financial responsibility to you.
  • At 20 Years Old (approx. 73% depreciation): The insurance payout is minimal, leaving you to cover almost the entire replacement value out of pocket.

As you can see, as the roof ages, the financial burden of a storm-related replacement shifts almost entirely onto you.

Key Age Thresholds and Material Factors That Trigger Insurance Changes

In the insurance world, your roof’s age isn’t just a number—it is a series of risk milestones. As your roof crosses these thresholds, insurers adjust their underwriting guidelines to protect themselves from high-probability claims.

Roof Material Expected Lifespan Insurer Scrutiny Begins ACV Switch Risk Non-Renewal Risk
3-Tab Asphalt Shingles 15–20 Years Year 8 Years 13–16 Years 18–22
Architectural Shingles 25–30 Years Years 10–12 Years 18–22 Years 22–28
Metal Roofing 40–70 Years Year 20 Years 30–35 Year 40+
Slate & Clay Tile 50–100+ Years Year 30 Years 35–40 Year 50+
Wood Shakes 20–40 Years Year 10 Years 15–20 Year 20+ (High fire risk)

Under 10 Years: The Safe Zone

If your roof is under 10 years old, you are in the insurance “safe zone.” Insurers view these roofs as low-risk. You will enjoy the lowest premium rates, full RCV coverage, and a very low likelihood of being asked for a professional roof inspection during policy renewals. Claims filed on roofs in this age bracket are typically processed quickly with minimal pushback regarding wear and tear.

10 to 15 Years: Scrutiny and Inspections Begin

Once your roof hits double digits, insurers start paying closer attention. In the Pacific Northwest, ten years of damp weather, wind, and heavy tree canopy coverage can lead to moss buildup and minor shingle lifting.

During renewals in this window, your insurer may require a professional roof inspection to verify that the structure is still sound. They may also apply premium surcharges or increase your wind and hail deductibles. To keep your coverage intact, it is wise to know How Often Should You Have Your Roof Inspected? so you can catch minor issues before an insurance inspector flags them.

15 to 20 Years: Coverage Restrictions and ACV Switches

This is the most critical threshold for standard asphalt shingle roofs. Between 15 and 20 years, standard architectural shingles are nearing the end of their peak performance life.

During this window, many insurance carriers will automatically switch your roof coverage from RCV to ACV. They may also exclude certain types of cosmetic damage or refuse to cover roof leaks altogether, attributing them to wear and tear. If your roof is in this age range, you face a major decision: Should I Repair or Replace My Roof? Proactively replacing your roof at this stage can prevent you from being locked into a highly restrictive policy.

20+ Years: Non-Renewal and Denial Risks

Once an asphalt roof passes the 20-year mark, it becomes a major liability in the eyes of underwriters. Many standard insurance carriers will outright refuse to renew your homeowners policy unless the roof is completely replaced.

If your policy is non-renewed due to roof age, you may have only 30 to 60 days to find new coverage. This often forces homeowners to turn to surplus lines carriers or state-sponsored high-risk insurance pools, which offer significantly less coverage for much higher premiums.

Material Lifespans and Insurer Preferences

Insurers evaluate roof age relative to the expected lifespan of the material, not just calendar years:

  • Asphalt Shingles: The most common material, but also the most scrutinized. Standard 3-tab shingles are viewed unfavorably after 12–15 years, while high-quality architectural shingles are usually trusted up to 20 years.
  • Metal Roofing: Highly favored by insurers. Because metal roofs are fire-resistant and shed water and snow easily, insurers often extend full coverage terms for 30 to 40 years before requiring inspections.
  • Slate and Tile: These materials can last a century. Insurers appreciate their durability and fire resistance, though they do look closely at the underlying underlayment, which typically wears out faster than the slate or tile itself.
  • Wood Shakes: Viewed with extreme caution. Wood shakes carry high fire risks and are prone to rot and moss in the damp climate of Western Oregon and Southwest Washington. Some insurers will not cover wood roofs at all without expensive fire-retardant treatments.

Roof Shape and Wind Mitigation

The design of your roof also influences how insurers calculate risk and premium rates.

  • Hip Roofs: Sloped on all four sides, hip roofs perform exceptionally well in high winds. Insurers view them favorably because wind flows over them easily, reducing the risk of shingles blowing off.
  • Gable Roofs: Sloped on only two sides, gable roofs have flat end walls that can catch wind like a sail. They carry a slightly higher risk of wind damage.
  • Flat Roofs: Common on modern homes and commercial buildings, flat roofs are prone to water ponding and require specialized low-slope membrane materials. Insurers scrutinize flat roofs closely for drainage issues and often charge higher premiums.

Proactive Steps to Protect Your Coverage and Lower Premiums

You do not have to wait for a storm or a non-renewal notice to take control of your roof insurance situation. By being proactive, you can protect your coverage, avoid unexpected out-of-pocket expenses, and even secure premium discounts.

First, regular maintenance is your best defense. Clearing moss, keeping gutters clean, and replacing damaged shingles promptly shows insurers that you are actively preventing neglect-related failures. Knowing How to Extend the Life of Your Roof is both a home maintenance necessity and an insurance safeguard.

Second, replacing an aging roof before your insurer forces your hand can save you money in the long run. A new roof can help lower your homeowners insurance premiums, especially if you upgrade to impact-resistant shingles or highly durable metal roofing. In fact, many homeowners realize a noticeable reduction in their annual premiums after a full replacement, as insurers reward the reduced risk of leaks and structural damage.

Essential Documentation for Homeowners

If you ever need to file a claim, having a well-organized paper trail is your greatest asset. Insurers are far less likely to argue about wear and tear if you can prove exactly how well you have cared for your roof.

We highly recommend keeping a physical and digital “Roof History Folder” containing:

  • The Original Installation Invoice: Proves the exact year, materials used, and the contractor who performed the work.
  • Permit Records: Demonstrates that the roof was installed to local building codes.
  • Manufacturer Warranties: Verifies the rated lifespan of your shingles or metal panels.
  • Repair Receipts: Shows a history of proactive maintenance.
  • Annual Photo Evidence: Clear photos taken from the ground each year to prove the roof’s condition prior to any storm event.

Having this paperwork ready is a key part of understanding How Regular Inspections Catch Problems Early and protect your home’s insurability.

Frequently Asked Questions About Roof Age and Insurance

Can I get homeowners insurance with a 20-year-old roof?

Yes, but your options will be limited. Most standard, preferred insurance carriers will decline to write a new policy for a home with an asphalt shingle roof that is 20 years or older. To secure coverage, you may need to accept an Actual Cash Value (ACV) policy, agree to a higher wind/hail deductible, pass a strict professional inspection, or purchase a policy from a specialty high-risk insurer at a significantly higher premium rate.

Does a new roof lower homeowners insurance premiums?

Yes, in almost all cases. Installing a new roof reduces the insurer’s risk of water damage and structural claims. You can expect a premium discount, depending on your carrier and the materials you choose. Opting for wind-rated, fire-resistant, or impact-resistant materials (such as Class 4 asphalt shingles or metal roofing) will yield the highest potential savings.

Should I replace my roof before filing an insurance claim?

No. You should never tear off or permanently repair a damaged roof before filing a claim and allowing the insurance adjuster to inspect it. Doing so destroys the physical evidence needed to prove that storm damage occurred. You should take immediate, temporary steps to mitigate further damage—such as putting a tarp over a leak—but leave the damaged materials in place for the adjuster’s evaluation.

Conclusion

Understanding how roof age affects your insurance claim is essential for protecting your home and your financial peace of mind. As your roof crosses the 10, 15, and 20-year milestones, the risk of coverage drops, premium hikes, and expensive ACV claim payouts increases dramatically.

At Raindrop NW, we believe in helping our neighbors across Beaverton, Portland, Hillsboro, Tigard, and the surrounding communities navigate these complex decisions with honesty and clarity. We are a truly local, family-owned company with multi-generational roots in the community. We are committed to long-term service, certified craftsmanship, and genuine accountability, offering free inspections and estimates to help you make the best decision for your home.

Whether you need a professional inspection to satisfy your insurer, a proactive repair to extend your roof’s lifespan, or a complete replacement to restore your replacement cost coverage and lower your premiums, we are here to help.

Ready to find out where your roof stands? More info about residential roofing services is just a click away. Reach out to us today to schedule a comprehensive, transparent evaluation of your roof’s condition.

https://www.raindropnw.com/wp-content/uploads/2026/06/photo-1710139323182-69622cad5c3b.jpeg 720 1080 SEO Stats https://www.raindropnw.com/wp-content/uploads/2024/05/logo-raindrop-space-300x92.png SEO Stats2026-06-08 12:13:412026-06-08 12:13:41The Complete Guide to How Roof Age Affects Your Insurance Claim

How to File a Roof Damage Insurance Claim

Roofing

Understanding Covered Perils and Policy Exclusions

Before diving into the paperwork, it is essential to understand what your homeowners insurance actually covers. In the insurance world, a “peril” is a specific event that causes damage. Most standard homeowners policies in the Portland metro area are “open peril” policies for the structure of your home, meaning they cover everything except for specific items listed as exclusions.

Commonly covered perils for roofs include:

  • Wind Damage: High winds can lift, crack, or completely rip shingles from your roof deck.
  • Hail Impact: Hail can knock the protective granules off shingles, leaving the asphalt mat exposed to UV rays and leaks.
  • Fallen Trees: If a Douglas fir or heavy branch comes down during a storm, the structural damage is typically covered.
  • Fire and Lightning: Direct strikes or house fires are standard covered events.
  • Snow and Ice Weight: The heavy, wet snow we occasionally get in the NW can cause sudden structural failure or collapse.

However, insurance is designed to protect you from sudden and accidental events, not the inevitable passage of time. General wear and tear, aging, and deterioration are almost never covered. If your roof is 30 years old and simply reaching the end of its life, insurance will not pay for a replacement. Similarly, damage resulting from maintenance neglect—like allowing moss to rot your shingles for a decade—can lead to a denied claim. To keep your home safe, we recommend following Water Damage Prevention Tips for Pacific Northwest Homeowners to ensure your roof stays in “insurable” condition.

Identifying Sudden vs. Gradual Damage

Distinguishing between a covered accident and gradual aging is where many homeowners get stuck. Sudden damage is random and tied to a specific date—like a windstorm on a Tuesday night. Gradual damage is uniform across the whole roof, such as widespread fading, curling shingles, or brittle materials.

If you notice a leak, it’s important to act fast. Insurance companies expect you to be proactive. Learning how to protect your home from water damage through your roof can help you identify these issues before they become massive interior headaches that an adjuster might blame on “long-term seepage.”

How to File a Roof Damage Insurance Claim: A Step-by-Step Guide

Homeowner using a smartphone to take photos of roof damage for an insurance claim

Once you’ve confirmed there is damage, the clock starts ticking. Most policies have a filing window, often ranging from 30 to 60 days for the initial report, though some allow up to a year. Delaying can make it harder to prove the damage was caused by a specific storm rather than just old age. If the damage is severe and causing active leaks, you may need to refer to our Emergency Roof Repair Beaverton OR Guide to stabilize your home immediately.

Essential Documentation Before You File a Roof Damage Insurance Claim

Your claim is only as strong as your evidence. Before you even pick up the phone to call your agent, gather the following:

  • Photos and Videos: Take wide shots of the house and close-ups of the damage. If you see shingles in the yard, photograph them where they landed.
  • Interior Evidence: Document water stains on ceilings, damp insulation in the attic, or damaged personal belongings.
  • Date and Time: Note exactly when the storm occurred. You can often find local weather reports to back this up.
  • Home Inventory: Keep a list of any personal property damaged by roof leaks.

Having this folder ready will make the “Proof of Loss” form much easier to complete.

Working with Your Insurer to File a Roof Damage Insurance Claim

When you call your insurance company, they will assign you a claim number and a claims representative. This is the time to confirm your coverage details. Ask specifically about your deductible and whether you have a “Replacement Cost Value” (RCV) or “Actual Cash Value” (ACV) policy.

Your policy likely includes a “duty to mitigate,” which means you must take reasonable steps to prevent further damage. This might involve putting a tarp over a hole or placing buckets under a leak. Keep every receipt for these temporary fixes; they are usually reimbursable as part of the claim. To avoid being caught off guard by future storms, it helps to know how often should you have your roof inspected so you have a baseline of your roof’s condition before the damage happens.

The Role of Adjusters and Professional Roof Inspections

After you file, the insurance company will send out an adjuster to evaluate the damage. Their job is to determine the cause of loss and the extent of the damage. While adjusters are professionals, they are often handling dozens of claims at once and might miss subtle signs of hail bruising or wind-lifted shingles that aren’t completely missing.

This is why we highly recommend having a professional roofing contractor present during the adjuster’s visit. A contractor can speak the technical language of roofing, point out hidden issues, and ensure the “scope of work” includes everything needed to bring the roof back to local building codes. Regular maintenance and knowing how regular inspections catch problems early can also provide a history of care that supports your claim.

Why Contractor Advocacy Matters

A certified roofer provides a line-item estimate that reflects real-world local costs in areas like Beaverton and Portland. Adjusters often use standardized software that may not account for the specific requirements of Oregon building codes or the higher cost of quality materials in the NW. Whether it’s a home or a business, recognizing the signs your commercial roof needs attention and having an expert advocate for you ensures that the settlement actually covers the full cost of a proper repair.

Navigating Payouts: Actual Cash Value vs. Replacement Cost

Understanding how you get paid is the most confusing part of how to file a roof damage insurance claim. There are two primary types of payouts:

Feature Actual Cash Value (ACV) Replacement Cost Value (RCV)
Payout Basis Current value (minus depreciation) Full cost to replace today
Out-of-Pocket Higher (you pay for the “age” of the roof) Lower (mostly just your deductible)
Payment Structure One check Two checks (ACV first, then depreciation)

With an ACV policy, if your 20-year-old roof is damaged, the insurance company will deduct 20 years of “wear and tear” from your check. This often leaves homeowners with a significant bill. With an RCV policy, they pay to replace the roof with a brand-new version at today’s prices. You’ll usually receive an initial check for the ACV, and once the work is finished, the “recoverable depreciation” is released to cover the rest. Deciding should I repair or replace my roof often depends on which of these policies you have.

Understanding Deductibles and Premium Impacts

Your deductible is the amount you pay out of pocket before insurance kicks in. In Oregon, this is usually a fixed dollar amount (like $1,000 or $2,500). Some coastal or high-wind areas may have a percentage-based deductible, which can be much higher.

Filing a claim can affect your insurance profile. Information about your claim is recorded in the CLUE (Comprehensive Loss Underwriting Exchange) report, which stays with you and your property for up to seven years. While one claim might not always raise your rates, multiple claims within a 3-5 year window almost certainly will. This is why it’s vital to extend the life of your roof through proper maintenance to avoid filing for minor issues.

Avoiding Common Pitfalls in the Claims Process

The stress of a damaged roof can make you a target for “storm chasers”—unlicensed contractors who flood a neighborhood after a storm, offer “free roofs,” and disappear before the warranty is ever needed.

To protect yourself, avoid these common mistakes:

  • Waiting too long to file: Documentation gets harder to prove as time passes.
  • Hiring unlicensed contractors: If they aren’t licensed and insured, you could be liable for injuries on your property.
  • Incomplete documentation: Missing the interior leak photos could lead to that part of the claim being denied.
  • Signing over your rights: Be very careful with “Assignment of Benefits” (AOB) contracts that give a contractor total control over your insurance check.

What to Do if Your Claim is Denied

If you receive a denial letter, don’t panic. Read the explanation carefully. Common reasons for denial include “pre-existing damage” or “damage below the deductible.” You have the right to appeal. You can request a second inspection, hire a public adjuster (who works for you, not the insurance company), or provide a more detailed report from an independent roofing expert to dispute the findings.

Frequently Asked Questions about Roof Insurance Claims

Will filing a roof damage claim increase my insurance premiums?

It depends. In many cases, a single claim for an “Act of God” (like a storm) won’t result in an immediate surcharge. However, if there was widespread damage in your area, the insurance company may raise rates for the entire zip code to balance their risk. Statistics from other regions show that a single claim can sometimes increase premiums by 10-25% at renewal. Always weigh the cost of the repair against the potential long-term premium increase before filing for minor damage.

How long does the roof insurance claim process typically take?

Most claims wrap up in 30 to 60 days. You’ll usually hear from an adjuster within 48 hours of filing. The inspection happens within a week, and the first check typically arrives 10-14 days after that. The process can stretch into months if there is a disagreement between the contractor and the adjuster or if additional paperwork is required for code upgrades.

What happens if my roof insurance claim is denied?

If denied, request a written explanation citing the specific policy language used. You can provide additional evidence, such as photos of the roof before the storm or a report from a manufacturer-certified contractor. If you still disagree, you can file a formal appeal or contact the Oregon Division of Financial Regulation for assistance.

Conclusion

Navigating how to file a roof damage insurance claim is much easier when you have a local partner who understands the specific challenges of the Pacific Northwest climate. At Raindrop NW, we’ve built our reputation on accountability and long-term service. As a truly local, independently owned company based in Beaverton, we aren’t going anywhere once the storm clouds clear.

We specialize in helping homeowners and businesses in Portland, Tigard, Hillsboro, and the surrounding communities get their roofs back in top shape with certified craftsmanship and transparent communication. If you suspect your roof has storm damage, don’t wait for the next heavy rain to find out for sure.

Contact Raindrop NW for a professional inspection and expert guidance on your residential roofing needs.

https://www.raindropnw.com/wp-content/uploads/2026/06/photo-1744820937908-0fc46bb8b2f6.jpeg 810 1080 SEO Stats https://www.raindropnw.com/wp-content/uploads/2024/05/logo-raindrop-space-300x92.png SEO Stats2026-06-05 11:53:222026-06-05 11:53:22How to File a Roof Damage Insurance Claim

Breaking the Ice and Saving Your Roof

Roofing

Why Understanding How Ice Dams Form and What to Do About Them Could Save Your Roof This Winter

How ice dams form and what to do about them is something every homeowner in the Pacific Northwest and northern climates needs to understand before winter hits hard. Here’s the short version:

How ice dams form:

  1. Heat escapes from your living space into the attic
  2. That heat warms the upper portion of your roof, melting snow
  3. Meltwater runs down toward the cold eaves and refreezes
  4. Ice builds up along the roof edge, blocking further drainage
  5. Backed-up water works its way under shingles and into your home

What to do about them:

  • Right now: Safely remove snow from your roof with a roof rake and call a professional if water is already leaking inside
  • This season: Keep gutters clear and avoid chipping or salting the ice
  • Long-term: Seal attic air leaks, upgrade insulation to R-50, and ensure proper soffit-to-ridge ventilation

That ridge of ice along your eaves might look like a winter postcard, but it’s actually a warning sign. Ice dams don’t just stress your gutters — they push water beneath your shingles, soak your insulation, and can lead to mold, damaged ceilings, and costly structural repairs. In northern climates, where freezing temperatures and heavy snowfall go hand in hand, this is one of the most common and preventable causes of serious roof damage.

I’m Torrey Yungeberg, owner of Raindrop Roofing NW, and after years of inspecting Oregon roofs damaged by winter weather, I’ve seen the destruction that comes from not knowing how ice dams form and what to do about them before it’s too late. Let’s walk through everything you need to know to protect your home this season and for winters to come.

infographic showing the ice dam melt-freeze cycle from attic heat loss to eave refreezing and water infiltration under

Understanding How Ice Dams Form and What to Do About Them

To effectively manage your home during a Beaverton winter, you have to look past the icicles. An ice dam is essentially a thick ridge of solid ice that builds up along the eaves (the edges) of your roof. While they might look like a natural part of winter, they are actually a sign of a “feverish” house.

thick ice building up in gutters and along the roof edge - how ice dams form and what to do about them

The process is a cycle of melting and refreezing. For an ice dam to form, you need three ingredients: snow on the roof, subfreezing outdoor temperatures, and a roof surface that is unevenly heated. When the higher part of your roof surface rises above 32°F while the lower eaves remain below freezing, you have the perfect recipe for trouble.

As snow melts on the warm upper part of the roof, the water flows down until it hits the cold eave. Because the eave hangs out past the walls of the house, it isn’t warmed by the attic air; it stays at the outdoor temperature. The water refreezes there, creating a literal dam. As more snow melts, the water pools behind this ice wall. Since it has nowhere to go, it backs up under the shingles.

This leads to significant shingle damage, as the freezing water can lift the edges of the shingles, allowing moisture to reach the wooden decking and eventually your ceiling. If you notice any of these signs, you likely have an ice dam:

  • Large, heavy icicles forming only on the gutter edge (not on the gutters themselves).
  • Ice emerging from your exterior soffit vents.
  • Water or ice buildup behind the siding or around window frames.
  • Stains on your interior ceilings or walls near the outside of the house.

If you’ve spotted these issues, you may need to look into residential roofing repairs to assess the extent of the moisture infiltration.

The Root Causes: Why Roof Temperatures Become Uneven

It is a common misconception that ice dams are a “roofing problem.” In reality, they are almost always an insulation and ventilation problem. We like to say that the roof is just the place where the symptoms show up. The root cause is heat escaping from your heated living space into the attic.

There are three primary ways heat moves into your attic to cause that uneven melting:

  1. Conduction: Heat moves directly through solid materials, like your ceiling drywall and wooden framing.
  2. Convection: Warm air rises. If there are holes in your ceiling (attic bypasses), warm air will flow right into the attic.
  3. Radiation: Heat radiates off the surface of your insulation or attic floor onto the underside of the roof deck.
Heat Transfer Method How it Affects Your Roof Common Culprit
Conduction Heat travels through the building materials themselves. Thin or compressed insulation.
Convection Warm air escapes through gaps and rises to the peak. Unsealed light fixtures, plumbing stacks, and attic hatches.
Radiation Heat waves move through the air space to warm the wood. Lack of radiant barriers or very high indoor temperatures.

Air leakage is often the biggest offender. Small gaps around chimneys, recessed “can” lights, and electrical wires act like little chimneys, pumping warm, moist air into the attic. This air quickly warms the roof deck above the freezing point. If you haven’t had your roof looked at lately, a professional roof inspection can help identify these “hot spots” before the next big snowstorm hits in 2026.

How Ice Dams Form and What to Do About Them in an Emergency

If you wake up and find water dripping from your window frame or a brown spot forming on your bedroom ceiling, you are in an emergency situation. You need to act fast, but you also need to act safely.

The Do’s of Emergency Removal:

  • Roof Raking: Use a long-handled roof rake to pull fresh snow off the first three to four feet of the roof while standing safely on the ground. This removes the “fuel” for the ice dam.
  • Professional Steaming: This is the gold standard for removal. Professionals use low-pressure steam to melt through the ice without damaging the shingles.
  • Emergency Channeling: In a pinch, on a slightly warmer day, you can use a hose with tap water to melt a vertical channel through the ice dam. Start at the bottom and work up. This gives the pooled water a path to drain off the roof.

The Don’ts (Safety Warnings):

  • Avoid Hammers and Chippers: Never go onto a snowy roof with a hammer or ice pick. You are almost guaranteed to punch a hole through your shingles, which are brittle in the cold.
  • No Salt or Rock Salt: These chemicals can corrode your gutters and kill the landscaping below when the snow finally melts.
  • Avoid Heat Cables in an Emergency: Installing heat cables over an existing ice dam is ineffective and can be a fire hazard.

For immediate help with leaks or structural concerns, our team provides comprehensive residential roofing services to help Beaverton homeowners dry out and secure their homes.

Long-Term Prevention: Insulation, Air Sealing, and Ventilation

While emergency fixes get you through the night, the only way to stop ice dams for good is to fix the thermal environment of your attic. The goal is to keep the roof temperature the same as the outdoor temperature.

1. Insulation (The Blanket) In our climate, the current recommendation for 2026 is to have attic insulation at a minimum of R-49 or R-50. If your insulation is less than 12 inches thick, you likely don’t have enough. Adding more insulation slows the conduction of heat from your home into the attic space.

2. Air Sealing (The Seal) Before you add insulation, you must seal the leaks. We use expanding foam and caulk to close off attic bypasses—those gaps around plumbing pipes, light fixtures, and the attic hatch. If you skip this step, the warm air will simply “wind wash” through your new insulation, rendering it much less effective.

3. Ventilation (The Breath) A cold attic needs to breathe. We follow the 1:300 rule: you should have at least 1 square foot of vent opening for every 300 square feet of attic floor. This is achieved through a combination of:

  • Soffit Vents: These bring cold air in at the bottom of the roof.
  • Ridge Vents: These allow any lingering warm air to escape at the very peak.
  • Baffles: These plastic or foam inserts ensure that your insulation doesn’t block the airflow coming in from the soffits.

If your roof is old and lacks these modern features, it might be time to consider new replacement roofs that incorporate advanced ventilation systems and ice-and-water shield membranes.

How Ice Dams Form and What to Do About Them Regarding Insurance

Does homeowners insurance cover ice dam damage? Generally, yes. Most standard policies cover damage caused by the “weight of ice and snow.” This usually applies to the structural damage to your roof or the interior damage caused by the resulting leaks.

However, insurance typically covers the damage (like the ruined drywall and wet carpet), but not the prevention. They likely won’t pay to upgrade your insulation or install new vents. It’s also important to note that many policies require you to perform “reasonable maintenance.” If you ignore a massive ice dam for three weeks while it pours water into your home, you might run into coverage issues.

We always recommend checking our owner resources for tips on documenting damage for insurance adjusters. If you are worried about whether your roof can handle the weight of heavy snow, a professional structural assessment is a wise investment.

Frequently Asked Questions about Ice Dams

Can gutters cause ice dams?

Gutters do not cause ice dams—heat loss causes them. However, gutters can certainly make them worse. If your gutters are full of leaves and debris, the meltwater has nowhere to go and will freeze faster, accelerating the damming process. Keeping your gutters clean is a vital first step in winter prep.

Is mechanical attic ventilation recommended?

Generally, no. We usually advise against powered or mechanical attic fans for ice dam prevention. These fans can actually create “negative pressure,” which sucks even more warm air out of your house and into the attic through unsealed gaps. Natural, passive ventilation (soffit and ridge vents) is much more effective and energy-efficient.

What are the best practices for new construction?

If you are building a new home in the Beaverton or Portland area, ensure your contractor is installing a continuous air barrier. This is a dedicated layer that prevents any air exchange between the house and the attic. Additionally, ensure the roof design includes a “cold roof” system with plenty of space for thick insulation (R-50+) and unobstructed airflow from eaves to peak.

Conclusion

Understanding how ice dams form and what to do about them is about more than just avoiding a few icicles. It’s about protecting the structural integrity of your home and ensuring your family stays dry and comfortable through the 2026 winter season.

At Raindrop NW, we take pride in being a truly local, independently owned company. We aren’t an out-of-state firm looking for a quick buck; we are your neighbors in Beaverton, and we’re committed to the long-term health of your roof. Whether you need an emergency inspection after a freeze or you want to proactively upgrade your home’s defenses, we are here to help.

For more information on how to keep your home safe this year, explore our residential roofing guide or give us a call today. Let’s make sure the only thing “breaking” this winter is the ice, not your budget.

https://www.raindropnw.com/wp-content/uploads/2026/06/photo-1770128076146-1eae85354f2f.jpeg 720 1080 SEO Stats https://www.raindropnw.com/wp-content/uploads/2024/05/logo-raindrop-space-300x92.png SEO Stats2026-06-04 13:23:132026-06-04 13:23:13Breaking the Ice and Saving Your Roof

Seal the Deal with Proper Roof Flashing

Roofing

What Is Roof Flashing and Why Does It Matter for Your Oregon Home?

How proper flashing prevents leaks is one of the most important things an Oregon homeowner can understand about their roof. Here’s the short answer:

  • Flashing is thin, waterproof material — usually metal — installed at vulnerable transition points on your roof
  • It directs water away from joints, edges, and intersections before it can seep into your home
  • Without it, even brand-new, high-quality shingles cannot stop water from entering at chimneys, valleys, vents, and walls
  • Proper installation follows the “shingle principle” — each layer overlaps the one below, so water always flows toward the exterior
  • Routine flashing inspections can prevent up to 90% of major leaks before they become costly structural problems

The National Roofing Contractors Association (NRCA) identifies improper flashing as one of the leading causes of premature roof system failure — and in Oregon’s wet climate, that’s not a risk worth taking. Water doesn’t need a big opening to cause big damage. A small gap, a cracked sealant line, or a missing piece of metal at the wrong spot can quietly rot your decking, soak your insulation, and invite mold into your walls — sometimes for months before you notice a single stain on your ceiling.

I’m Torrey Yungeberg, owner of Raindrop Roofing NW, and after years of inspecting and repairing roofs across Oregon and Southwest Washington, I’ve seen how understanding how proper flashing prevents leaks is the difference between a roof that lasts decades and one that fails prematurely. Let’s walk through exactly what you need to know to keep your home protected.

Infographic showing how proper flashing prevents leaks using the shingle principle of water shedding - how proper flashing

Introduction: What is Roof Flashing?

Think of your roof as a suit of armor. Your shingles are the plates, but no matter how strong those plates are, there are always joints where the pieces meet—around the neck, the shoulders, and the waist. In roofing, those “joints” are the valleys where two roof planes meet, the spots where a chimney pokes through, or where the roof meets a vertical wall.

Roof flashing is the specialized material used to seal those vulnerable gaps. In 2026, roofing standards have evolved to account for heavier rainfall and wind patterns, making these transition points more critical than ever. When we talk about how proper flashing prevents leaks, we are talking about creating a secondary drainage plane. This ensures that even if water gets past the primary roofing material, it is immediately caught and channeled back out to the gutters.

Common Flashing Materials

Not all flashing is created equal. The material choice depends on your home’s aesthetic, your budget, and the specific demands of our Pacific Northwest climate. When we perform residential roofing installations, we typically look at these four heavy hitters:

  1. Galvanized Steel: This is the most common choice for modern homes. It’s durable, cost-effective, and usually coated with zinc to resist the relentless Oregon rain.
  2. Aluminum: Lightweight and easy for installers to bend into custom shapes. It’s naturally resistant to corrosion, though it shouldn’t be used in direct contact with masonry or treated lumber due to chemical reactions.
  3. Copper: The “gold standard” of flashing. It is incredibly durable, lasting 50 to 70 years, and develops a beautiful green patina over time. It’s often used on historic homes in Portland or Lake Oswego.
  4. Lead or Rubber (Neoprene): Often used for pipe boots (the seals around vent pipes). While effective, neoprene has a shorter lifespan than metal and usually needs replacing every 15–20 years due to UV resistance issues.

How Proper Flashing Prevents Leaks and Protects Your Home

Close-up of step flashing being integrated with asphalt shingles on a sidewall - how proper flashing prevents leaks

The magic of how proper flashing prevents leaks lies in physics. Water is a sneaky traveler; it uses gravity to pull itself down, but it also uses “capillary action” to suck itself sideways or even upward into tight gaps. Proper flashing breaks that cycle.

By acting as a secondary drainage plane, flashing ensures that water never reaches the wooden roof deck. If a shingle edge lifts during a windstorm in Beaverton, the flashing underneath catches the water and directs it back onto the surface of the next shingle. This is why roof inspections and certifications are so vital—we check to make sure that “shingle-fashion” layering is still intact and that wind hasn’t compromised the metal.

Protecting Attic Insulation and Energy Efficiency

Many homeowners are surprised to learn that flashing affects their monthly bills. When flashing fails, moisture enters the attic and soaks the insulation. Wet insulation loses its “R-value” (its ability to resist heat flow), meaning your furnace has to work much harder in the winter.

By staying on top of repairs and maintenance, you keep that insulation dry. Dry insulation keeps your home warmer and prevents wood rot in the rafters, which can be an incredibly expensive structural fix if left unaddressed.

Maintaining Manufacturer Warranty Compliance

Here is a professional tip: if your flashing is installed incorrectly, your shingle manufacturer might actually void your warranty. Most major brands require that flashing meets specific NRCA standards to guarantee their products.

Working with a manufacturer certified roofing contractor ensures that every piece of metal is installed according to the book. At Raindrop NW, we prioritize this long-term accountability because we know that a “shortcut” today is a leak tomorrow.

Critical Areas: Where Your Roof Needs Protection Most

Your roof isn’t just one flat surface; it’s a complex geometry of angles and penetrations. Here are the high-risk zones where we focus our attention:

  • Drip Edges: Installed along the eaves to keep water from wicking back under the shingles and rotting the fascia boards.
  • Vent Pipes: Every house has them for plumbing and HVAC; they require “boot” flashing to seal the round pipe to the flat roof.
  • Headwalls: Where a roof slope meets a vertical wall (like the front of a dormer).
  • Kickout Flashing: A crucial piece at the end of a wall that “kicks” water away from the siding and into the gutter.

When we install new replacement roofs, we pay extra attention to these junctions because they are where 90% of leaks originate.

How proper flashing prevents leaks around chimneys and skylights

Chimneys are notorious for leaking because they are large obstacles that “dam” the flow of water. To fix this, we use a “cricket” or “saddle”—a small peaked structure behind the chimney that splits the water flow.

We then use a two-part system: base flashing (which goes under the shingles) and counter-flashing (which is tucked into the mortar joints of the brick). This allows the chimney and the roof to move independently as temperatures change without breaking the seal. This level of detail is also applied to waterproof deck surfaces where they meet house walls.

How proper flashing prevents leaks in roof valleys

Valleys handle a massive volume of water because they collect runoff from two different roof planes. There are two main ways to handle them:

Feature Open Valley Flashing Closed Valley Flashing
Material Heavy-gauge W-profile metal Shingles woven over the valley
Debris Sheds needles and leaves easily Can trap debris in the “fold”
Durability High; metal resists ice dams Moderate; shingles can wear faster
Best For High-rainfall areas (Oregon!) Aesthetic preference

For our residential roofing services in the Northwest, we often recommend open metal valleys. They are superior at handling the heavy slush and pine needles common in areas like Tigard and Hillsboro.

Best Practices for Installation and Long-Term Maintenance

Installation is an art form. According to ARMA (Asphalt Roofing Manufacturers Association) guidelines, flashing should never be a single long strip. Instead, it should be “step flashed”—individual L-shaped pieces that overlap each other with every course of shingles.

We also provide owner resources to help you understand that fasteners (nails) should never be placed in the “water path.” If a nail is exposed to the rain, it will eventually rust and create a hole exactly where you don’t want one.

Signs of Flashing Failure and Damage

You don’t always need to climb a ladder to see if your flashing is failing. Keep an eye out for:

  • Rusted Metal: If the protective coating on steel has worn away, holes are soon to follow.
  • Cracked Sealants: Caulking is a secondary defense, but if it’s drying and peeling, water can get behind the metal.
  • Water Stains: Look at your ceilings, but also check your exterior siding. Peeling paint under a roof corner often means the kickout flashing is missing.
  • Loose Sections: High winds in the Columbia Gorge can sometimes lift flashing away from the wall.

If you see any of these, it’s time for roof inspections and certifications to assess the damage.

Routine Maintenance and Seasonal Checks

A little prevention goes a long way. Our repairs and maintenance team recommends a “Spring and Fall” schedule.

  1. Clear Debris: Pine needles and leaves trap moisture against the flashing, accelerating corrosion.
  2. Trim Trees: Overhanging branches can scratch or dent metal flashing during a storm.
  3. Check Sealants: If we find cracked solar-seal or silicone, we reapply it before the winter rains hit.

Frequently Asked Questions about Roof Flashing

Can I reuse old flashing when getting a new roof?

We generally advise against it. When you invest in new replacement roofs, you want the entire system to last 30+ years. Old flashing often has “metal fatigue,” hidden rust, or old nail holes that won’t align with the new shingles. Replacing it ensures the structural reliability of the whole system.

Why is professional installation recommended over DIY?

Roof flashing requires precision bending and custom fabrication. A “DIY disaster” we often see is homeowners using too much caulk to try and stop a leak. Caulk is a temporary fix; proper metal layering is a permanent one. A manufacturer certified roofing contractor has the tools to bend metal to the exact angle of your roof, ensuring a watertight fit.

How long does roof flashing typically last?

It depends on the material. Galvanized steel usually lasts 20–30 years, while copper can go for 70. However, in 2026, we see environmental factors like increased UV and heavier storms wearing down sealants faster. With routine maintenance, your flashing should last as long as your shingles. Check our owner resources for more on material lifespans.

Conclusion

At Raindrop NW, we believe that a roof is only as good as its weakest point. Understanding how proper flashing prevents leaks is the first step in protecting your biggest investment. Whether you are in Beaverton, Portland, or Vancouver, you deserve a roofing system that stands up to the unique challenges of the Northwest.

We are a truly local, independently owned company. Unlike the big firms bought out by out-of-state investors, we live in the communities we serve—from Tualatin to Camas and everywhere in between. We are committed to long-term service and accountability. If you’re worried about a potential leak or it’s just been a while since your last check-up, reach out to us for your residential roofing needs. We’ll make sure your home stays dry, one piece of flashing at a time.

https://www.raindropnw.com/wp-content/uploads/2026/06/photo-1764393188367-d5dc0a4f7265.jpeg 606 1080 SEO Stats https://www.raindropnw.com/wp-content/uploads/2024/05/logo-raindrop-space-300x92.png SEO Stats2026-06-02 10:49:152026-06-02 10:49:15Seal the Deal with Proper Roof Flashing

Asphalt Shingle vs Metal Roof: Costs and Durability Comparison

Roofing

Is a Metal Roof or Asphalt Shingles the Right Choice for Your Oregon Home?

When it comes to an asphalt shingle vs metal roof comparison, the short answer is: both are solid options — but they serve different homeowners in different situations. Here’s a quick breakdown to help you decide at a glance:

Factor Asphalt Shingles Metal Roof
Lifespan 15–30 years 40–70 years
Upfront Investment Lower Higher
Long-Term Value Moderate Higher
Maintenance More frequent Minimal
Weather Resistance Good Excellent
Energy Efficiency Standard 10–25% cooling savings
Environmental Impact ~11M tons/year to landfills Fully recyclable
Best For Tighter budgets, shorter ownership Long-term owners, harsh climates

If you’re planning to stay in your home for 15 or more years, metal roofing often wins on total value of ownership. If you need a reliable, affordable roof now — especially if you’re planning to sell within the next decade — asphalt shingles remain a proven, widely trusted choice.

Replacing your roof is one of the biggest home investments you’ll make — and here in the Portland metro, you don’t get a pass on tough weather while you’re thinking it over. Oregon’s wet winters, wind events, and moss-prone conditions put both materials to the test in ways that a sunny Arizona homeowner never has to consider. The right choice between asphalt shingles and metal roofing depends on your budget, how long you plan to stay, your home’s structure, and what matters most to you: lower upfront investment or lower lifetime maintenance.

Choosing a truly local, accountable roofer is essential when you’re making a decision that will protect your home for the next 20 to 70 years.

I’m Torrey Yungeberg, owner of Raindrop Roofing NW, and I’ve spent years helping Beaverton and Portland-area homeowners navigate exactly this kind of asphalt shingle vs metal roof comparison — weighing real-world performance in Oregon’s climate against long-term value and budget. Let’s walk through everything you need to know to make the right call for your home.

Infographic comparing asphalt shingles vs metal roof: lifespan, cost, durability, maintenance, and sustainability infographic

The Ultimate Asphalt Shingle vs Metal Roof Comparison for Oregon Homes

Choosing the right roof for a home in Beaverton, Lake Oswego, or Hillsboro requires looking beyond initial curb appeal. The Pacific Northwest climate introduces unique challenges—primarily relentless moisture, driving winter rain, and heavy tree canopies that encourage biological growth.

architectural shingles installed on a home in the Pacific Northwest

When we look at the materials themselves, the differences are stark. Traditional asphalt shingles are engineered using a fiberglass base mat coated with asphalt and topped with ceramic granules. They are designed to shed water by overlapping in staggered layers, relying on gravity and a sloped surface to keep your home dry.

Metal roofing, on the other hand, is composed of large metal panels or shingles. These panels are typically made of steel or aluminum and are engineered to form a highly durable barrier. The two primary types of metal roofing systems are:

  • Standing Seam Metal: These systems feature raised interlocking seams that connect the panels above the water line. The fasteners are completely hidden, protecting them from the elements and eliminating potential leak points.
  • Exposed Fastener Metal: These panels are overlapped and screwed directly down into the roof deck. While more budget-friendly than standing seam, they require thousands of screws with rubber washers that must be inspected and eventually replaced as they weather.

To understand how these systems hold up specifically in our wet climate, read our deep dive on Metal Roof Durability vs Shingle in Oregon Rain.

Key Material Differences in an Asphalt Shingle vs Metal Roof Comparison

To truly understand how these systems function, we have to look closely at their chemistry and engineering.

Asphalt shingles rely on a multi-layer construction. The core is a fiberglass mat that provides tear resistance. This mat is saturated with a petroleum-based asphalt layer that acts as the primary waterproofing barrier. Finally, the top is embedded with mineral or ceramic granules. These granules aren’t just for color; they protect the underlying asphalt from degrading under daily ultraviolet (UV) radiation. If you’re curious about how different grades perform, check out our guide on How Shingle Grade Affects Lifespan and Appearance.

Metal roofing relies on high-tensile metals coated with advanced protective finishes:

  • Steel: The most common residential choice, steel is coated in a zinc-aluminum alloy (Galvalume) and finished with high-performance PVDF (Kynar 500) paint systems to prevent rust.
  • Aluminum: Naturally rustproof, aluminum is an excellent choice for coastal areas or high-moisture zones, though it is slightly softer than steel.
  • Copper and Zinc: These are premium, lifetime metals that develop a natural protective patina over time. They require virtually zero maintenance but require a much higher initial investment.

Aesthetic Options and Curb Appeal

Your roof represents up to 40% of your home’s visible exterior. The material you choose will dramatically impact your property’s architectural style and resale value.

Asphalt shingles have evolved far beyond the flat, grey three-tab shingles of the past. Today, dimensional (or architectural) shingles are the standard, featuring varying thicknesses and shadow lines that mimic the look of natural wood shakes or slate. For homeowners looking to elevate their home’s style further, premium designer shingles offer thick, heavy-duty profiles. We compare these options in detail in our Architectural vs Designer Shingle Comparison and explore whether the upgrade is justified in Are Designer Shingles Worth the Extra Cost?.

Metal roofing has also shed its industrial, “barn-like” reputation. Modern residential metal roofs feature clean, vertical lines that complement contemporary Northwest modern, craftsman, and transitional home designs. For those who want the durability of metal but prefer a traditional look, stone-coated metal shingles are available. These panels are stamped into profiles that look exactly like wood shakes, clay tiles, or high-end architectural shingles, giving you the best of both worlds.

Lifespan and Durability in the Pacific Northwest Climate

In our local service areas—stretching from Vancouver, WA, down through Portland, Tigard, and Oregon City—durability is synonymous with moisture control.

The sheer volume of rain we receive means that any vulnerability in a roofing system will eventually be found by water. Asphalt shingles are highly effective, but because they are petroleum-based, they naturally degrade over time. Exposure to fluctuating temperatures causes shingles to expand and contract, eventually leading to drying, cracking, and loss of the protective ceramic granules.

Furthermore, the damp, shaded environments common in neighborhoods like West Linn and Lake Oswego are breeding grounds for moss and algae. Moss can grow under the edges of asphalt shingles, lifting them and allowing water to penetrate the roof deck.

Metal roofing is inherently resistant to these biological threats. Moss and algae cannot easily root into a smooth metal surface, and the metal itself does not dry out, crack, or rot. Additionally, metal roofing offers unmatched safety features. In an era where wildfire awareness is increasingly important in the Pacific Northwest, metal roofs provide a Class A fire rating—the highest rating possible—meaning they are non-combustible and will not ignite from flying embers. To explore durable shingle alternatives designed to handle our local climate, see our list of Premium Shingle Options for Pacific Northwest Homes.

Weather Performance: Snow, Wind, and Rain

Our local weather can transition quickly from winter rainstorms to heavy wind events, and occasionally, heavy snow and freezing ice.

  • Wind Resistance: High-quality architectural shingles are typically rated for wind speeds up to 110–130 mph when installed with proper nailing patterns. Metal roofing panels, particularly standing seam systems, offer superior wind resistance. Their interlocking panels are mechanically fastened to the deck, allowing them to withstand wind speeds of 120–180 mph without lifting or tearing.
  • Snow and Ice: Metal roofs excel at shedding snow. Because metal is smooth and conducts heat quickly, snow slides off easily, preventing the heavy snow loads that can strain a home’s structure. This also dramatically reduces the risk of ice dams, which occur when melted snow refreezes at the cold edge of a roof, backing up water under traditional shingles.
  • Roof Pitch: The slope of your roof plays a major role in material selection. While asphalt shingles require a minimum pitch to shed water effectively, certain standing seam metal roofs can be installed on very low-slope roofs. To understand how slope affects your choices, read our Flat Roof vs Pitched Roof Comparison.

Maintenance Requirements and Common Issues

No roof is completely maintenance-free, but the tasks required for each material differ significantly.

Asphalt Shingle Maintenance:

  • Granule Loss: As shingles age, they shed their ceramic granules. Homeowners will notice these accumulating in gutters. Once the granules are gone, the underlying asphalt is exposed to UV rays, accelerating rot.
  • Moss Treatment: Asphalt roofs in the Pacific Northwest require regular treatment to prevent moss growth. This involves applying moss-killing agents and gently brushing away debris. High-pressure washing should never be used, as it strips away the protective granules.
  • Wind Damage: After major storms, it is common to find cracked, curled, or missing shingles that must be repaired quickly to prevent leaks.

Metal Roof Maintenance:

  • Fastener Inspections: For exposed fastener systems, the neoprene washers on screws will eventually degrade due to UV exposure and must be checked and replaced periodically. Standing seam systems do not have this issue.
  • Debris Clearing: While moss won’t damage the metal, pine needles and leaves can trap moisture in valleys or gutters, potentially causing corrosion over many years if not cleared.
  • Sealant Checks: Professional roofers should periodically inspect the sealants around roof penetrations, chimneys, and flashing.

Upfront Investment vs. Long-Term Financial Value

When comparing these two systems, the decision often comes down to upfront investment versus long-term ROI.

Comparison Category Asphalt Shingles Metal Roofing
Upfront Investment Low to Moderate High to Very High
Expected Lifespan 15–30 Years 40–70 Years
Maintenance Requirements Moderate (Regular moss treatments & repairs) Low (Occasional debris clearing & inspections)
Warranty Coverage 15–30 Years (Varies by grade) 30–50 Years (Paint and structural)
Energy Impact Standard High (10–25% cooling energy savings)
Insurance Discounts Rare Yes (5–35% discount in some areas)

While asphalt shingles are the most budget-friendly option initially, metal roofing is a long-term investment that pays off over time.

Several factors influence the overall financial equation:

  • Material Availability: Global supply chain shifts and material availability can influence upfront investments, which can affect the initial difference between the two systems.
  • Insurance Discounts: Because metal is highly impact-resistant and fireproof, many insurance carriers offer premium discounts ranging from 5% to 35% for homes with metal roofs.
  • Energy Savings: Metal roofs act as natural radiant barriers. By reflecting solar heat back into the atmosphere rather than absorbing it into your attic, they can reduce your summer cooling energy consumption by 10% to 25%.

Long-Term Financial Value: Asphalt Shingle vs Metal Roof Comparison

If you plan to stay in your home for several decades, a metal roof is often the more economical choice. Over a 50-year period, a homeowner with an asphalt roof will likely have to replace it two or even three times. Each replacement cycle involves tear-off labor, disposal fees, and rising material expenses.

A single, high-quality standing seam metal roof can easily last 50 to 70 years, meaning it will be the last roof you ever have to install. When you factor in the avoided replacement cycles, minimal maintenance requirements, and ongoing energy savings, a metal roof can yield a significantly lower total value of ownership over a 25-year period.

Furthermore, a metal roof can increase your home’s resale value and appeal to future buyers, who will appreciate the peace of mind that comes with a highly durable, low-maintenance roof.

Sustainability and Environmental Considerations

For environmentally conscious homeowners in the Portland metro area, the ecological footprint of their roofing material is a major consideration.

  • Landfill Waste: Traditional asphalt shingles are a significant environmental challenge. Approximately 11 million tons of asphalt shingles are sent to U.S. landfills every year. Because they are petroleum-based, they do not easily biodegrade.
  • Recyclability: Metal roofing is highly sustainable. Most metal roofing panels are manufactured with a high percentage of recycled content, and at the end of their exceptionally long lifespan, they are 100% recyclable, keeping them out of landfills entirely.
  • Carbon Footprint: While the energy required to manufacture metal is higher than that of asphalt, metal’s long lifespan means this footprint is spread over many decades. Combined with energy savings from solar reflectivity, metal is widely considered the more eco-friendly choice.
  • Solar Compatibility: If you plan to install solar panels, metal roofs—especially standing seam—provide an ideal platform, allowing for secure, penetration-free installation.

Frequently Asked Questions About Roofing Materials

Making a final decision can be overwhelming. Here are answers to some of the most common questions we hear from local homeowners.

Can you install a metal roof over existing asphalt shingles?

In many cases, yes. This process is known as a “roof-over” or “overlay.” Because metal roofing is exceptionally lightweight—weighing roughly half as much per square foot as asphalt shingles—most residential structures can easily support the weight of both.

However, there are important factors to consider:

  • Building Codes: Local building codes in Oregon generally limit residential roofs to a maximum of two roofing layers. If your home already has two layers of shingles, a complete tear-off is required.
  • Deck Integrity: We always recommend inspecting the underlying roof deck first. If there is any active rot or water damage in the plywood sheathing, installing a new roof over it will trap the moisture and lead to structural failure.
  • Underlayment: A high-quality underlayment must be installed between the old shingles and the new metal panels to act as a buffer and prevent the abrasive shingle granules from damaging the back of the metal panels over time.

Are metal roofs noisier than shingles in the rain?

This is one of the most common myths about metal roofing. Many people associate metal roofs with the loud, metallic drumming heard inside old barns or industrial buildings.

In a modern residential home, however, a metal roof is installed over a solid wood roof deck, high-performance underlayment, and a fully insulated attic space. This layered assembly acts as a highly effective sound barrier. In fact, acoustic testing shows that a properly installed metal roof is only about 8 decibels louder than an asphalt shingle roof during a heavy downpour—a difference that is virtually imperceptible to the human ear inside the living space.

Which roofing material is better for solar panel installation?

While solar panels can be installed on both materials, standing seam metal roofing is the absolute gold standard for solar integration.

Solar installers can use specialized aluminum clamps that grip the raised seams of the metal panels. This allows the solar racking system to be mounted securely without drilling a single hole through your roof. This completely eliminates the risk of future leaks associated with solar mounts. On an asphalt roof, installers must drill holes through the shingles and into the rafters, relying on flashing and sealants to keep water out—which can degrade over time.

Conclusion

Whether you choose the immediate affordability and classic look of asphalt shingles or the lifetime durability and energy efficiency of a metal roof, the key to a successful project is certified workmanship and a transparent process.

At Raindrop Roofing NW, we are proud to be a truly local, multi-generational, family-owned company based right here in Beaverton, Oregon. We are deeply committed to our local communities, long-term accountability, and providing honest, expert guidance.

We offer professional, certified installations for both asphalt shingles and premium metal roofing systems, backed by industry-leading warranties and our own commitment to outstanding craftsmanship.

Ready to find the perfect roof for your home? Schedule a professional roof replacement consultation with Raindrop Roofing NW today, and let our family protect yours.
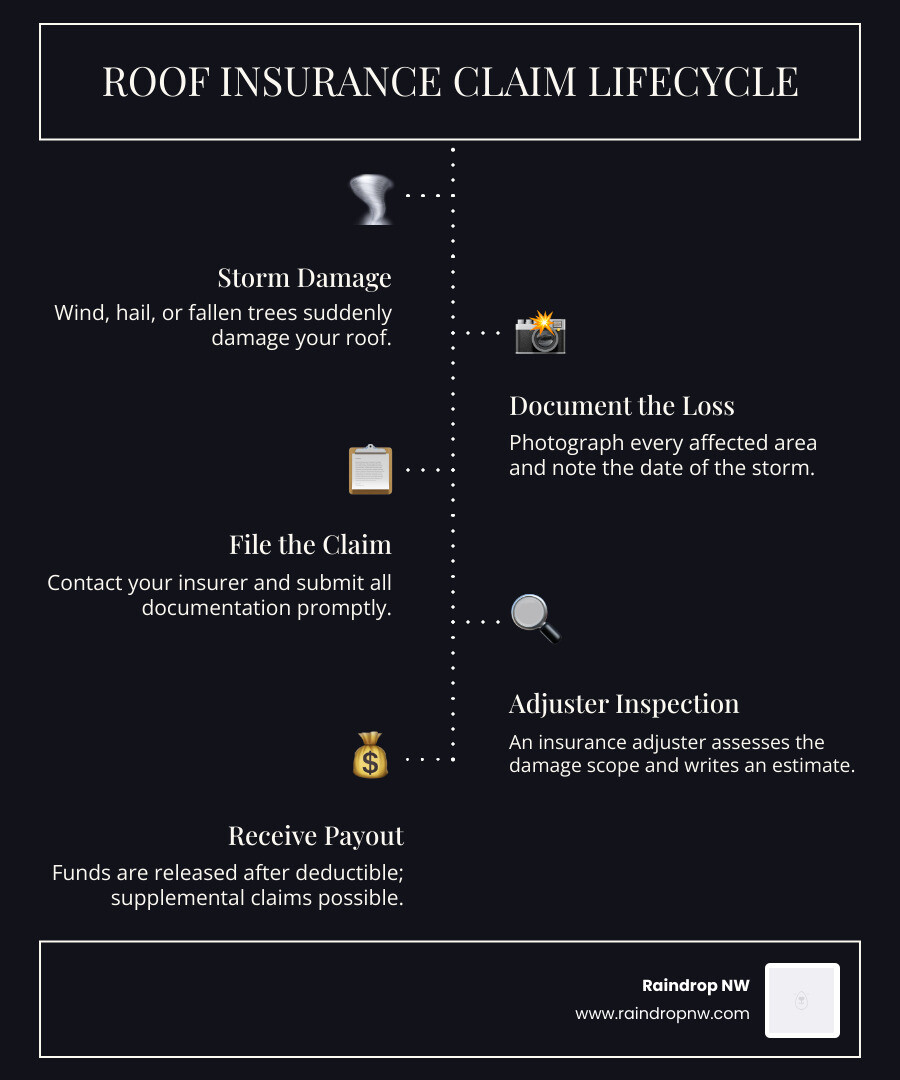
https://www.raindropnw.com/wp-content/uploads/2026/06/pexels-photo-12660749.jpeg 627 940 SEO Stats https://www.raindropnw.com/wp-content/uploads/2024/05/logo-raindrop-space-300x92.png SEO Stats2026-06-01 12:33:452026-06-01 12:33:45Asphalt Shingle vs Metal Roof: Costs and Durability Comparison
Page 5 of 12«‹34567›»
Search Search
  • Plant & PlantJuly 15, 2015 - 3:40 pm

Categories

  • Chimneys
  • general
  • Gutter Cleaning
  • Gutter Maintenance
  • Gutters
  • Low Slope Roofing
  • News
  • Personal
  • Residential Roofing
  • Roof Inspections
  • Roof Leak Repair
  • Roof Maintenance
  • Roof Replacement
  • Roofing
  • Roofing Services
  • Shingle Roofing
  • Uncategorized

CLICK FOR A FREE ESTIMATE

CLICK NOW

Phone: (503)526-3887
Email:
info@raindropnw.com

Mon–Fri: 9:00am – 5:00pm
8305 SW Cirrus Dr.
Beaverton, OR 97008

Raindrop Roofing NW LLC BBB Business Review

 
Previous Previous Previous Next Next Next

©2026 Copyright - RAINDROP ROOFING NW | PORTLAND, OR
  • Link to X
  • Link to Instagram
  • Link to Youtube
  • Link to Facebook
  • Link to WhatsApp
Scroll to top Scroll to top Scroll to top

This site uses cookies. By continuing to browse the site, you are agreeing to our use of cookies.

AcceptDecline

Cookie and Privacy Settings


How we use cookies

We may request cookies to be set on your device. We use cookies to let us know when you visit our websites, how you interact with us, to enrich your user experience, and to customize your relationship with our website.

Click on the different category headings to find out more. You can also change some of your preferences. Note that blocking some types of cookies may impact your experience on our websites and the services we are able to offer.

Essential Website Cookies

These cookies are strictly necessary to provide you with services available through our website and to use some of its features.

Because these cookies are strictly necessary to deliver the website, refusing them will have impact how our site functions. You always can block or delete cookies by changing your browser settings and force blocking all cookies on this website. But this will always prompt you to accept/refuse cookies when revisiting our site.

We fully respect if you want to refuse cookies but to avoid asking you again and again kindly allow us to store a cookie for that. You are free to opt out any time or opt in for other cookies to get a better experience. If you refuse cookies we will remove all set cookies in our domain.

We provide you with a list of stored cookies on your computer in our domain so you can check what we stored. Due to security reasons we are not able to show or modify cookies from other domains. You can check these in your browser security settings.

Analytics & Advertising Cookies

These cookies help us understand how visitors use our website (Google Analytics) and measure how well our advertising works, including the Meta (Facebook/Instagram) Pixel. They are only used if you allow them.

You can turn analytics and advertising cookies on or off here:

Other external services

We also use different external services like Google Webfonts, Google Maps, and external Video providers. Since these providers may collect personal data like your IP address we allow you to block them here. Please be aware that this might heavily reduce the functionality and appearance of our site. Changes will take effect once you reload the page.

Google Webfont Settings:

Google Map Settings:

Google reCaptcha Settings:

Vimeo and Youtube video embeds:

Privacy Policy

You can read about our cookies and privacy settings in detail on our Privacy Policy Page.

Footer
Accept settingsDecline